Create a database
Planning Analytics users can create their own Planning Analytics databases by using Planning Analytics Workspace Administration.
All databases are created in the prod folder. The default database is named TM1.
If the prod folder doesn't exist, it is created along with the Data and Logs folders, and the tm1s.cfg file. You can use the folder as is, or change the directory structure to organize the Planning Analytics objects in a specific way. By default, all objects reside in the base directory. If the prod folder with valid subfolders and the tm1s.cfg file already exists, the folder is used for the new database.
The best practice is to keep the folder structure as shown in the following figure:
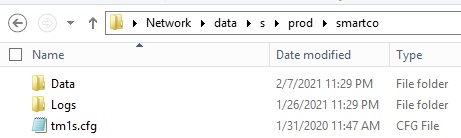
In this example, the name of the application is smartco. Therefore, for this Planning Analytics application, the base directory is: \\data\s\prod\smartco.
- The tm1s.cfg file must exist in the base directory.
- Any folders that you create must be within the base directory.
- The location or the name of the base directory cannot be changed.
- Excel - contains Perspectives report and template definitions for TM1 Web.
- Files - used to transfer .txt data files.
The list of settings in the tm1s.cfg file that you should not change is the same as for other Planning Analytics databases. If you need to change any settings, use Planning Analytics Workspace Administration to ensure that you change the proper the settings.
All users with the Administrator role in Planning Analytics Workspace are given ADMIN access to the new Planning Analytics database.
The default security mode 1 "admin" account for the new Planning Analytics database has a randomly generated password. This password cannot be accessed by the Cloud Operations team, and therefore cannot be communicated to you through the Welcome Kit.
If access to the default security mode 1 "admin" account is required, a new password can be set by using the AssignClientPassword function using your IBMid administrator account.
If access control lists are enabled to control access to shared folders, the access controls are applied to the database as well. For more information, see access control lists (the sections about user access to shared folders, and TM1 database access to data in shared folders).
Before you begin
The ability to create a Planning Analytics database is not available in the Planning Analytics Workspace Classic Experience.
About this task
- Have more than 75 characters
- Be blank
- Contain only spaces, and begin or end with a space
- Contain only periods (for example, '...'), and end with a period '.'
- Contain only the number 0
- Contain the following characters: \/":|<>+=;,?*@$`'}{%
- Contain the new line (\n) character
Procedure
What to do next
You can proceed to configure the database settings. For more information, see Configure databases.
To delete a Planning Analytics database, use the self-service delete function in Planning Analytics Workspace Administration. For more information, see Delete a database.