Compile or verify error messages from the error list view can be displayed inline in the editor or as annotations in the margin column of the editor.
About this task
- Inline style
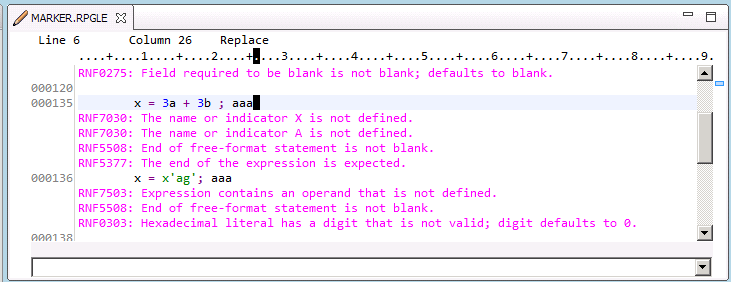
- When displayed inline, error messages display one message per
line. For example, the following image shows four error messages for
the selected line:
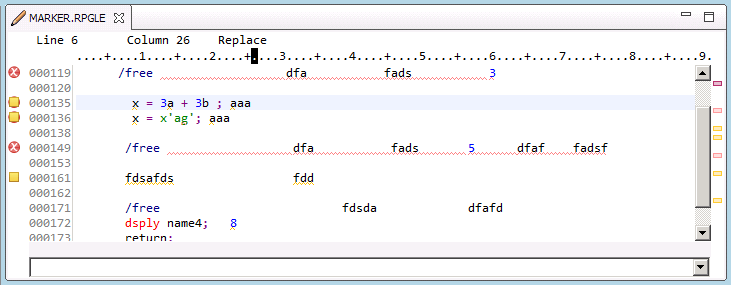
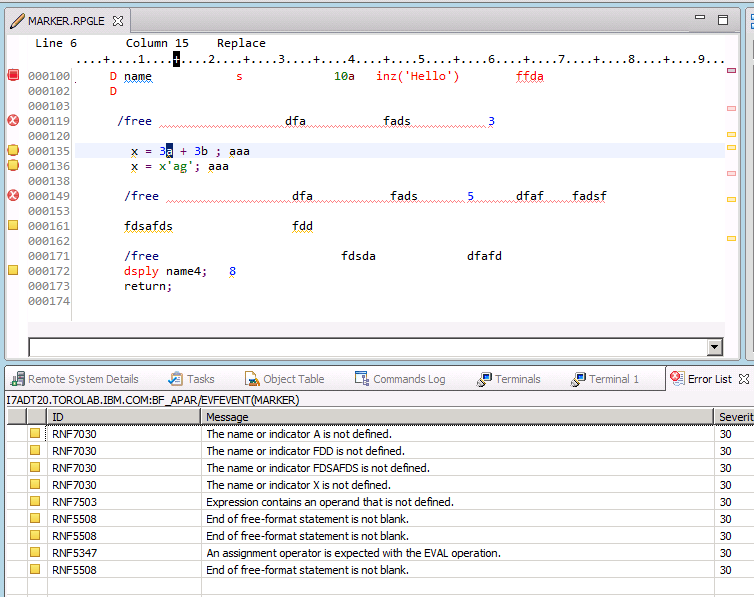
- Annotation style (default)
- With annotations, error messages are displayed as annotation icons
in the margin column as in the following image. Annotations present
a less cluttered view of the editor while still allowing access to
the message information:
The following steps describe how to set the message style, access more information, filter messages, and set annotation preferences
Procedure
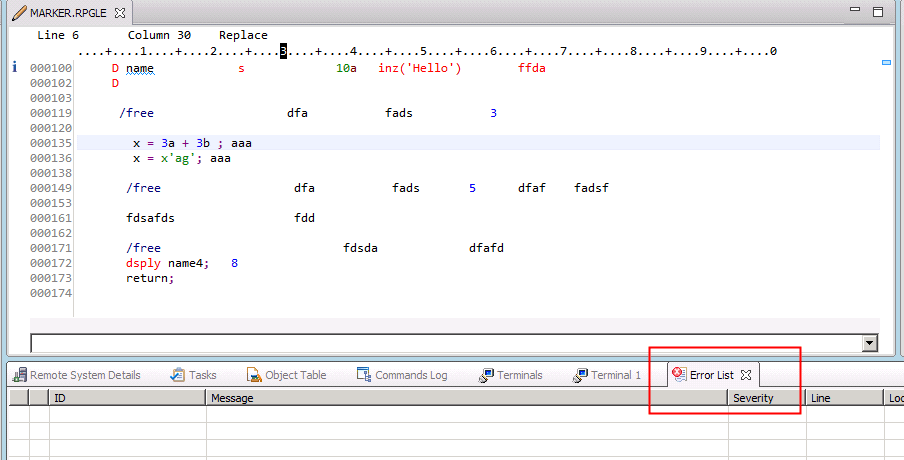
- Access the error list view. Usually the view
is displayed in a tab beneath the editor. If you do not see the view,
click .
- Click the view menu drop down icon
 and
select Message Style. Click Show
message as annotations to toggle between displaying messages
as annotations or the default inline style.
and
select Message Style. Click Show
message as annotations to toggle between displaying messages
as annotations or the default inline style. 
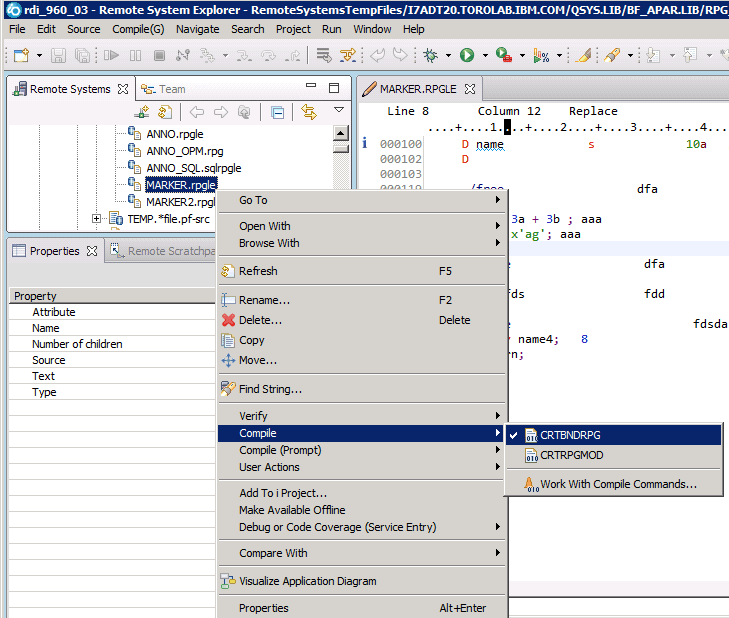
- Compile or verify your source.
Right-click your source member in the remote systems view or in the i Project view and select a Compile or a Verify option. The following example uses Compile.
After you compile, the errors will be shown inline or as annotations depending on the message style that you have chosen. The errors will also be listed in the Error List view.
 Note:
Note:- If you compile without the source open in the editor, you can double-click a message in the Error List view to open the editor and have the messages inserted.
- If you compile from the i Projects view by right-clicking a member,
selecting Remote Actions and choosing one of
the compile options, the errors will not be loaded automatically.
In this case, to see the errors, in the Job Status view, right-click
the job and select .

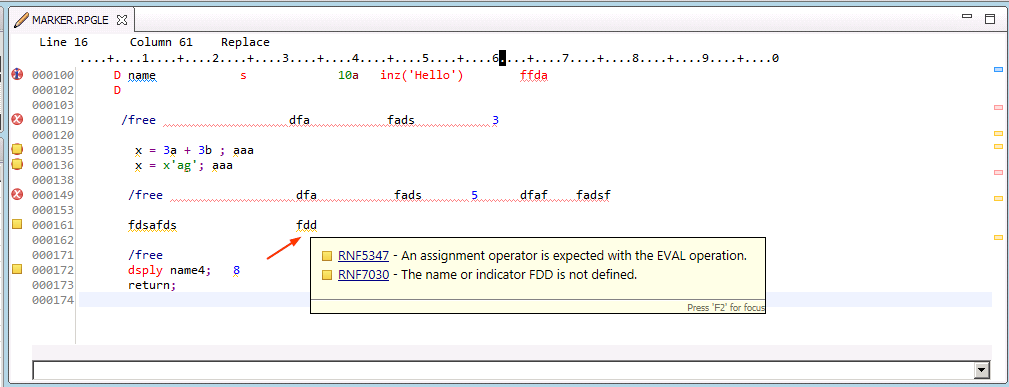
- Get more information about the errors.
If you are using the annotation style, to see more information, place your pointer on an annotation and wait for the hover text to display. If there are multiple messages, a line is used for each message.
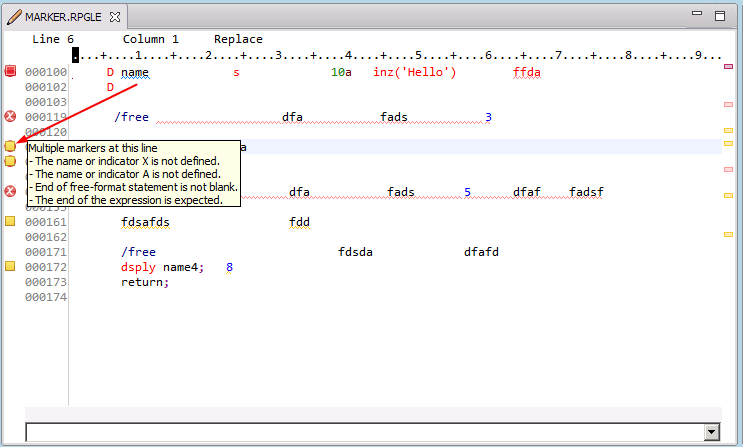
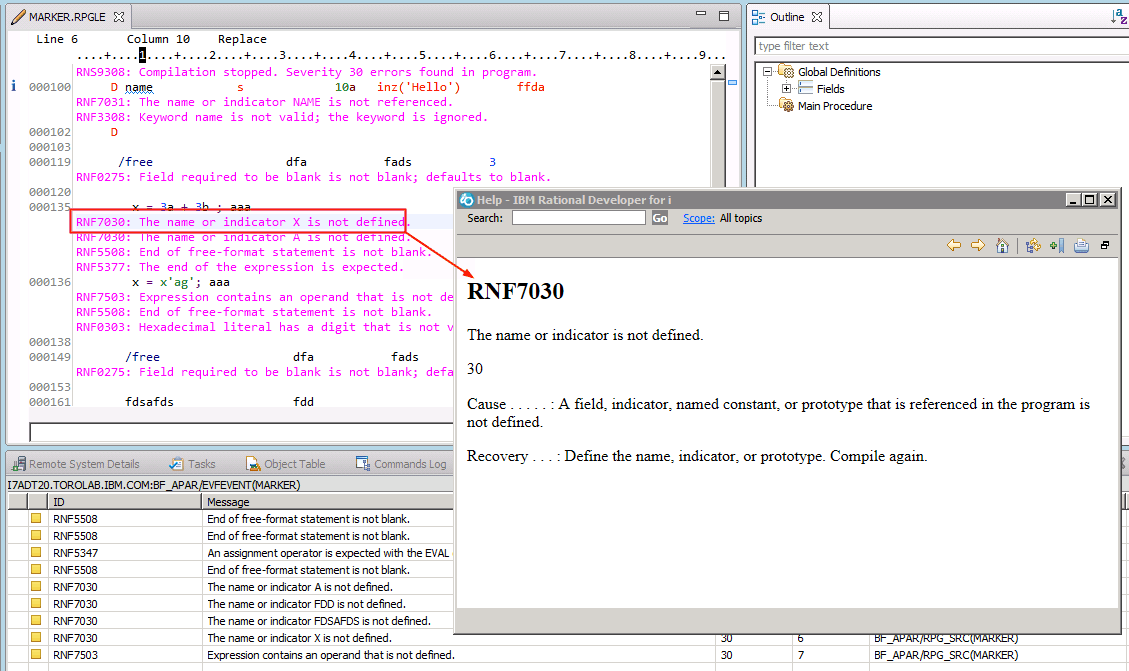
You can also place your pointer over underlined sections in the source for additional information. Click the error message links to open the help for more detail about the errors.
If you are using the inline style, select a message in the editor and press F1 to view second level help about the message.
- Filter the messages that are displayed.
To display all messages, click the view menu drop down icon
and
select .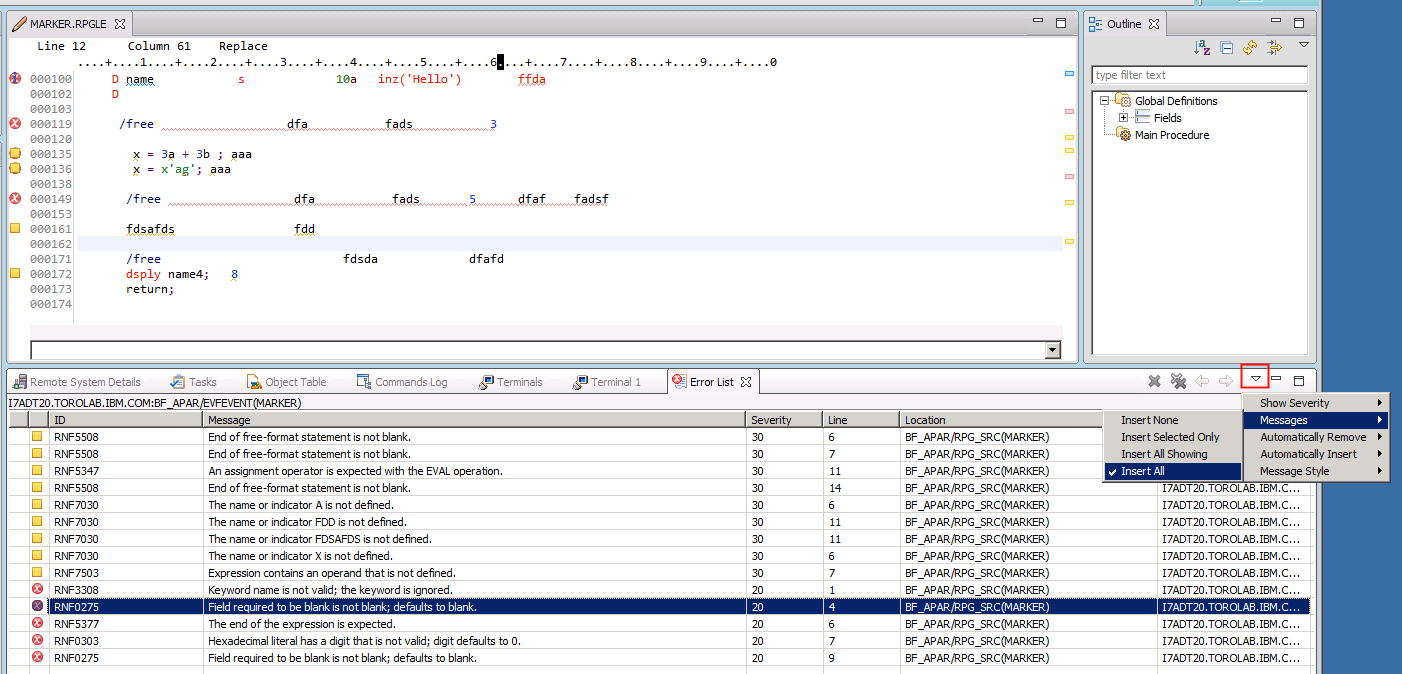
To filter messages based on severity, click the view menu drop down icon
and select .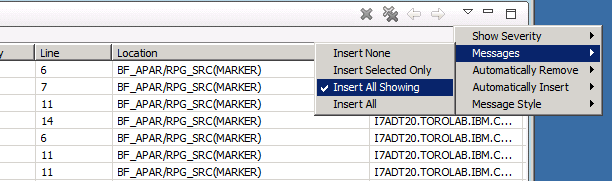
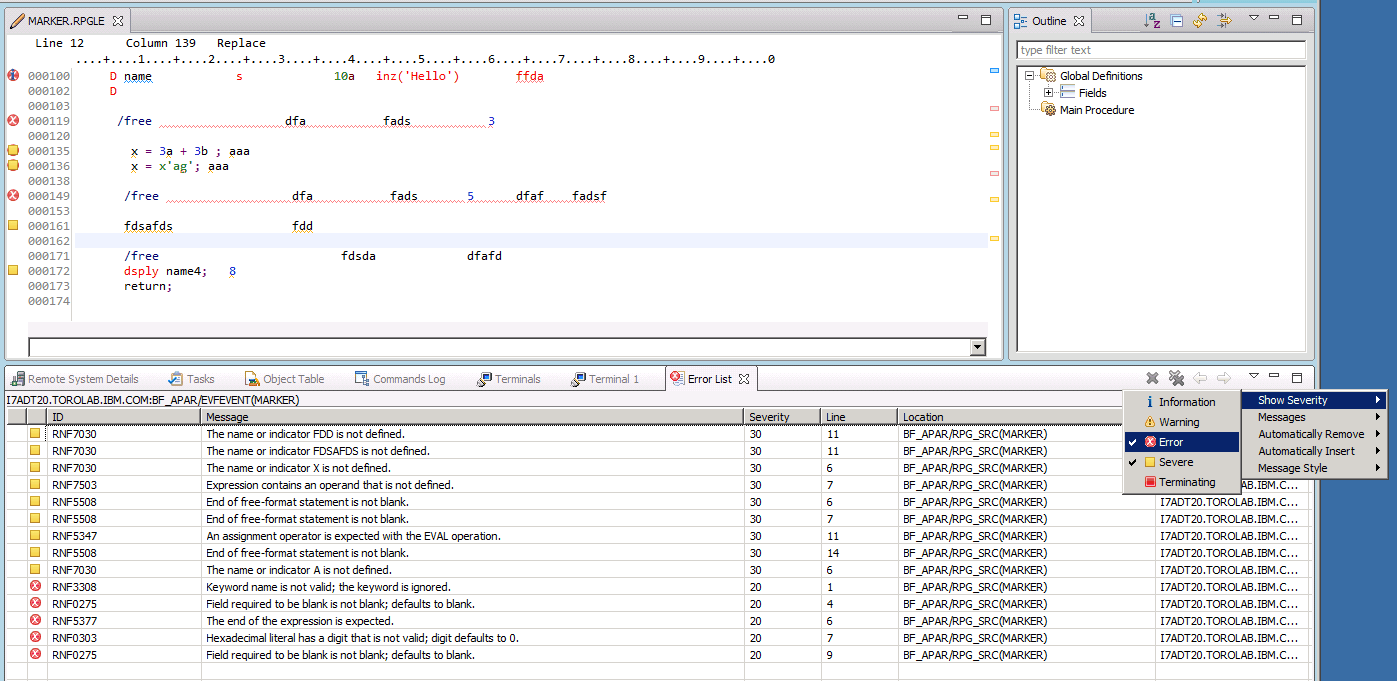
With the Insert All Showing option, only the message levels that you have selected in the Show Severity section will be displayed. For example, with , only severe errors are shown as in the following image.
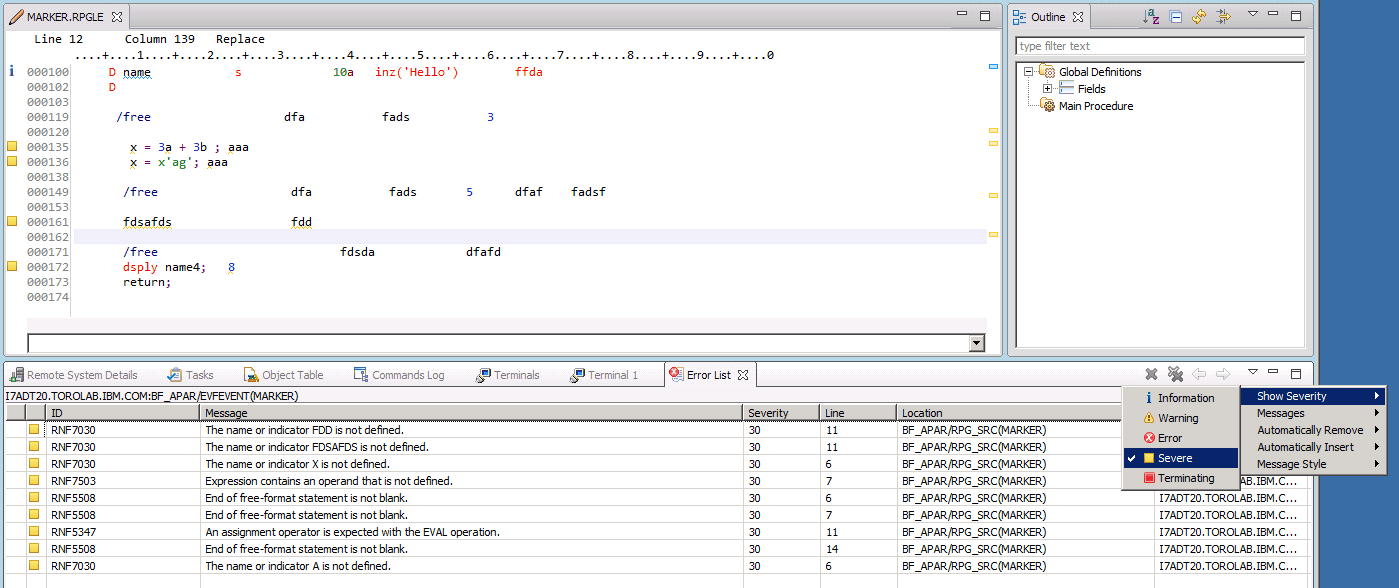
If you choose and Severe, both normal errors and severe errors will be shown.
 Note: When switching between the messages options for Insert All and Insert All Showing, you will need to recompile for the new filtering to take effect.
 - Set annotation preferences.
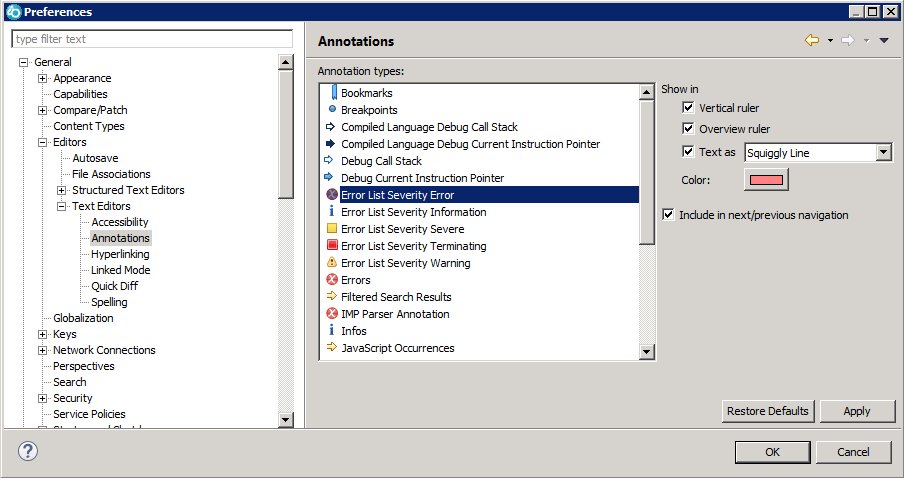
To change the underline style and color for annotated messages, click . For the annotation presentation in RPG source, you can change preferences for Error List Severity Warning, Error List Severity Error, Error List Severity Severe, and Error List Severity Terminating.
 Note: Syntax check errors are set to display messages as annotations by default. If you want to display syntax check errors inline, click and uncheck Display syntax check messages as annotations.