Setting up dmctop
The dmctop utility is a lightweight, low overhead monitoring tool that works in a text-only environment.
Beginning with IBM® Db2® Data Management Console v3.1.5, the monitoring utility dmctop v1.0.2 is bundled with Db2 v11.5.6.
Dependency
The dmctop utility has dependency on Db2 CLI driver.
- Download the IBM Data Server Driver for ODBC and CLI.
- Go to the IBM Support Fix Central website:
- Select Information Management from the Product Group drop down box.
- Select the IBM Data Server Client Packages from the Select from Information Management drop-down box.
- Select the IBM Data Server Driver for ODBC and CLI product version that you require from the Installed Version drop-down box.
- Select the platform from the Platform drop-down box then click Continue.
A list of all client and driver packages available for your platform, including IBM Data Server Driver for ODBC and CLI will be displayed.
- Install the driver manually:
- Copy the compressed file that contains the driver to the target system.
- Select an install directory in the target system and uncompress the file.
- Optional: Remove the compressed file.
- Setup an environment variableFor Linux®/AIX®:
LD_LIBRARY_PATH=<DRIVER_INSTALL_PATH>/libFor MacOS:DYLD_LIBRARY_PATH=<DRIVER_INSTALL_PATH>/libFor Windows:PATH=%PATH%;<DRIVER_INSTALL_PATH>\bin
Downloading dmctop
You can download dmctop from Db2 Download Center website.
Running dmctop from Db2 server
- Copy dmctop on server under the desired location. Note: If you want to use dmctop v1.0.0.0 for Db2 v11.5.5. databases, skip step1 and go directly to step 2.
- Run the dmctop .For Linux/AIX/MacOS:
dmctop -d SAMPLEFor Windows:dmctop.exe -d SAMPLE
Run dmctop remotely
The easiest way to run dmctop is to fully specify the database and user credentials. The dmctop utility will use the CLI driver.
dmctop -d <database_name> -n <host_name> -r <port_number> -u <user_id> [-cert-path Root-CA certificate absolute path]dmctop.exe -d <database_name> -n <host_name> -r <port_number> -u <user_id> [-cert-path Root-CA certificate absolute path]For example:
dmctop -d SAMPLE -n localhost -r 50000 -u db2inst1dmctop.exe -d SAMPLE -n localhost -r 50000 -u db2inst1For example:
dmctop -d SAMPLE -n localhost -r 50000 -u db2inst1 -cert-path \home\db2inst1\ssl\inernal-CA.armWindows: dmctop.exe -d SAMPLE -n localhost -r 50000 -u db2inst1 -cert-path C:/ssl/inernal-CA.armIf SSL is not configured for databases then -insecure option can be used to
disable default secure connection.
For example:
dmctop -d SAMPLE -n localhost -r 50000 -u db2inst1 -insecuredmctop.exe -d SAMPLE -n localhost -r 50000 -u db2inst1 -insecuredmctop requires a password. You can specify the password on the command line with -p. However, this is not recommended as the password will then be visible to other users running similar commands.
For example:
dmctop -d SAMPLE -n localhost -r 50000 -u db2inst1 -p <password>dmctop.exe -d SAMPLE -n localhost -r 50000 -u db2inst1 -p <password>Run dmctop in background mode
When using the -b parameter, dmctop saves information to file in CSV format. Issuing multiple sub-options for background mode (-b) is not supported.
The -b parameter takes one of the following single character sub-option values
d - overview
l - connections
a - top consumer activities
J - Skew monitor
s - in-flight statements
D - Package cache
L - Lock statistics
m - DB memory
I - Instance memory
F - Federation
A - HADR
For example:
Using default file name
dmctop -d SAMPLE -n localhost -r 50000 -u db2inst1 -insecure -b ddmctop.exe -d SAMPLE -n localhost -r 50000 -u db2inst1 -insecure -b dSpecifying output file name
dmctop -d SAMPLE -n localhost -r 50000 -u db2inst1 -insecure -b d -f <outputFile>.csvdmctop.exe -d SAMPLE -n localhost -r 50000 -u db2inst1 -insecure -b d -f <outputFile>.csvRunning dmctop on a remote system using PuTTY
- Check the system character set by running
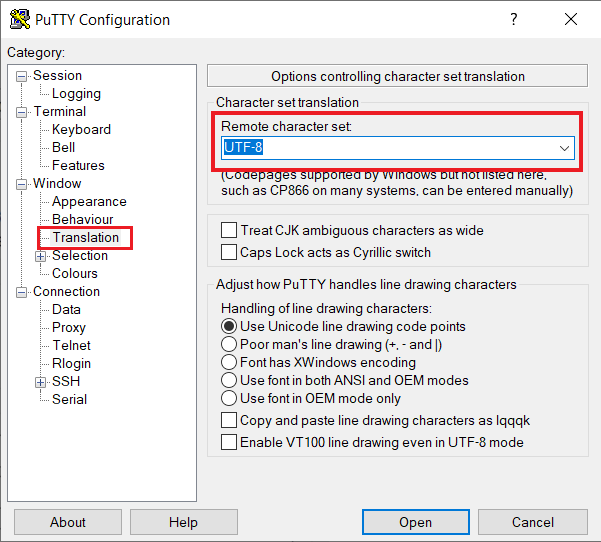
localectl statusin the remote system. For example:# localectl status System Locale: LANG=en_US.UTF-8 VC Keymap: us X11 Layout: us - In the PuTTY Configuration window, under the Category menu, go to
and
verify whether the value for Remote character set option is the one that is specified
on your remote system.
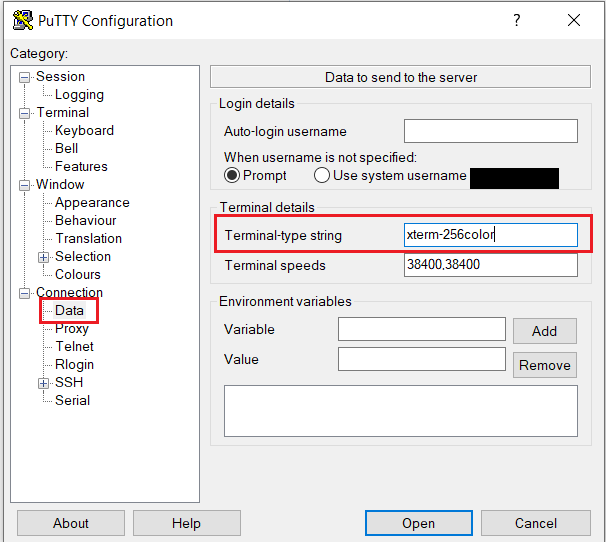
- Set the terminal-type string to accept more colors. In the PuTTY Configuration window, under the
Category menu, go to
and enter the
value xterm-256color in the Terminal-type string
option.