Installing support rails into the rack
To install support rails into the rack, complete the steps in this procedure.
About this task
Attention: To avoid rail failure and potential danger to yourself and to the unit,
ensure that you have the correct rails and fittings for your rack. If your rack has square support
flange holes or screw-thread support flange holes, ensure that the rails and fittings match the
support flange holes that are used on your rack. Do not install mismatched hardware by using washers
or spacers. If you do not have the correct rails and fittings for your rack, contact your IBM® reseller.
Important: The rail installation can be completed by one person. However, the
installation is easier if one person is positioned at the front of the rack and one person is
positioned at the rear of the rack.
Procedure
-
Install the spring to the rail by hooking one end around one of the circular standoffs
(A) and the other end around the other circular standoff
(B) as shown in Figure 1.
Note: If your rack has the square mounting holes, remove the rail pins from the rail. Install the larger rail pins that are provided with the rack installation kit.
Figure 1. Installing the spring to the rail 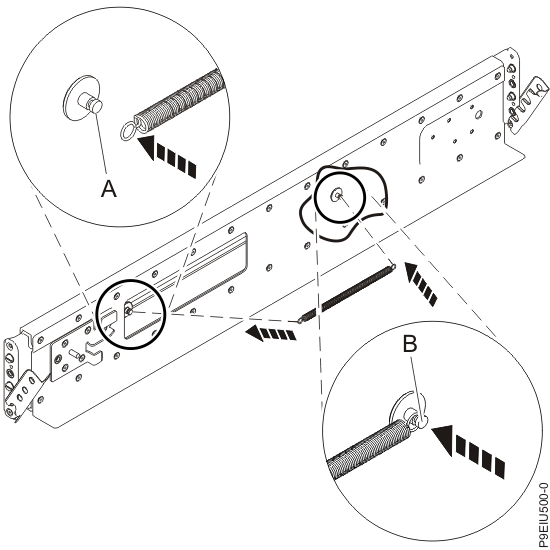
-
Open the hinge bracket on each end of the rail.
Figure 2. Opening the rail hinge bracket 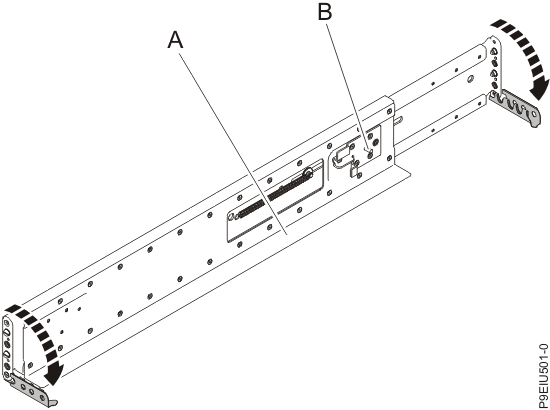
-
Identify the side of the rack where the rail must be mounted
by holding the rail inside of the open space of the rack as follows:
- The rail points from front to rear.
- The support ledge (A) is at the bottom and points toward the center of the open space inside the rack.
- The enclosure stop (B) is located toward the rear of the rack.The drawer stop (B) is located toward the rear of the rack.
Figure 3. Opening the rail hinge bracket 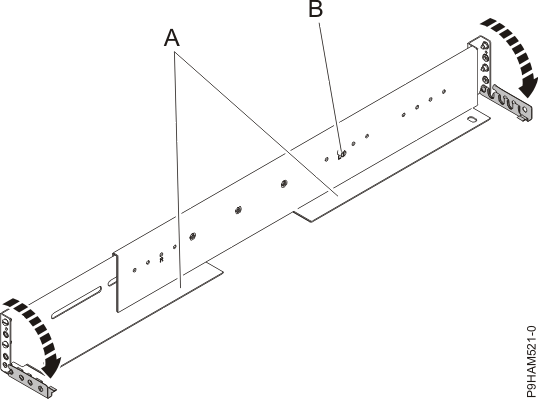
-
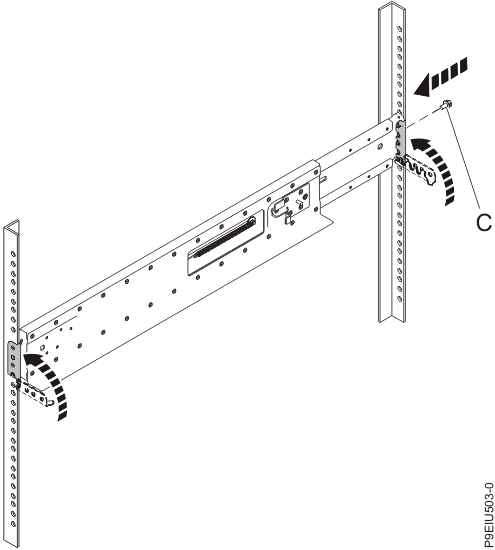
Align the rail bracket inside the rack cabinet beside the marks, and seat the front of the
support rail bracket pins in the mounting holes. The bottom of the rail support ledge appears
slightly higher than the U mark on the rack flange.
Figure 4. Mounting the rail on the rack 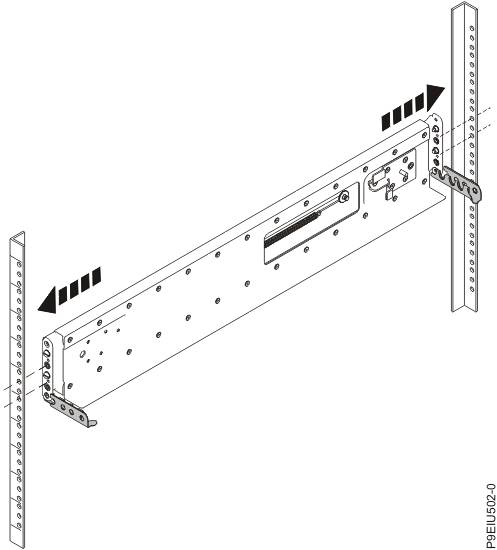
-
Close the front hinge bracket to secure the rail to the rack cabinet flange.
Figure 5. Securing the rail to the rack