Cloning SYSBAS using save and restore
A manual process using save and restore can be used to create a copy of the setup source node.
At the end of the setup wizard after the validation step has completed, you will be guided through the 12 steps to complete the clone of SYSBAS using save and restore.
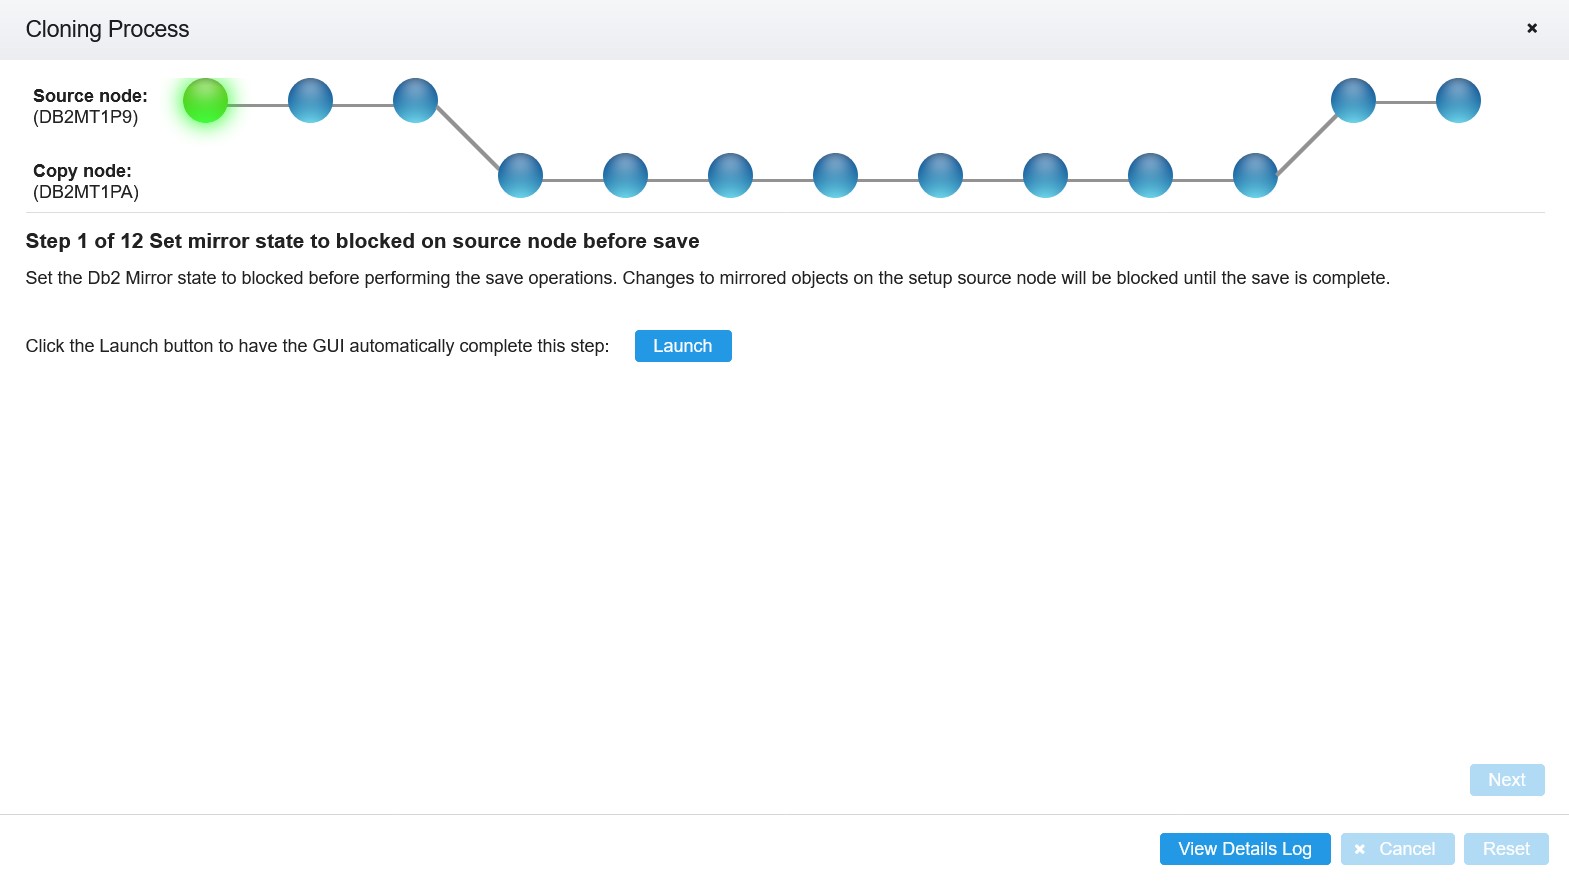
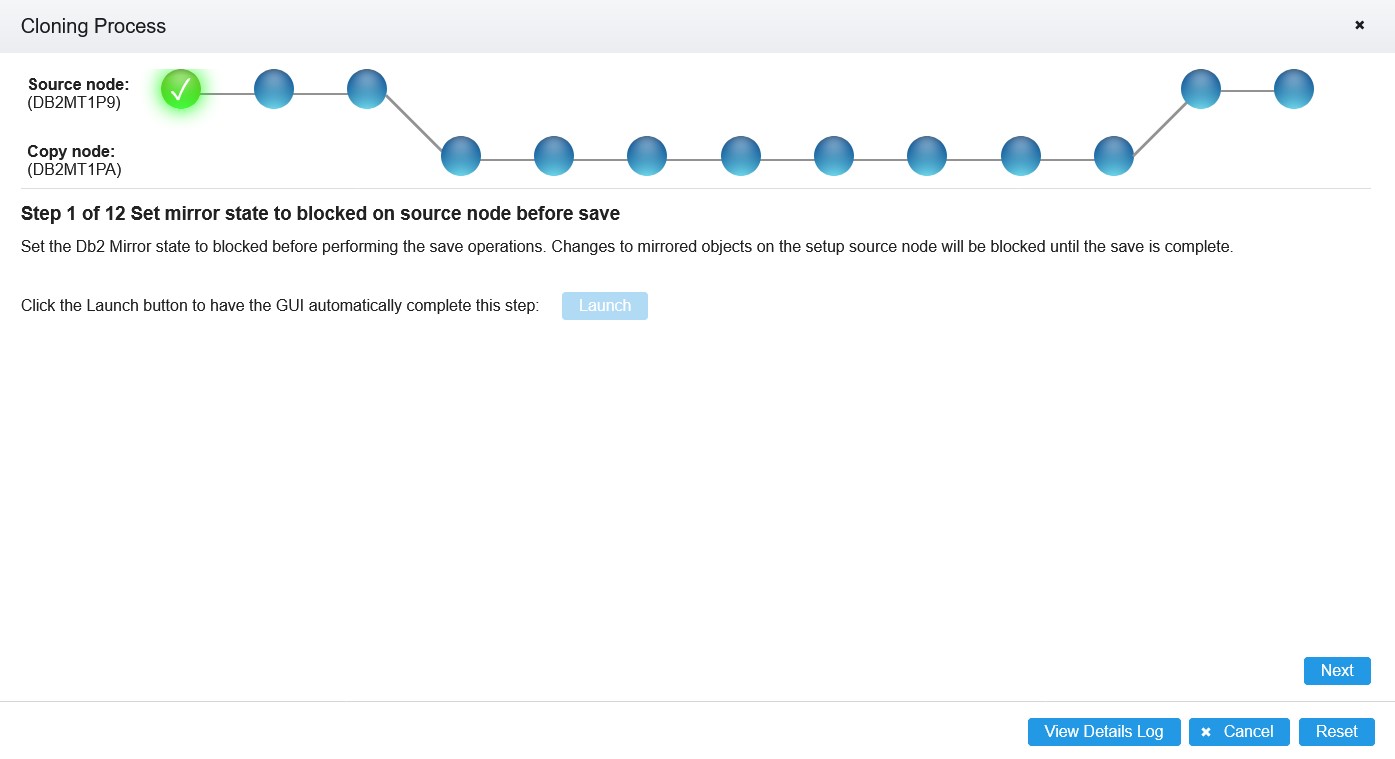
Step 1: Set mirror state to blocked on source node before save
Set the Db2® Mirror state before the save operation to block changes to replicated objects on the setup source node. Click the Launch button to automatically complete this step, as shown in the figure below.
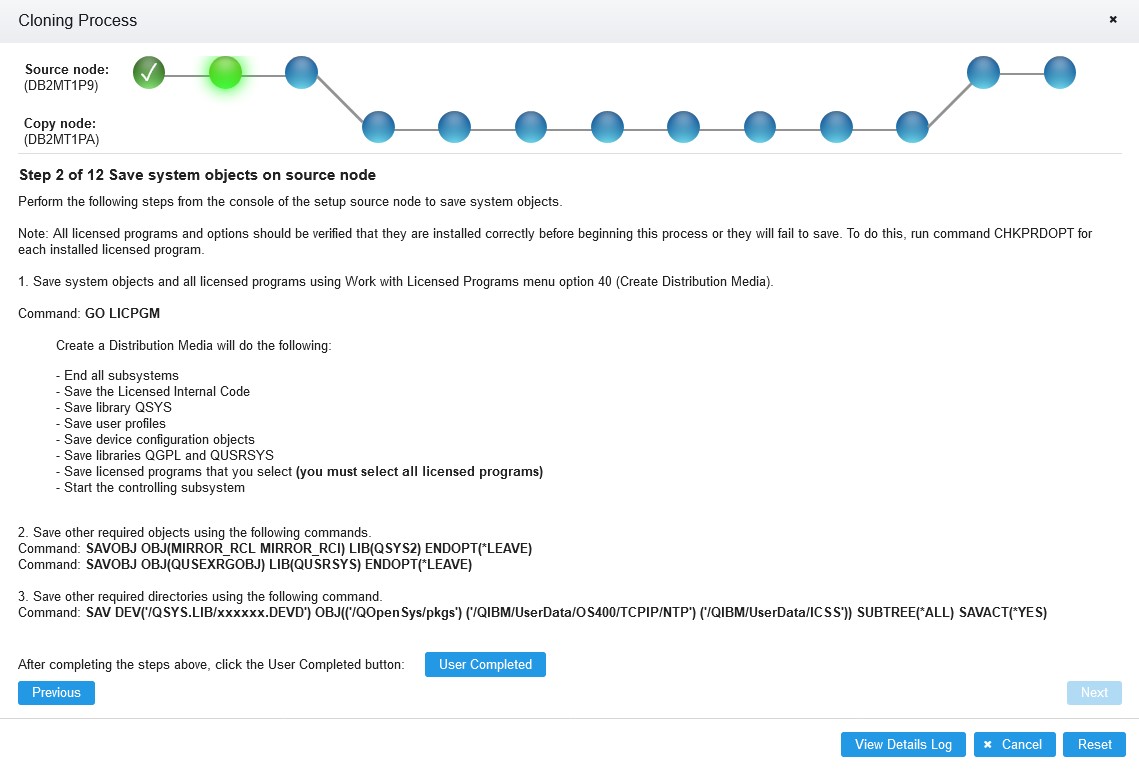
Step 2: Save system objects on source node
Perform the following steps from the console of the setup source node to save system objects.
- Save system objects and all licensed programs using Work with Licensed Programs menu option 40
(Create Distribution Media).
- Type GO LICPGM at a command prompt to display the Work with Licensed Programs menu.
- Select option 40 (Create Distribution Media) from the menu.
- On the Specify Command Defaults display, type your choices and then press the Enter key.
- Devices: Specify up to four stand-alone tape device names or one optical device name.
Note: Work with Licensed Programs menu option 40 (Create Distribution Media) does not support saving to a tape library. However, tape drives in a tape library can be used as standalone devices. See Using tape libraries when cloning SYSBAS for specific instructions.
- Check for active files: Specify N (No) to write over any active files on the save media without warning you.
- Message queue delivery: Specify *NOTIFY to only have the save operation be interrupted by severity 99 messages sent to QSYSOPR that are associated with the save operation.
- End TCP/IP wait time: Specify the number of seconds to delay the job to allow TCP/IP processing to end before ending all subsystems. Optional: Specify *NONE to end all subsystems without ending TCP/IP processing first.
- Print joblog: Specify Y (Yes) to print the joblog when the save operation ends.
- Start controlling subsystem: Specify Y (Yes) to start the controlling subsystem when the save operation ends.
- Devices: Specify up to four stand-alone tape device names or one optical device name.
- On the End Subsystem (ENDSBS) display, type your choices and press the Enter key.
- On the Specify Installation Profile display, type *NONE for the Installation Profile. Press the Enter key.
- On the Save System (SAVSYS) display, type your choices and then press the Enter key.
- On the Save Library (SAVLIB) display for saving QGPL, type your choices and then press the Enter key.
- On the Save Library (SAVLIB) display for saving QUSRSYS, type your choices and then press the Enter key.
- On the Save Licensed Programs display, type a 1 next to each Licensed Program. After selecting all Licensed Programs, press the Enter key.
- On the Save Options prompt display, type your choices and then press the Enter key.
- Specify *LEAVE for End of media option.
- If the save completes successfully, the following message will appear: The Save or restore option completed successfully.
-
Save other required objects using the following commands.
SAVOBJ OBJ(MIRROR_RCL MIRROR_RCI) LIB(QSYS2) ENDOPT(*LEAVE)SAVOBJ OBJ(QUSEXRGOBJ) LIB(QUSRSYS) ENDOPT(*LEAVE) -
Save other required directories using the following command.
SAV DEV('/QSYS.LIB/xxxxxxxx.DEVD') OBJ(('/QOpenSys/pkgs') ('/QIBM/UserData/OS400/TCPIP/NTP') ('/QIBM/UserData/ICSS')) SUBTREE(*ALL) SAVACT(*YES)
Step 3: Change mirror state on source node after save
Change the Db2 Mirror state to tracking after saving the system objects. Changes to replicated objects on the setup source node will be allowed and the changes will be tracked.
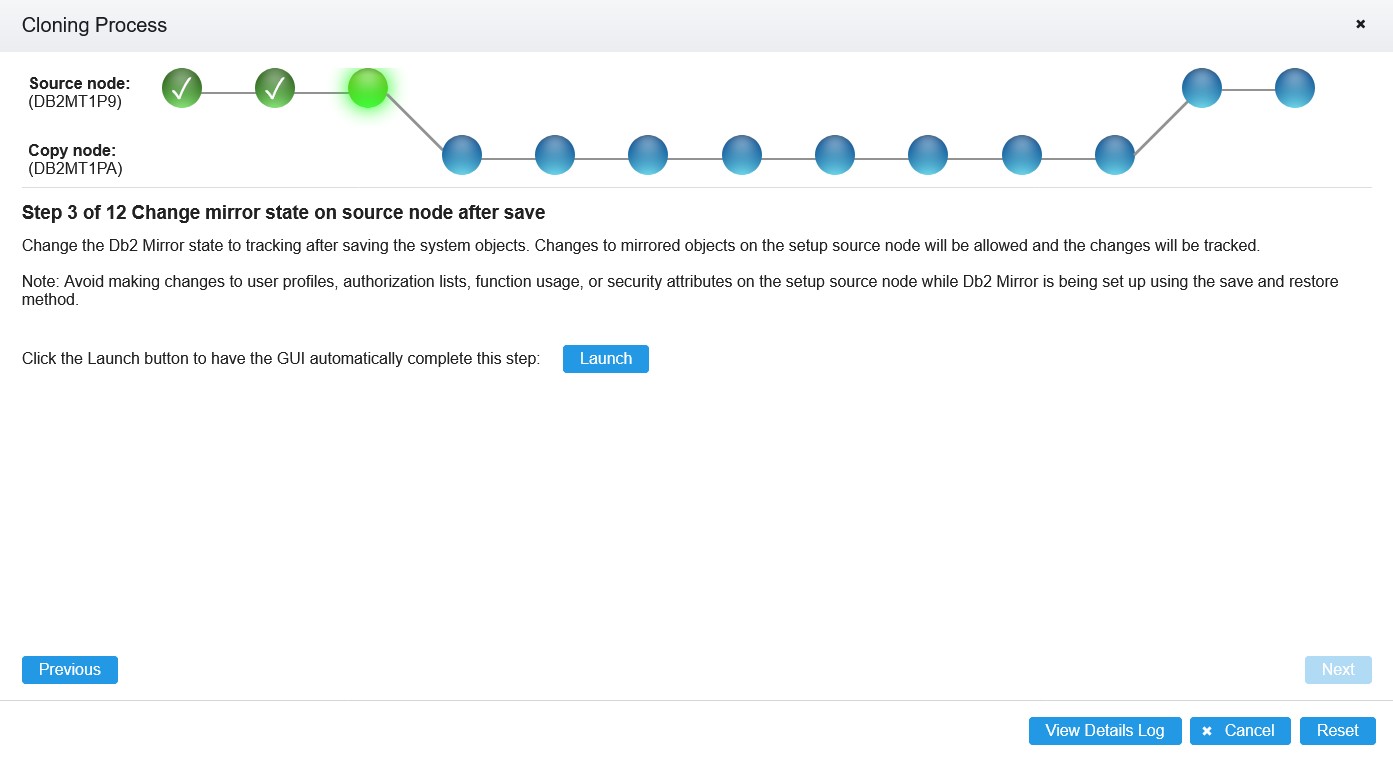
When the automated step is complete, a check mark will appear in the highlighted green circle at the top of the panel. Click the Next button to continue to the next step.
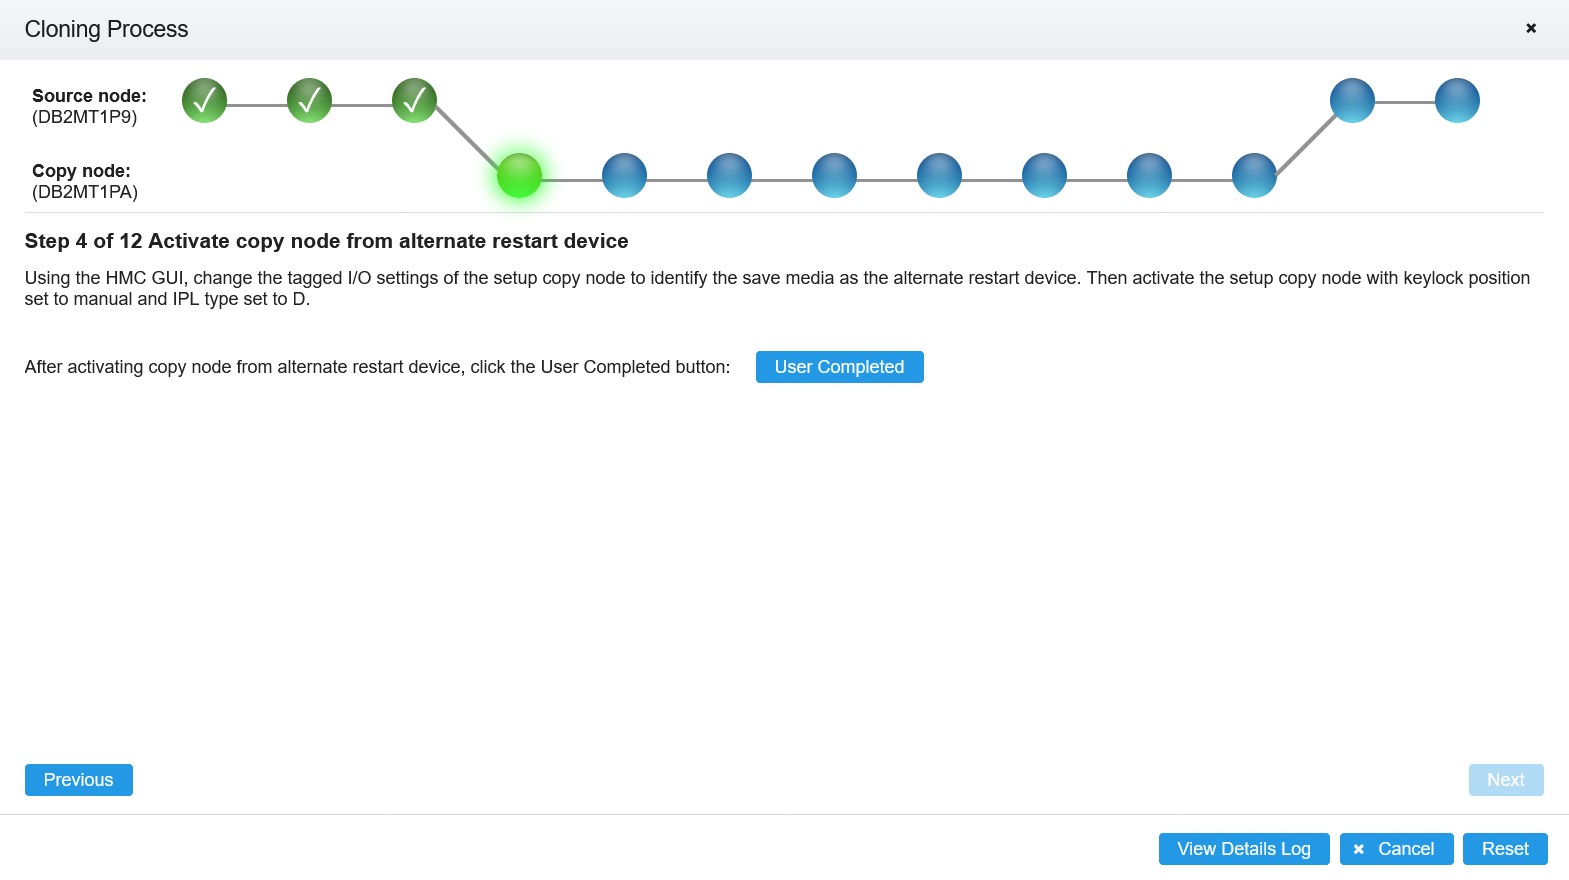
Step 4: Activate copy node from alternate restart device
Using the HMC GUI, change the tagged I/O settings of the setup copy node to identify the save media as the alternate restart device. Then activate the setup copy node with keylock position set to manual and IPL type set to D.
The following steps can be used to change the current configuration of the setup copy node to identify the save media as the alternate restart device..
- Select the partition and then select General Properties.
- Click on the Advanced button and then click the Tagged I/O Settings button.
- On the Tagged IO Device Details display, select the appropriate resource for Alternate Restart Device. Click the Ok button to save the change to the current configuration.
- Select the partition and then select .
- For Operation Type, select Activate.
- For Partition Configuration, select Current Configuration.
- Click on Advanced Settings.
- For Keylock Position, select Manual.
- For IPL Type, select D.
- Click on the Finish button to activate the setup copy node.
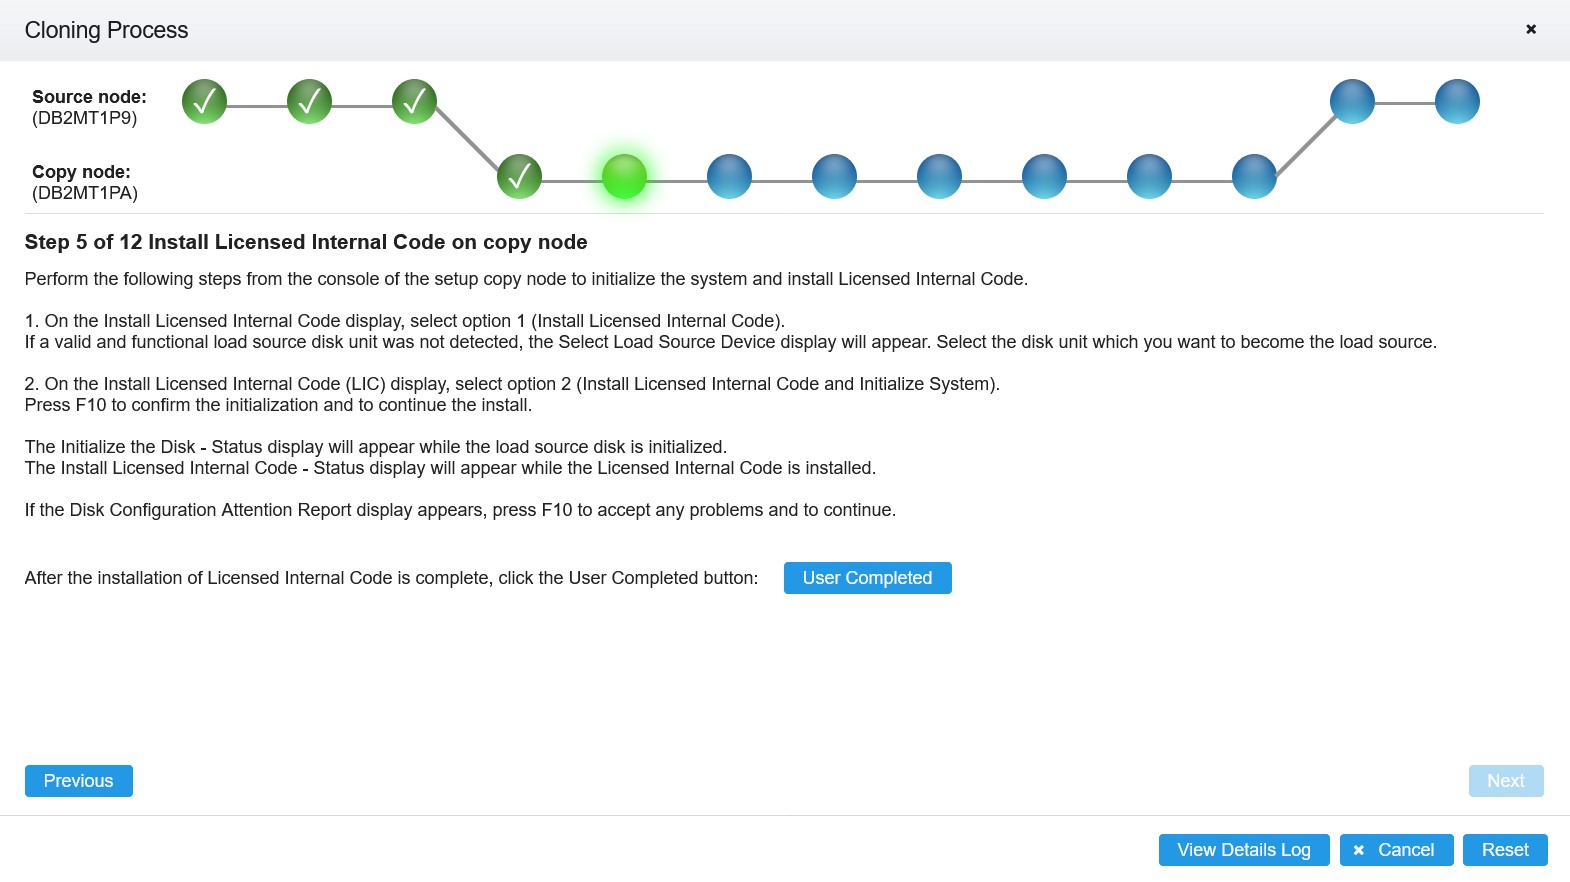
Step 5: Install Licensed Internal Code on copy node
Perform the following steps from the console of the setup copy node to initialize the system and install Licensed Internal Code.
- On the Install Licensed Internal Code display, select option 1 (Install Licensed Internal Code).
- If a valid and functional load source disk unit was not detected, the Select Load Source Device display will appear. Select the disk unit which you want to become the load source.
- On the Install Licensed Internal Code (LIC) display, select option 2 (Install Licensed Internal
Code and Initialize System). Press F10 to confirm the initialization and to continue the install.
- The Initialize the Disk - Status display will appear while the load source disk is initialized.
- The Install Licensed Internal Code - Status display will appear while the Licensed Internal Code is installed.
- If the Disk Configuration Attention Report display appears, press F10 to accept any problems and to continue.
After the installation of Licensed Internal Code is complete, click the User Completed button, as shown in the figure below. Then click the Next button to continue to the next step.
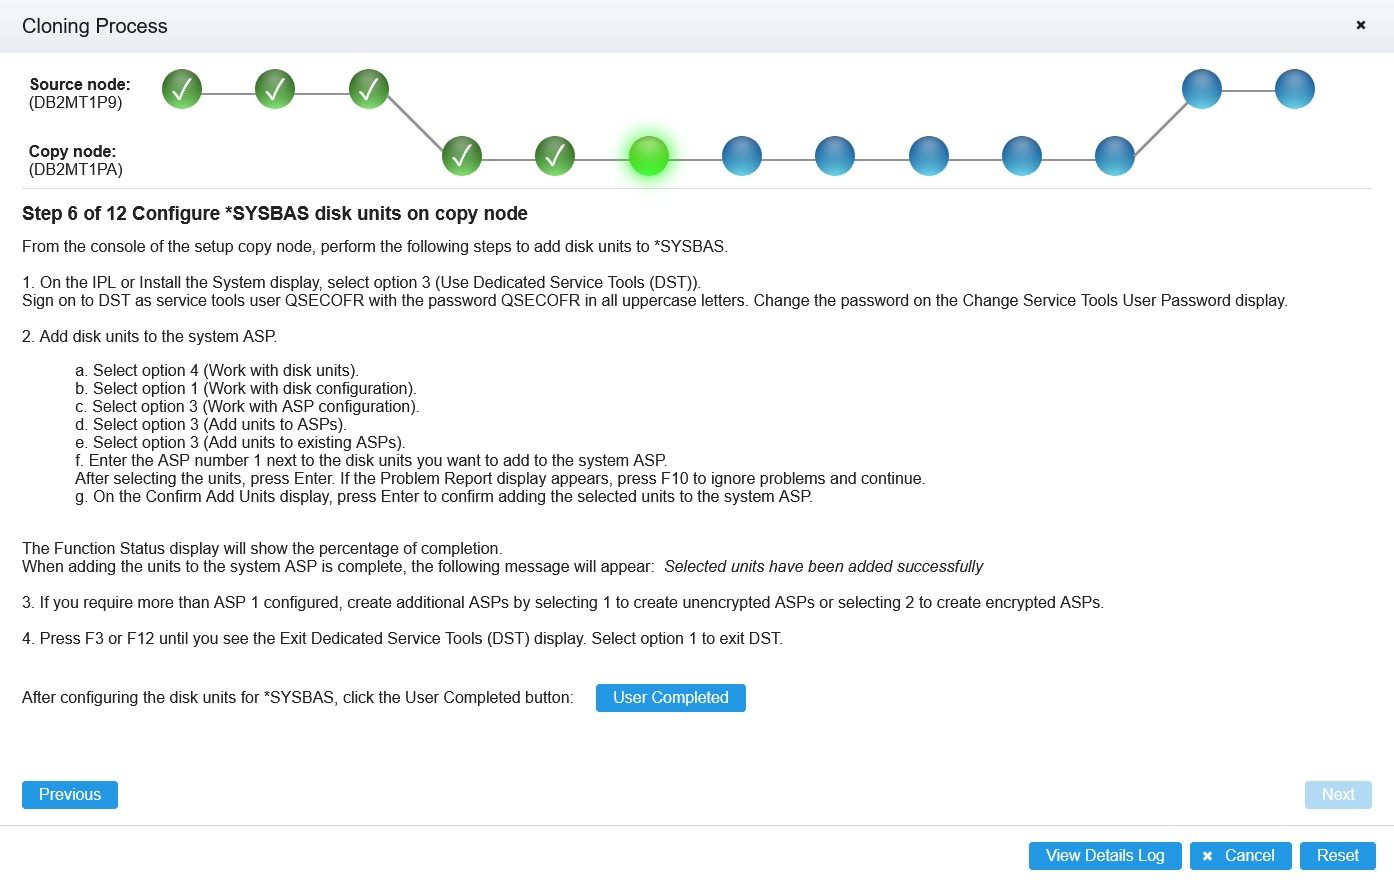
Step 6: Configure SYSBAS disk units on copy node
From the console of the setup copy node, perform the following steps to add disk units to SYSBAS.
- On the IPL or Install the System display, select option 3 (Use Dedicated Service Tools (DST)). Sign on to DST as service tools user QSECOFR with the password QSECOFR in all uppercase letters. Change the password on the Change Service Tools User Password display.
- Add disk units to the system ASP.
- Select option 4 (Work with disk units).
- Select option 1 (Work with disk configuration).
- Select option 3 (Work with ASP configuration).
- Select option 3 (Add units to ASPs).
- Select option 3 (Add units to existing ASPs).
- Enter the ASP number 1 next to the disk units you want to add to the system ASP. After selecting
the units, press Enter.
- If the Problem Report display appears, press F10 to ignore problems and continue.
- On the Confirm Add Units display, press F10 to confirm adding the units to the system ASP and balancing data on the units.
The Function Status display will show the percentage of completion.
When adding the units to the system ASP is complete, the following message will appear: Selected units have been added successfully.
- If you require more than ASP 1 configured, create additional ASPs by selecting 1 to create unencrypted ASPs or selecting 2 to create encrypted ASPs.
- Press F3 or F12 until you see the Exit Dedicated Service Tools (DST) display. Select option 1 to exit DST and press Enter.
Configuring the disk units for SYSBAS is complete. Click the User Completed button, as shown in the figure below. Then click the Next button to continue to the next step.
Step 7: Install operating system on copy node
From the console of the setup copy node, perform the following steps to install the operating system.
- On the IPL or Install the System display, select option 2 (Install the Operating System).
- On the Install Device Type Selection display, select the installation device type.
- On the Select a Language Group display, select to install the primary language feature that is on your save media.
- On the Install the Operating System display, select option 2 (Change install options). If the date and time are not correct, type new values.
- On the Specify Install Options display, specify the following installation options:
- Restore option: 1=Restore programs and language objects from current media set
- Job and output queues option: 2=Keep
- Distribute IBM® i on available disk units: 1=Yes
- On the Specify Restore Options display, you must specify 1 for the following options:
- System information
- Edit descriptions
- Message reply list
- Job descriptions
- Subsystem descriptions
The IBM i Installation Status display will show the installation progress of the IBM i operating system.
- On the Sign On display, logon as user QSECOFR. You do not need to
enter a password at this time.Note: It is expected that the system name on the Sign On display is the system name of the setup source node. The setup copy node temporarily has this system name until it is automatically configured during the IPL in step 10.
- On the IPL options display, type correct values for the system date, time, and time zone. Only
the following options should be set to Y:
- Start system to restricted state
- Set major system options
- Define or change the system at IPL
Attention: Do not leave restricted state on the setup copy node until after the IPL in step 10. - On the Set Major System Options display, specify Y next to Enable automatic configuration.
- On the Define or Change the System at IPL display, select option 3 (System Value Commands).
- On the System Value Commands display, select option 3 (Work with System Values).
- On the Work with System Values display, change the following system values:
- QFRCCVNRST to 0
- QINACTITV to *NONE
- QIPLTYPE to 2
- QJOBMSGQFL to *PRTWRAP
- QJOBMSGQMX to minimum of 30 with a suggestion of 64
- QLOGOUTPUT to *JOBLOGSVR
- QMAXSIGN to *NOMAX
- QPWDEXPITV to *NOMAX
- QSCANFSCTL add *NOPOSTRST
- QVFYOBJRST to 1
- After the system values are changed, press F3 twice to return to the Define or Change the System at IPL display.
- On the Define or Change the System at IPL display, press F3 to exit and continue the IPL.
- On the Change Password display, type QSECOFR as the current password and type a new password.
Installing the operating system is complete. Click the User Completed button. Then click the Next button to continue to the next step.
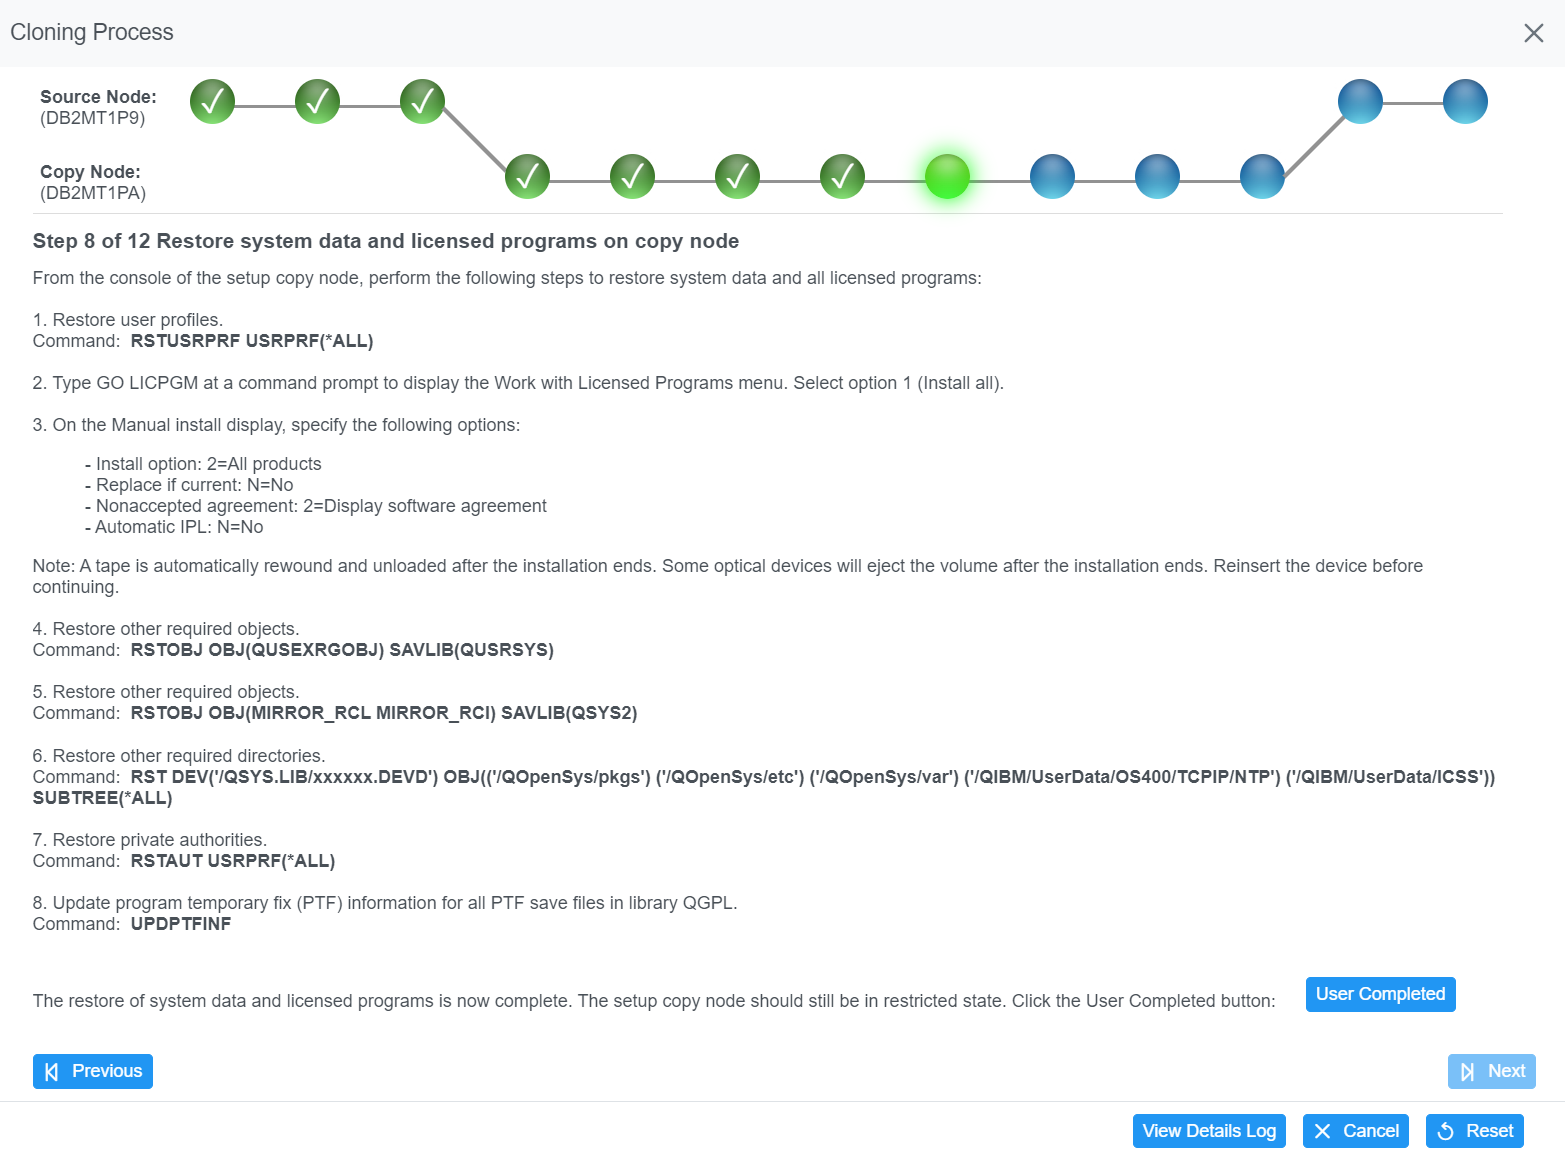
Step 8: Restore system data and licensed programs on copy node
From the console of the setup copy node, perform the following steps to restore system data and all licensed programs
-
Use the following command to restore user profiles.
RSTUSRPRF USRPRF(*ALL) - Type GO LICPGM at a command prompt to display the Work with Licensed Programs menu. Select option 1 (Install all).
- On the Manual install display, specify the following options:
- Install option: 2=All products
- Replace if current: N=No
- Nonaccepted agreement: 2=Display software agreement
- Automatic IPL: N=No
Note: A tape is automatically rewound and unloaded after the installation ends. Some optical devices will eject the volume after the installation ends. Reinsert the device before continuing. -
Type the following command to restore other required objects.
RSTOBJ OBJ(QUSEXRGOBJ) SAVLIB(QUSRSYS) -
Use the following command to restore other required objects.
RSTOBJ OBJ(MIRROR_RCL MIRROR_RCI) SAVLIB(QSYS2) -
Use the following command to restore other required directories.
RST DEV('/QSYS.LIB/xxxxxxxx.DEVD') OBJ(('/QOpenSys/pkgs') ('/QIBM/UserData/OS400/TCPIP/NTP') ('/QIBM/UserData/ICSS')) SUBTREE(*ALL) -
Use the following command to restore private authorities.
RSTAUT USRPRF(*ALL) -
Use the following command to update program temporary fix (PTF) information for all PTF save files in library QGPL.
UPDPTFINF
The restore of system data and licensed programs is complete. The setup copy node should still be in restricted state. Click the User Completed button, as shown in the figure below. Then click the Next button to continue to the next step.
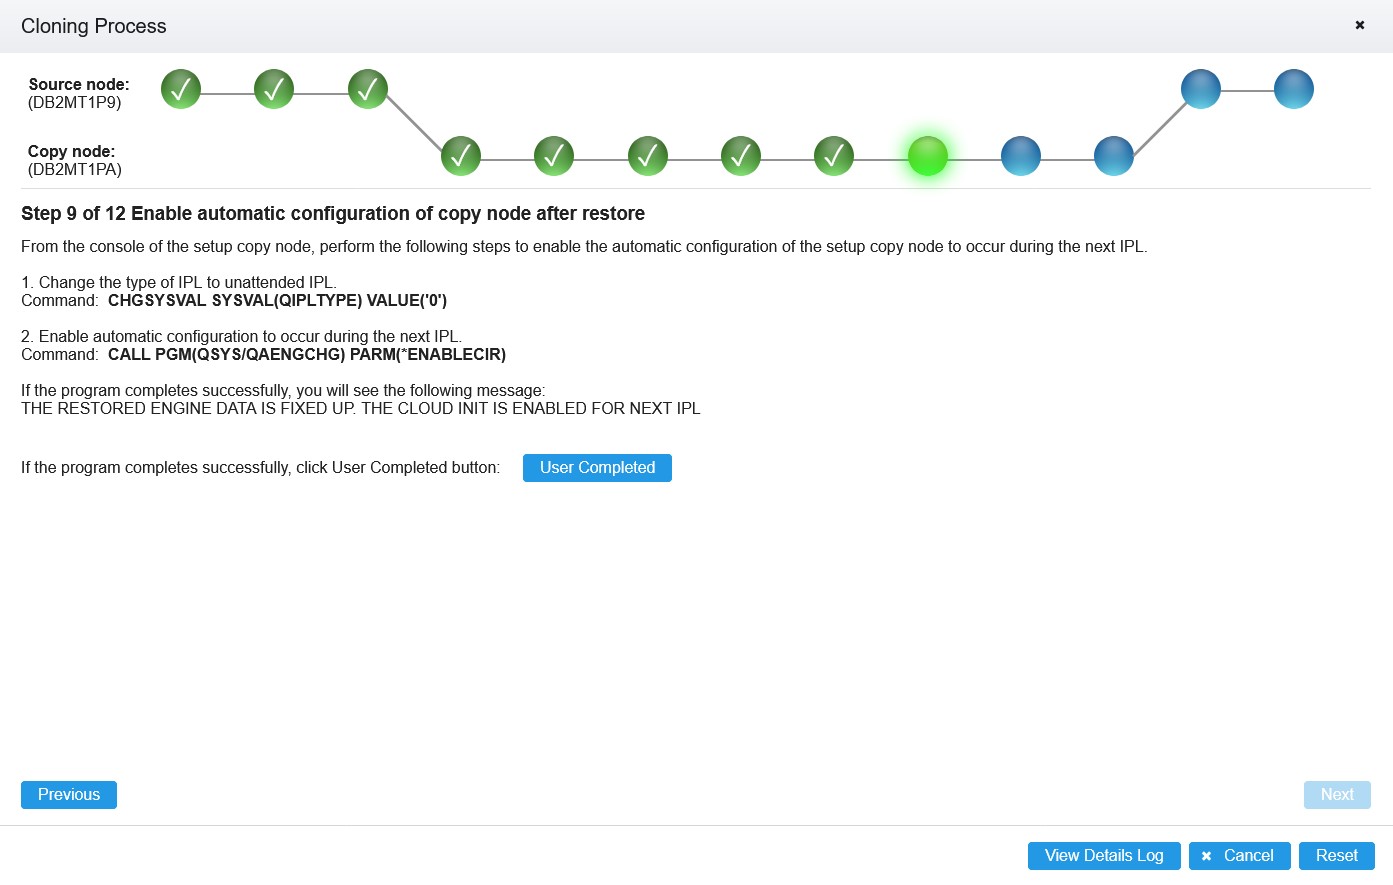
Step 9: Enable automatic configuration of copy node after restore
From the console of the setup copy node, perform the following steps to enable the automatic configuration of the setup copy node to occur during the next IPL.
-
Type the following command to change the type of IPL to unattended IPL.
CHGSYSVAL SYSVAL(QIPLTYPE) VALUE('0') -
Type the following command to enable automatic configuration to occur during the next IPL.
CALL PGM(QSYS/QAENGCHG) PARM(*ENABLECIR)If the program completes successfully, you will see the following message: THE RESTORED ENGINE DATA IS FIXED UP. THE CLOUD INIT IS ENABLED FOR NEXT IPL.
If the program completes successfully, click the User Completed button, as shown in the figure below. Then click the Next button to continue to the next step.
Step 10: IPL copy node
The setup copy node will be automatically configured during the IPL. Click the Launch button to have the GUI automatically perform a normal IPL of the setup copy node.
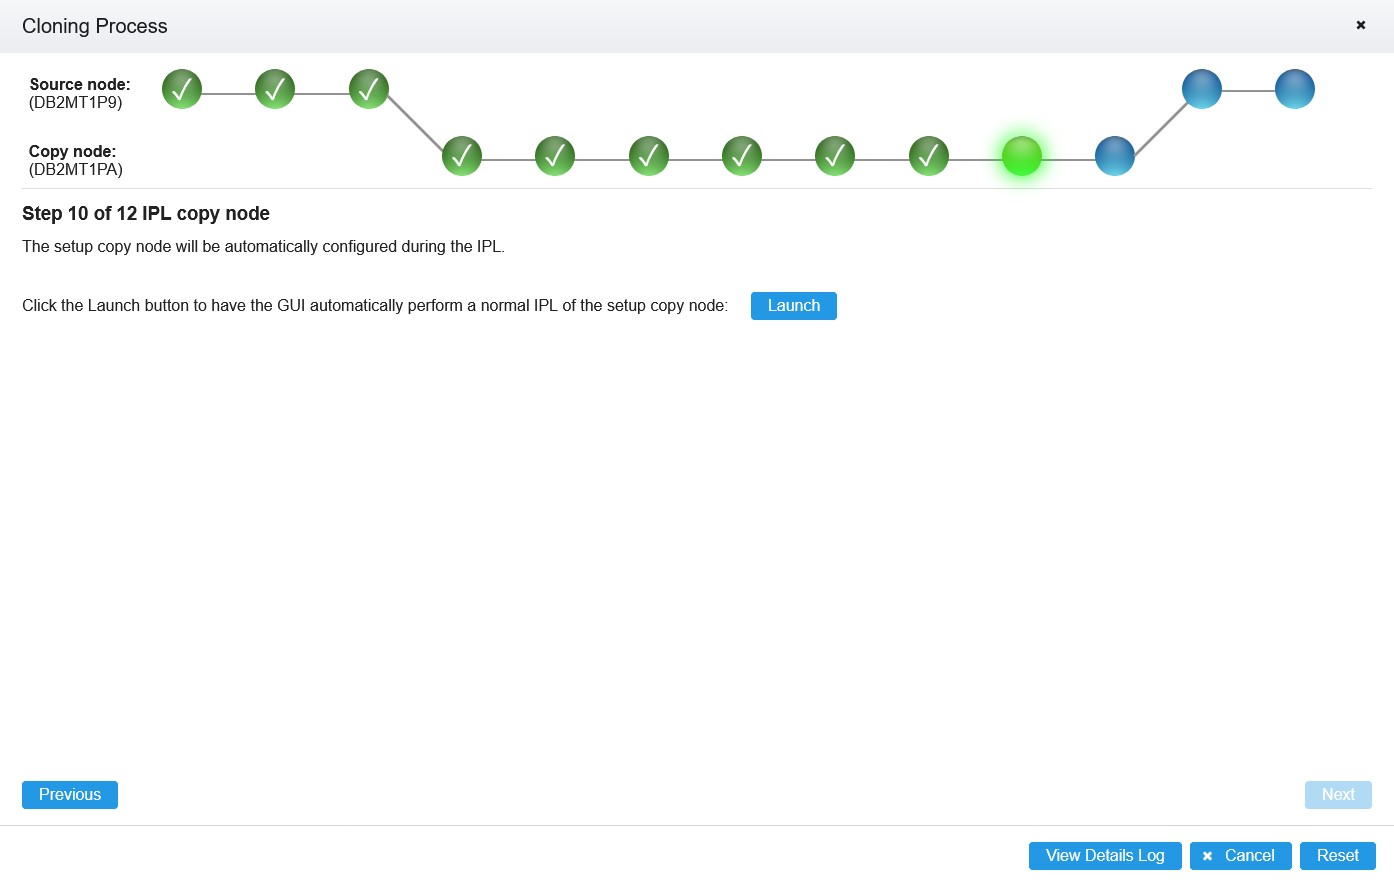
When the automated step is complete, a check mark will appear in the highlighted green circle at the top of the panel. Click the Next button to continue to the next step.
Step 11: Post check for SYSBAS
This step verifies the Db2 Mirror pair has been configured successfully. Click the Launch button to have the GUI automatically complete this step
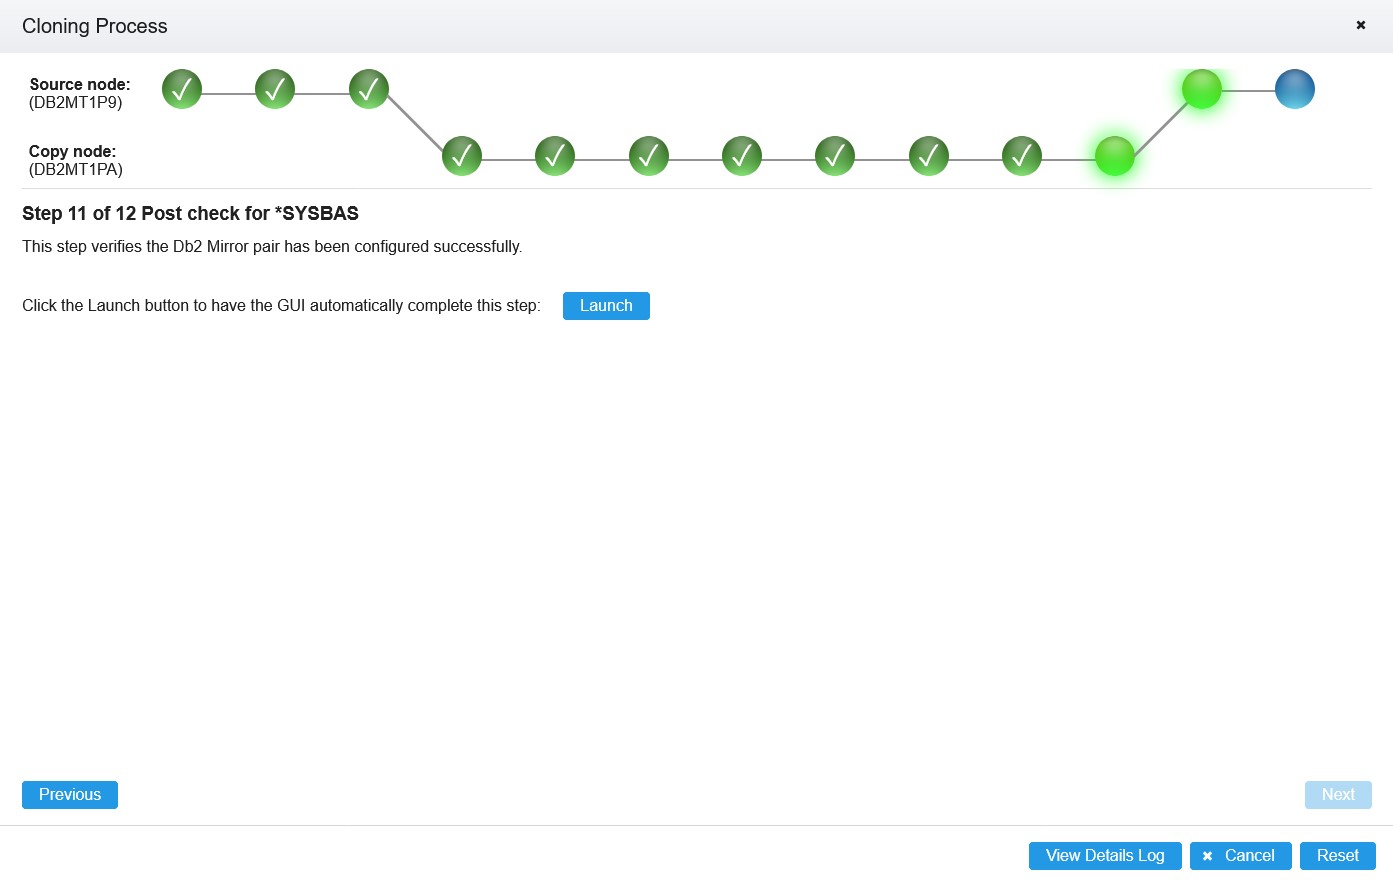
When the automated step is complete, a check mark will appear in the highlighted green circles at the top of the panel. Click the Next button to continue to the next step.
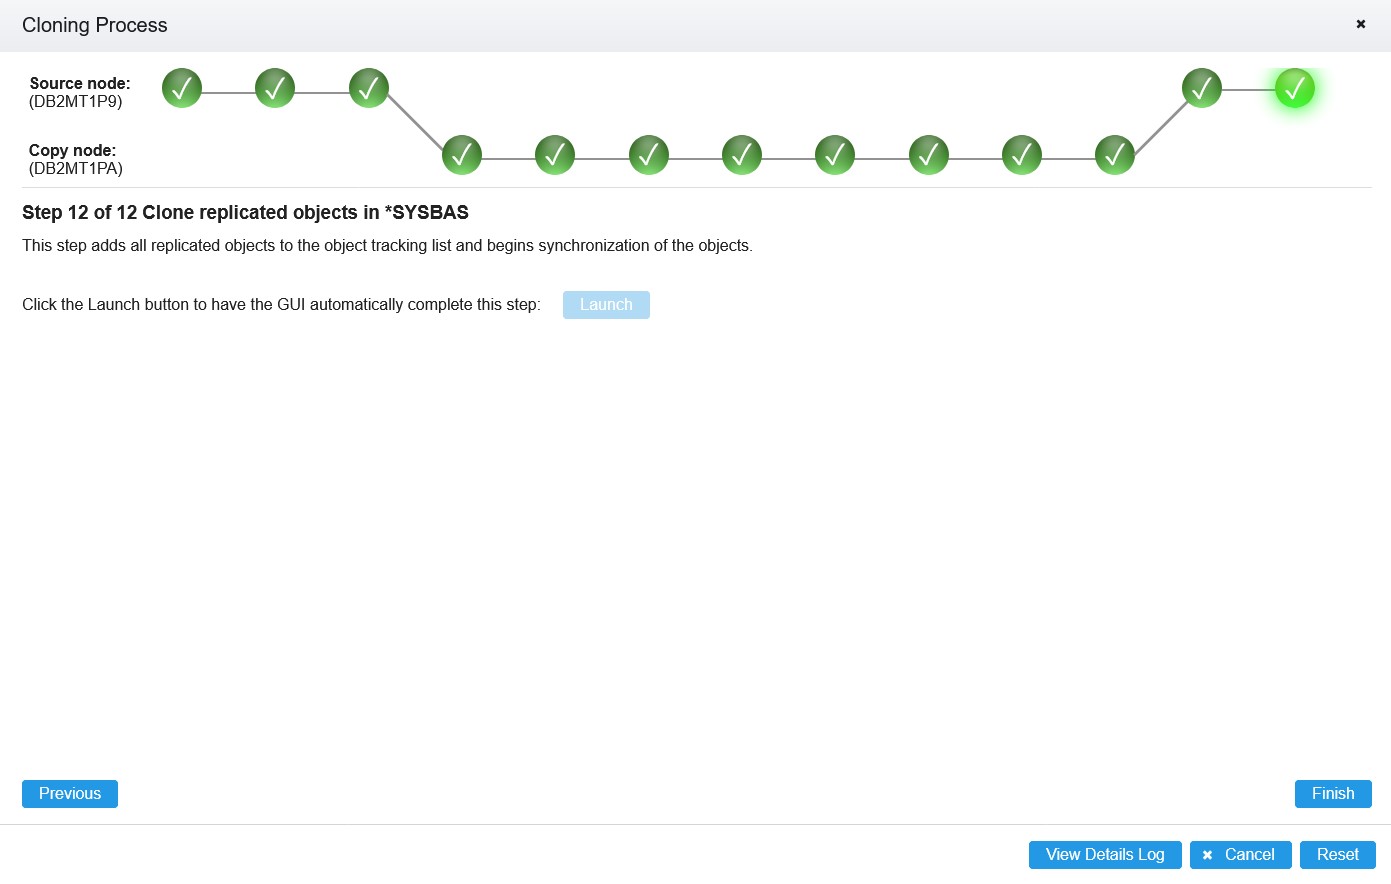
Step 12: Clone replicated objects in SYSBAS
This step adds all replicated objects to the object tracking list and begins synchronization of the objects.
Click the Launch button to have the GUI automatically complete this step, as shown in the figure below.
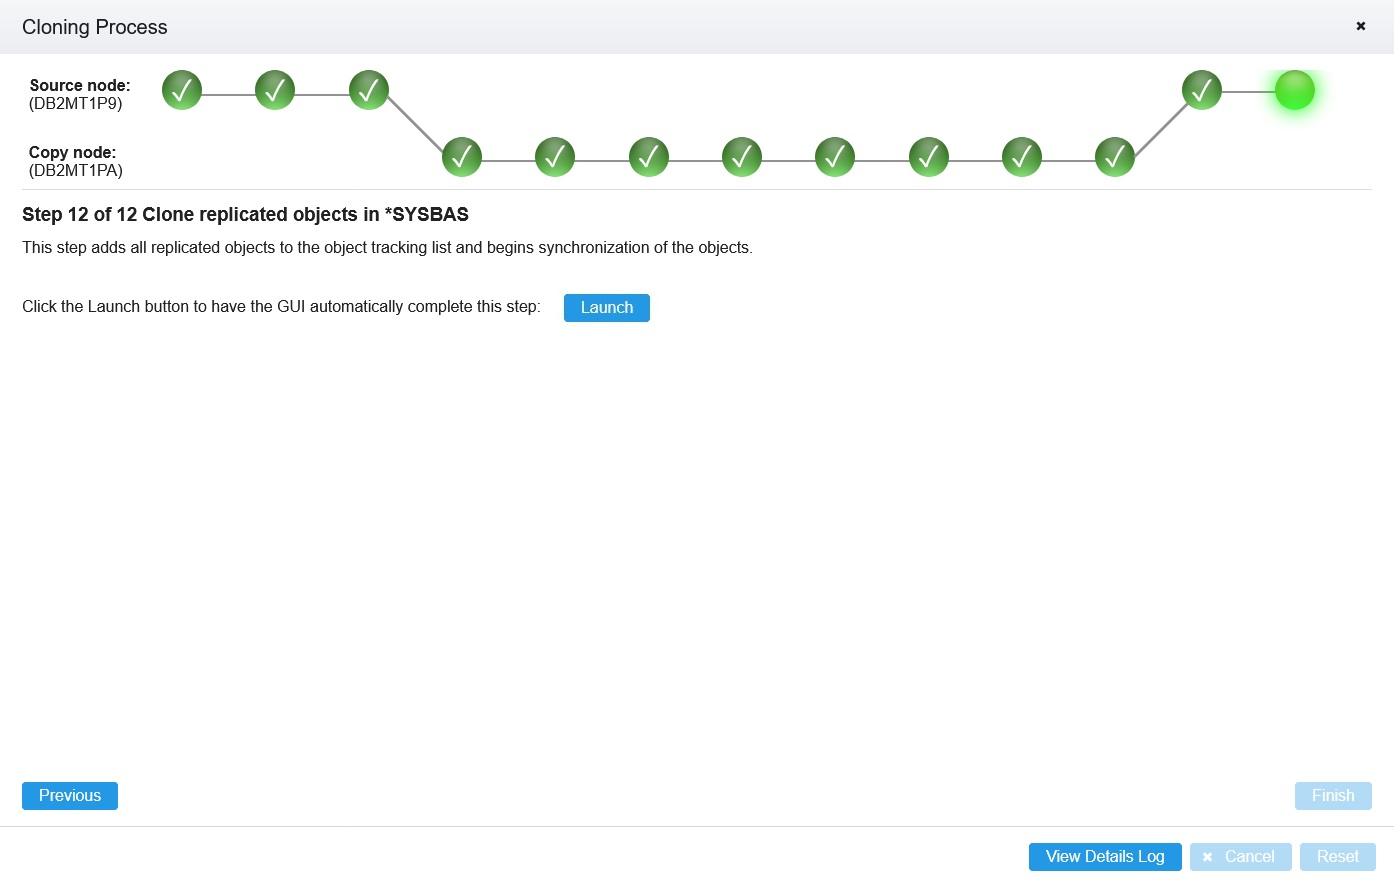
After completing all the steps, each step should be marked with a check mark, as shown in the figure below. Click the Finish button to return to the home page. Db2 Mirror should be Active and Replicating, indicating that the configuration of Db2 Mirror has completed successfully.