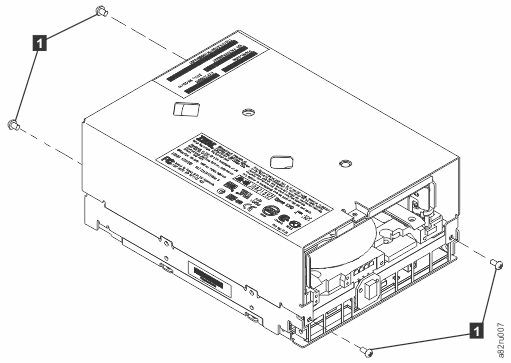
Remove the cover of the full height drive by completing these steps:
Remove the four cover-mounting screws and washers 1.
Remove the cover by lifting it up. Figure 1. Removing the cover from the full height drive
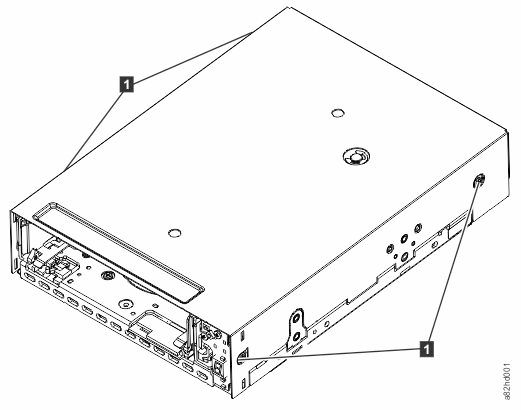
Remove the cover of the half height drive by completing these steps:
Remove the four cover-mounting screws (1). Two screws are on each
side of the drive.
Remove the cover by lifting it up.Figure 2. Removing the cover from the half height drive
Inspect the drive to decide which of the following conditions most closely matches the symptom
on the drive:
Tape spooled off the supply reel - All the tape appears to be on the take
up reel and no tape is on the supply reel (inside the cartridge). Test the drive after the procedure
is completed.
Tape pulled from leader pin (or broken at the front end) - All the tape
appears to be on the supply reel (inside the cartridge) and little or no tape appears to be on the
take up reel. The leader block is positioned in the take up reel. Return the drive after the
procedure is completed.
Tape broken in mid-tape - Tape appears to be on both the supply reel
(inside the cartridge) and take up reel. Test the drive after the procedure is completed.
Tape tangled along tape path - Tape appears to be tangled and damaged but
intact. Return the drive after the procedure is completed.
-- OR
--
No damage to tape (or no apparent failure) - There appears to be no
damage or slack to the tape. Return the drive after the procedure is completed.