Removing the drive brick from the sled
Procedure
- Place the sled on a clean, sturdy work surface.
It is not necessary to remove the plastic cover or connection card.
Figure 1. Connection screws and plastic cover 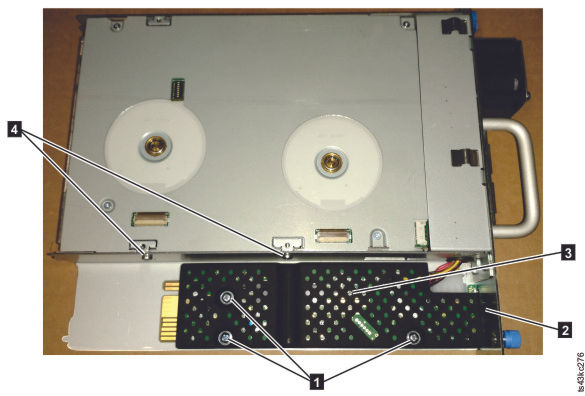
1 Connection card screws 2 Plastic cover 3 Connection card (under the plastic cover) 4 Screws that hold the drive brick to the sled (2 on each side). - Remove the drive brick from the sled by completing these
steps:
- Remove the four screws (two on each side of the sled 4) that secure the sled to the drive brick.
- Pull the drive brick out of the front of the sled far enough to unplug the cables
(5). Some of the cables and connectors are small and can be delicate,
so be careful when you are unplugging them.
Figure 2. The drive brick, showing the cables to be unplugged. 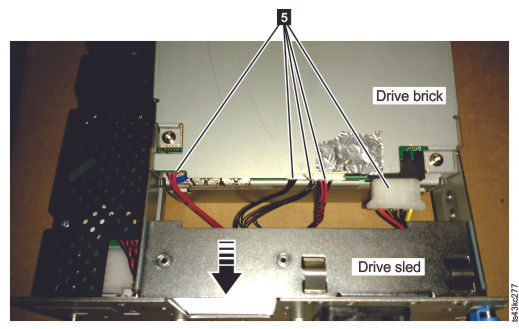
Note: Make sure to note where each cable is connected, so they can be connected correctly later. - Remove the drive brick from the sled.