Adding, removing, or replacing a power supply
 |
CAUTION:
Static Sensitive Risk of damage to devices
|
Important: ESD events occurring during power supply installation or removal
may cause SAS link reset on tape drives installed in the library. If this occurs, restart any jobs
that were running on affected SAS links.
Removing the power supply
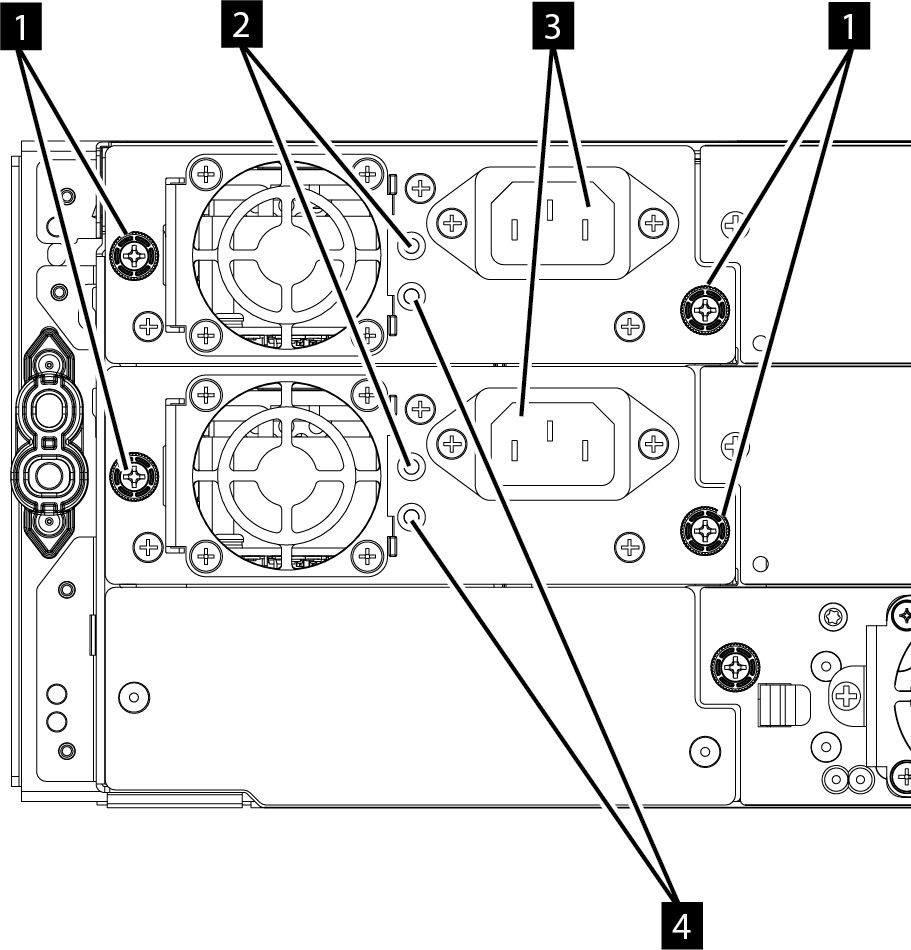
| 1 | Blue captive thumbscrews |
| 2 | White, lit if the AC power is connected. |
| 3 | AC power outlet |
| 4 | Green, lit if the Library in turned on. |
- Locate the failed power supply in the rear of the library. A power supply has failed if either the white or green LED is not lit. See the troubleshooting section for more detail.
- Unplug the AC power cord (3) from the power supply you are replacing.
- Loosen the two blue captive thumbscrews (1) with your fingers on the power supply.
- Using the thumbscrews (one on each side), slowly pull the power supply approximately 10 cm (4 inches) from the back of the module.
- Use one hand to completely remove the power supply from the module, while the other hand is used to support the bottom.
Installing the power supply
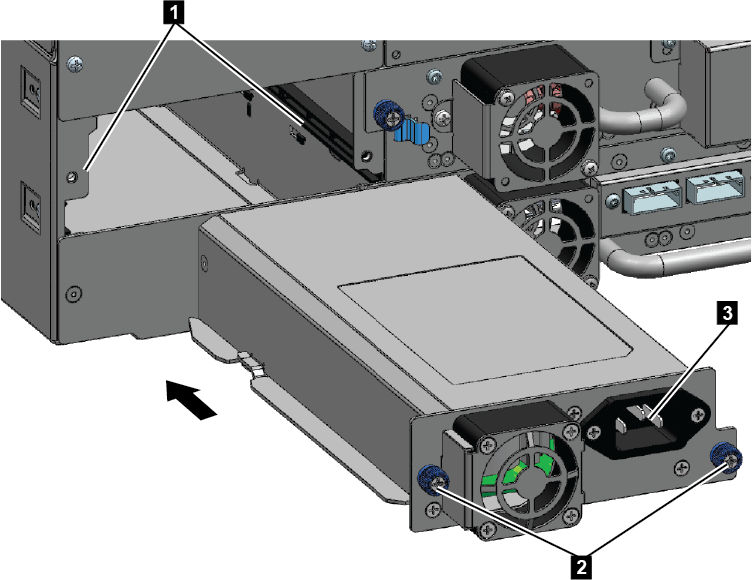
- Position the new power supply onto the alignment rails (1).
- Slide the power supply into the module until it is flush with the back panel of the module.
- Tighten the blue captive thumbscrews (2) with your fingers to secure it to the module.
- Attach the AC power cord to the new power supply (3) and plug the power cord into an outlet.
Installing a secondary power supply
- Remove the power supply face plate. Note that power supplies can only be installed in the top 2 bays.
- Position the secondary power supply onto the alignment rails.
- Slide the power supply into the module until it is flush with the back panel of the module.
- Tighten the blue captive thumbscrews with your fingers to secure it to the module.
- Attach the AC power cord to the new secondary power supply.
Verifying the power supply installation and operation
- If AC power is plugged into the power supply and the library is turned on, both the white LED (2 in Figure 1) and the green LED (4 in Figure 1) will be lit.
- Use the Operator Panel or Management GUI to confirm that the power supply is operating correctly. If there was a power supply event, it should now be cleared.