Running the completed decision service
You run the completed version of the decision service to see the expected
results.
About this task
Tip: If
you want to refer to the completed decision service while you are going through the tutorial, use
the answer and start projects in different Eclipse
workspaces.
Procedure
-
Import the answer project that you downloaded from GitHub:
- In the Rule perspective, click .
- In the Import wizard, expand , and click Next.
- Choose Select root directory, and browse to <InstallDir>/answer. InstallDir is the name of the directory to which you downloaded the answer project from GitHub.
- Click Select All, and in Options, click Copy projects into workspace.
- Click Finish.
The Rule Explorer displays six projects:
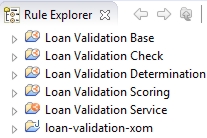
The Java™™ project loan-validation-xom defines an execution object model (XOM) for rule execution. The main decision service, Loan Validation Service, references the other projects.
-
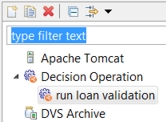
Expand Decision Operation, and click the run loan
validation configuration:
-
Click Run.
The Console view displays the following results, which show that the input data is valid and the loan is approved:
