Task 1: Designing the main rule project for the decision service
About this task
As a developer, you want to create a business rule vocabulary that business users can use to write and edit rules. The vocabulary must consist of terms that are familiar to the business users. The process of creating a vocabulary is called verbalization.
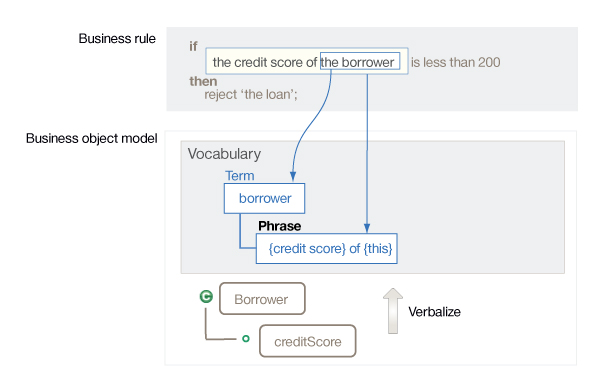
In this task, you create a business object model (BOM) that is based on an object model that is defined in a Java project. The following diagram shows how the classes and members of the BOM relate to the vocabulary that is familiar to the business users.
Step 1: Starting Rule Designer and importing the Java object model
Rule Designer is an Eclipse development environment for business rule applications. You can develop both rule projects and Java projects in this environment.
Before you begin
The file from which you copy rules for this tutorial is available in only American English
(en_US). To use Rule Designer in
American English, add the following lines to
<InstallDir>/eclipse/eclipse.ini before
-vmargs, where <InstallDir> is the
installation directory for your instance of Rule Designer:
-nl
en_US
Procedure
Results
The Rule perspective contains various views that you learn about in this tutorial, such as the Rule Explorer and the Decision Service Map.
The Rule Explorer shows miniloan-xom, which contains
the execution object model (XOM) that you use in the tutorial. The XOM is the model against which
you run rules. It references the application objects and data, and is the base implementation of the
BOM (see Overview: BOM and execution object model (XOM)). The
miniloan package holds the Borrower and Loan
Java classes.
Notice the Rule Project Map tab. When you work on a decision service, the Rule Project Map tab shows the Decision Service Map, which contains the different steps for making and deploying a decision service. You can use the Decision Service Map as a guide to the creation process for the decision service. If the Decision Service Map is not displayed, click to open it.
The following image shows the Rule Project Map in the tab bar.

Step 2: Creating a rule project for a decision service
In Rule Designer, you store the business logic of your application in a decision service. A decision service can consist of a main rule project and optional standard rule projects to split the logic of your business application into different parts. Each rule project can contain rule artifacts, a BOM, a vocabulary, and a reference to the XOM. In a rule project, you can manage, build, and debug the items that comprise the business logic of your application. In this tutorial, you create only a main rule project to simplify the logic of the application.
Procedure
Step 3: Importing the XOM into your rule project
You import the XOM from the Miniloan Java project.
Procedure
-
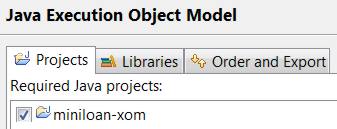
In the Projects tab, select miniloan-xom and click
Apply and Close:
Step 4: Creating the business object model
Before you can create and edit business rules, you must create a BOM. You can create a BOM manually or automatically by parsing your XOM. You use Rule Designer to parse the Java classes in the XOM, and create the BOM from their methods and properties. Then, you can write rules that use the verbalized terms that are contained in the BOM.
Procedure
-
Under Select classes, select the miniloan package.
Selecting the package selects all the classes in the package.
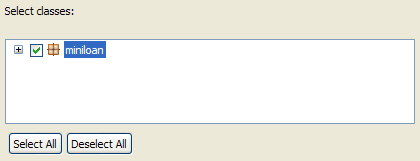 The miniloan package contains the Borrower and Loan classes.
 -
On the BOM Verbalization page, you must select the All
Methods check box.
The All Methods check box ensures that all the methods are verbalized in addition to the elements already selected.

-
In the Rule Explorer, double-click to open the BOM Editor, and take a moment to look at the BOM.
In the BOM Editor, expand the
miniloanentry: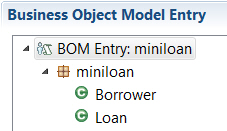
In your BOM, you now have two classes that are equivalent to the XOM classes Borrower and Loan.
-
In the Members section, double-click the
addToMessages(String)method.The BOM editor switches to the Member tab. In the Member Verbalization section, you can see that the verbalization of this method is
add a string to the messages of a loan: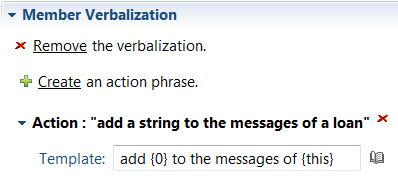
The verbalization is also used in the Rule Editor.
-
Close the
miniloantab to close the BOM Editor:
Step 5: Defining a decision operation
A ruleset is a runable package that includes rule artifacts and other elements. It contains a set of rules that can be run by the rule engine. You must define the contents of the ruleset and the parameters that allow the client application and the ruleset to exchange information. A decision operation includes all the settings that are needed to define the contents of the ruleset and its parameters.
Procedure
-
Select , and click OK.
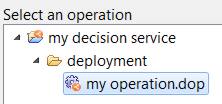
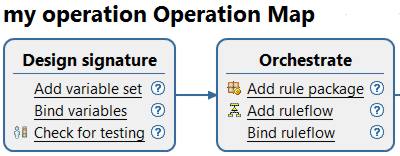
The operation map opens and shows the different actions that you can do. The links in the map open different editors.
Step 6: Designing the operation signature
Client applications interact with a ruleset by using input and output parameters. These parameters are defined in the signature of a decision operation. They are equivalent to Java method parameters. They are references that you can use when you write rules.
Procedure
To enable a decision to be made on the status of a loan, you create ruleset parameters for the borrower and the loan:
-
The borrower is an
INparameter. The value of theINparameter is provided as input to the ruleset when run. -
The loan is an
IN_OUTparameter. The value of theIN_OUTparameter is provided as input to the ruleset when run, and can be modified by the ruleset and provided as output when the run completes.
-
Repeat step 4 to define the
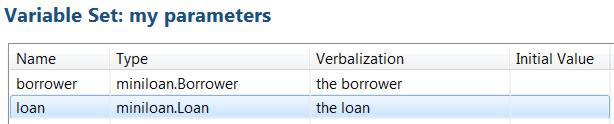
loanparameter:- Name: loan
- Type: Loan
- Verbalization: the loan
Your variable set is shown as follows:
-
Expand
my parametersin the Eligible variables part of the Decision Operation Signature editor: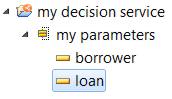
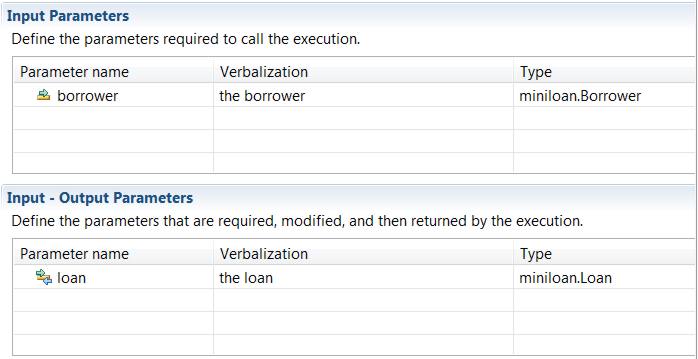
- Drag
borrowerto the input parameters. - Drag
loanto the input-output parameters.
The decision operation signature is displayed as follows:
- Drag