Setting Up App ID for Db2 Warehouse SaaS
This task guides you through configuring IBM Cloud AppID with Azure AD for secure SAML-based authentication to access Db2 Warehouse SaaS.
About this task
IBM Cloud AppID integration is supported in Db2 Warehouse SaaS for authentication purposes. However, this method assumes that the customer is responsible for implementing single sign-on (SSO) logic within their application. AppID does not support hybrid identity scenarios (e.g., combining external identities with internal enterprise users).
Additionally, this configuration does not currently support secure credential storage for disaster recovery. IBM recommends using Secret Manager for managing customer secrets, in alignment with service framework guidelines.
If your deployment requires direct Azure Active Directory (Azure AD) integration, please consult your IBM representative, as this capability is under evaluation for future productization.
IBM Cloud AppID enables federated authentication by using identity providers like Azure AD. This setup allows users to log in securely to Db2 Warehouse SaaS using their enterprise credentials. The task involves provisioning AppID, configuring Azure AD SAML settings, and integrating the setup with IBM Cloud IAM and Db2 Warehouse.
Procedure
-
IBM Cloud App ID Service
- Provision an App ID instance from IBM Cloud Catalog (cloud.ibm.com/catalog).
Figure 1. Provisioning an App ID 

- Access the new instance on the resources page to begin setup.
Figure 2. Accessing a new instance from the resource page 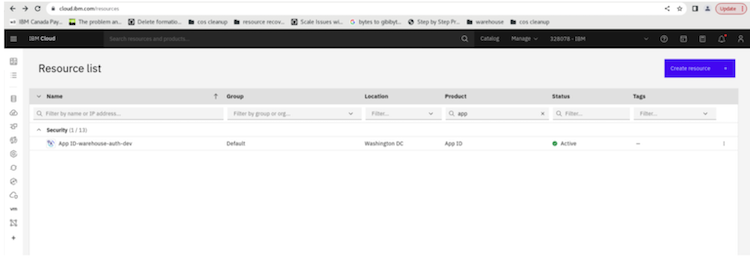
- Enable SAM 2.0 Federation under the Manage Authentication tab on the left side
of the screen.
Figure 3. Enable SAML Federation 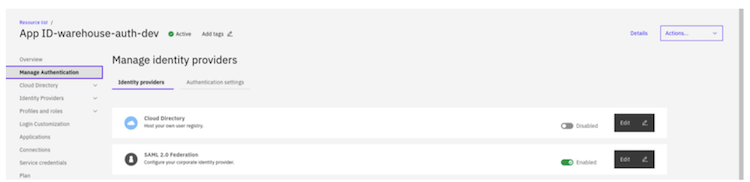
- Download the SAML metadata file under `Identity Providers` → `SAML 2.0 Federation` tab
for later use.
Figure 4. Downloading the SAML metadata file 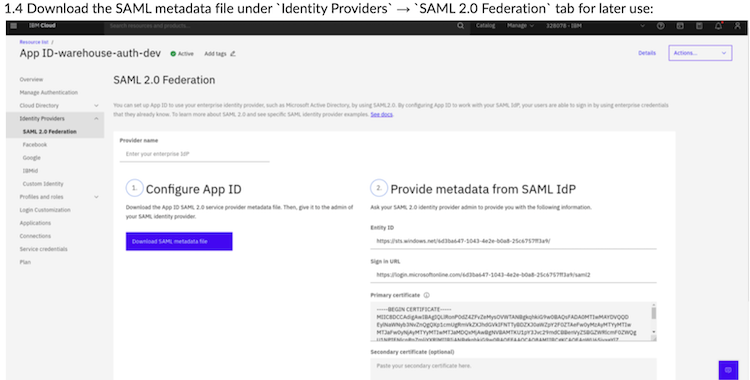
- Provision an App ID instance from IBM Cloud Catalog (cloud.ibm.com/catalog).
-
Azure AD Setup
- Create a new application under 'Enterprise Applications', then click 'Create your own
application' and use the same settings shown in the second image on the right.
Figure 5. Creating your own application 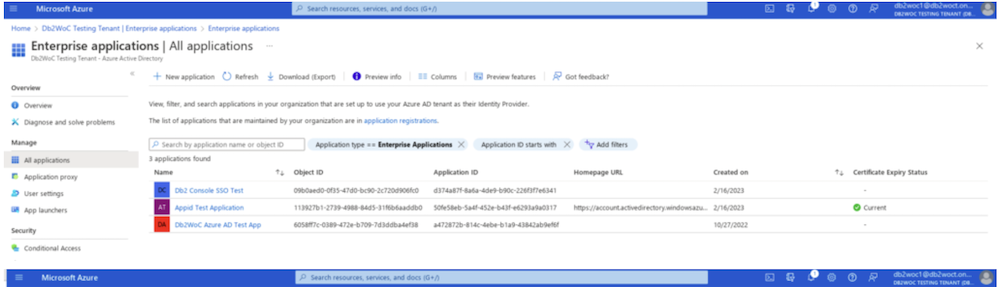

- Assign users and groups under the Users and Groups tab present on the left
menu.
Figure 6. Assigning users and groups 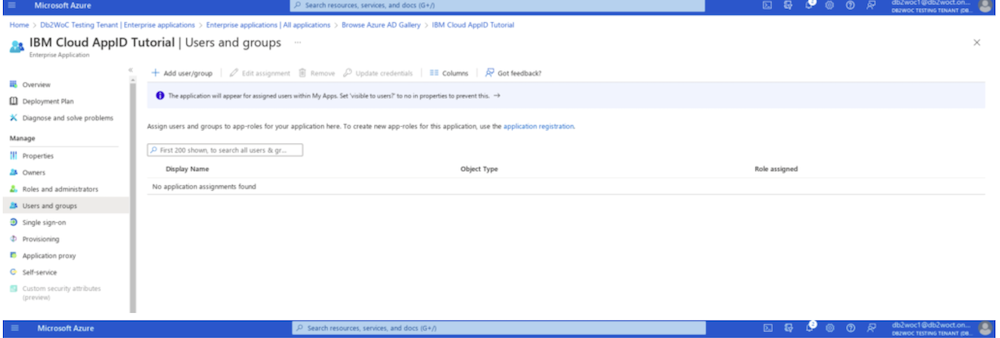
Figure 7. Adding the assignment 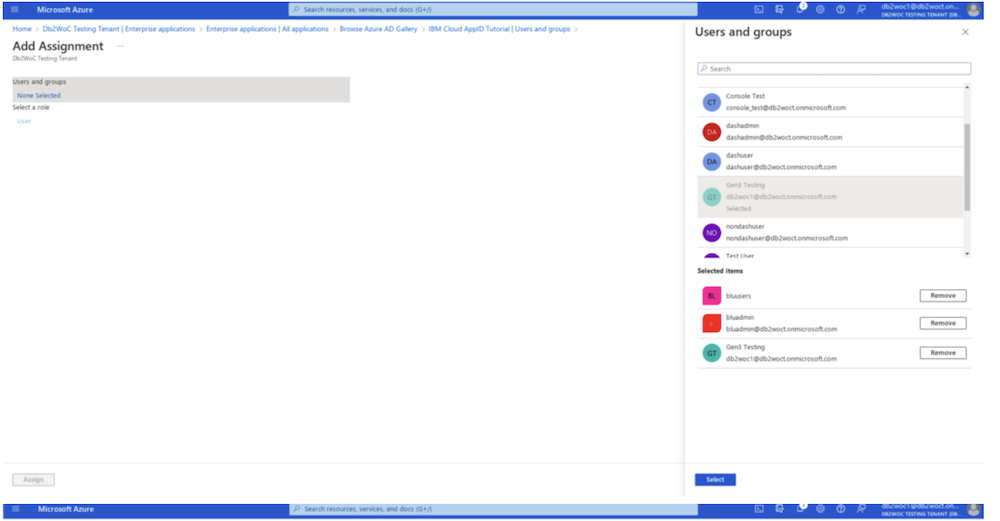
Figure 8. Users and Groups 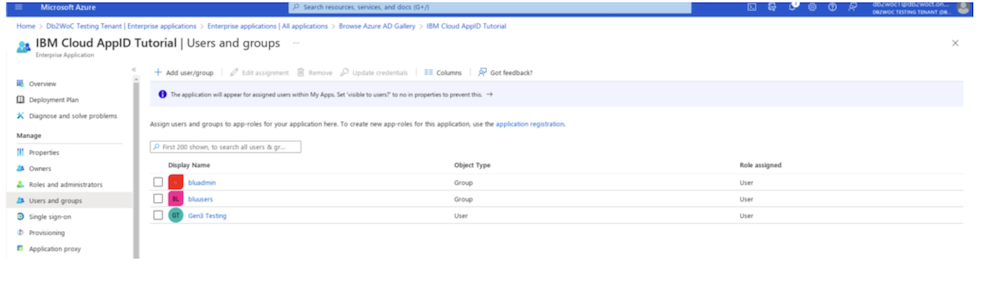
- Setup SAML by click on the single sign-on tab on the left.
Figure 9. Setting up SAML 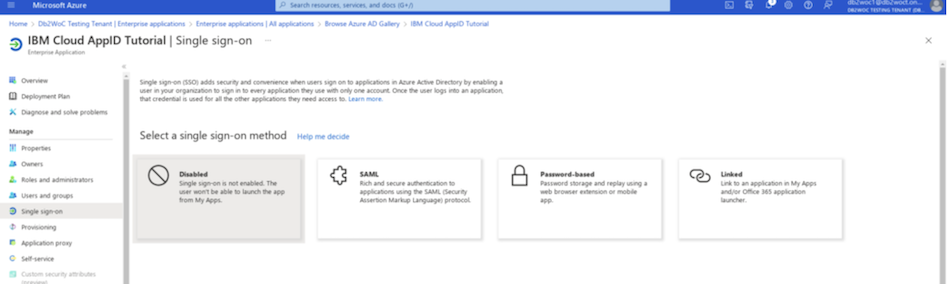
-
Click 'Edit' under the Basic SAML Configuration box and then click 'Add identifier' and 'Add reply URL'
Figure 10. Click Edit 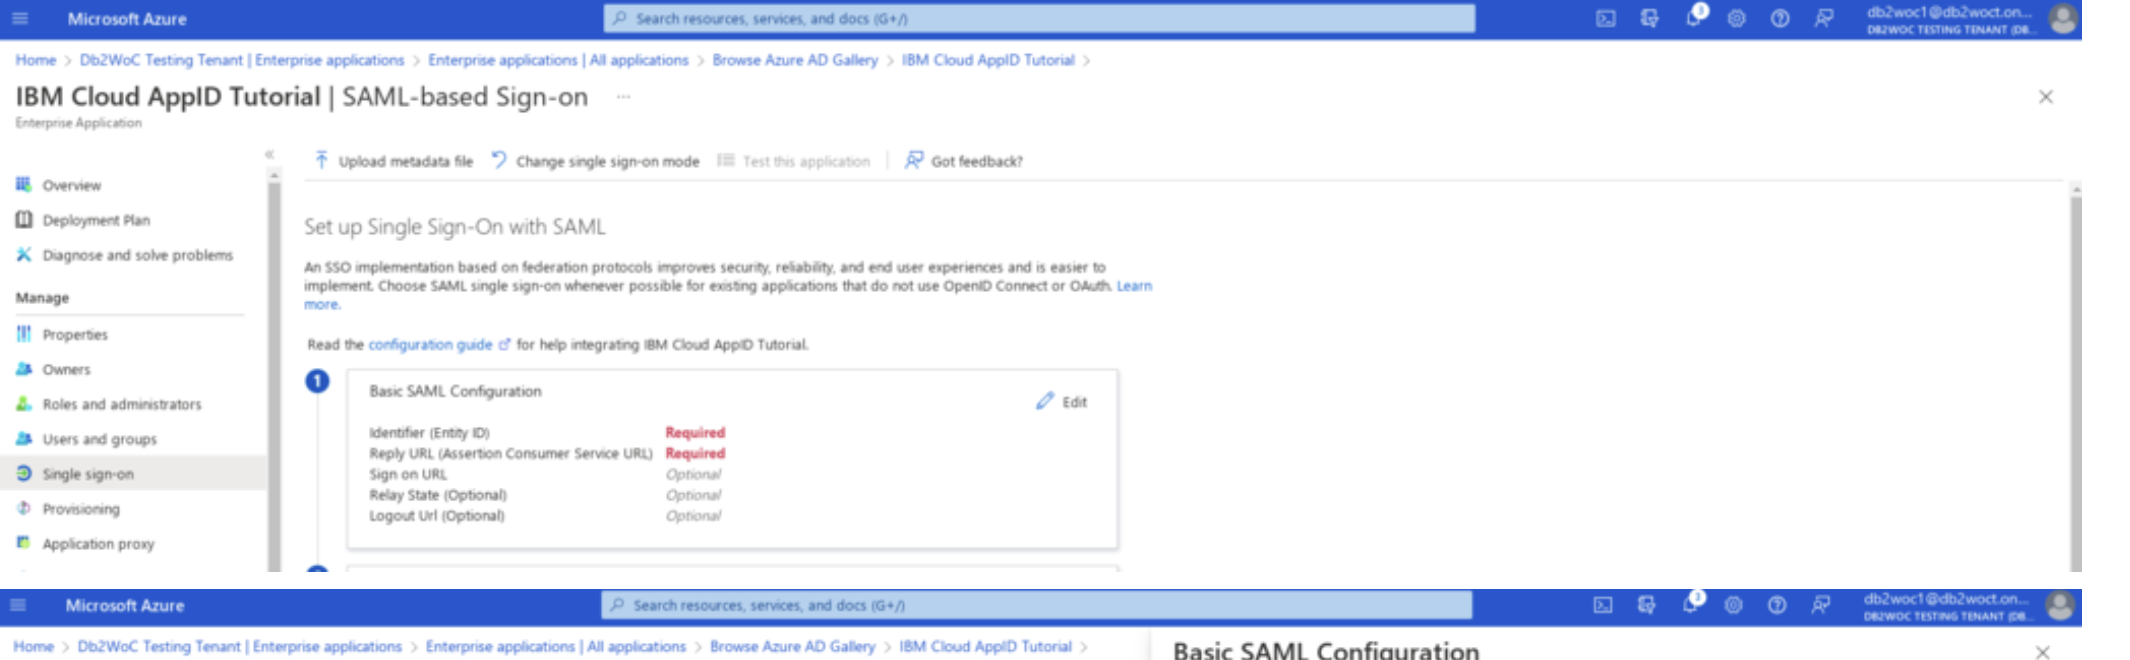
-
The two values should be populated by the appid metadata file you downloaded from step 2(d), specifically the values 'entity-id' and 'location'
Figure 11. Auto populating values 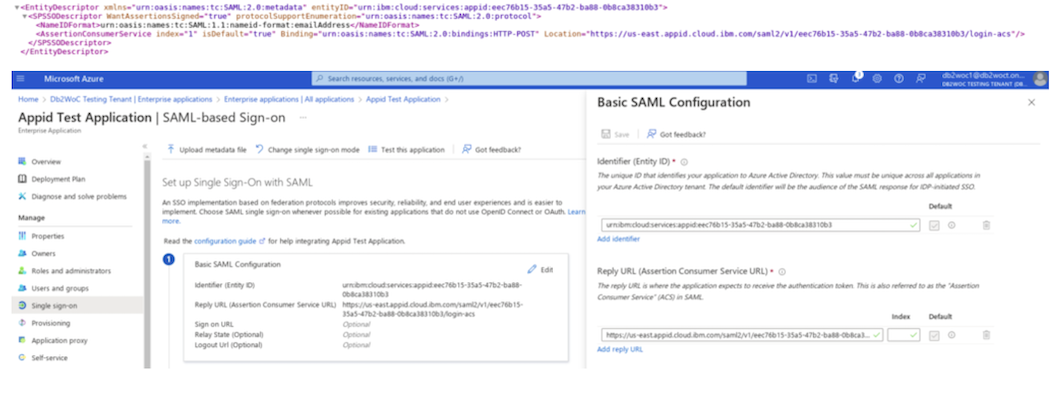
-
- Edit the Attributes & Claims box now
Figure 12. Editing the Attributes 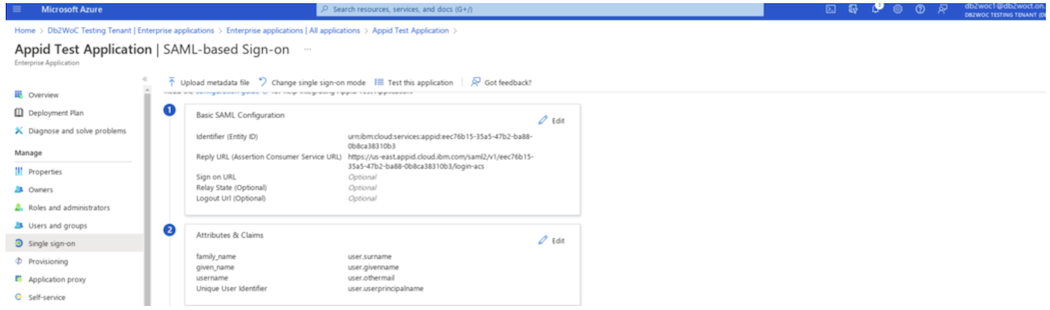
-
Now, Its required to remove all additional claims that were present previously and 'Add new claims' that are the same of the list that is shown below in the image.
Figure 13. Removing Additional Claims 
-
- Download the `Certificate (Base64) ` in the SAML Certificates box and copy the
Login URLand Azure ID Identifier fields in the 'setup application box'
Figure 14. Downloading the Certificate (Base 64) 
- Return back to the IBM Cloud AppID service and go back to the`Identitiy Providers` →
`SAML 2.0 Federation` tab and fill in the remaining information on the right side using the
information collected from step 'e' above.
Figure 15. Providing metadata for SAML IdP 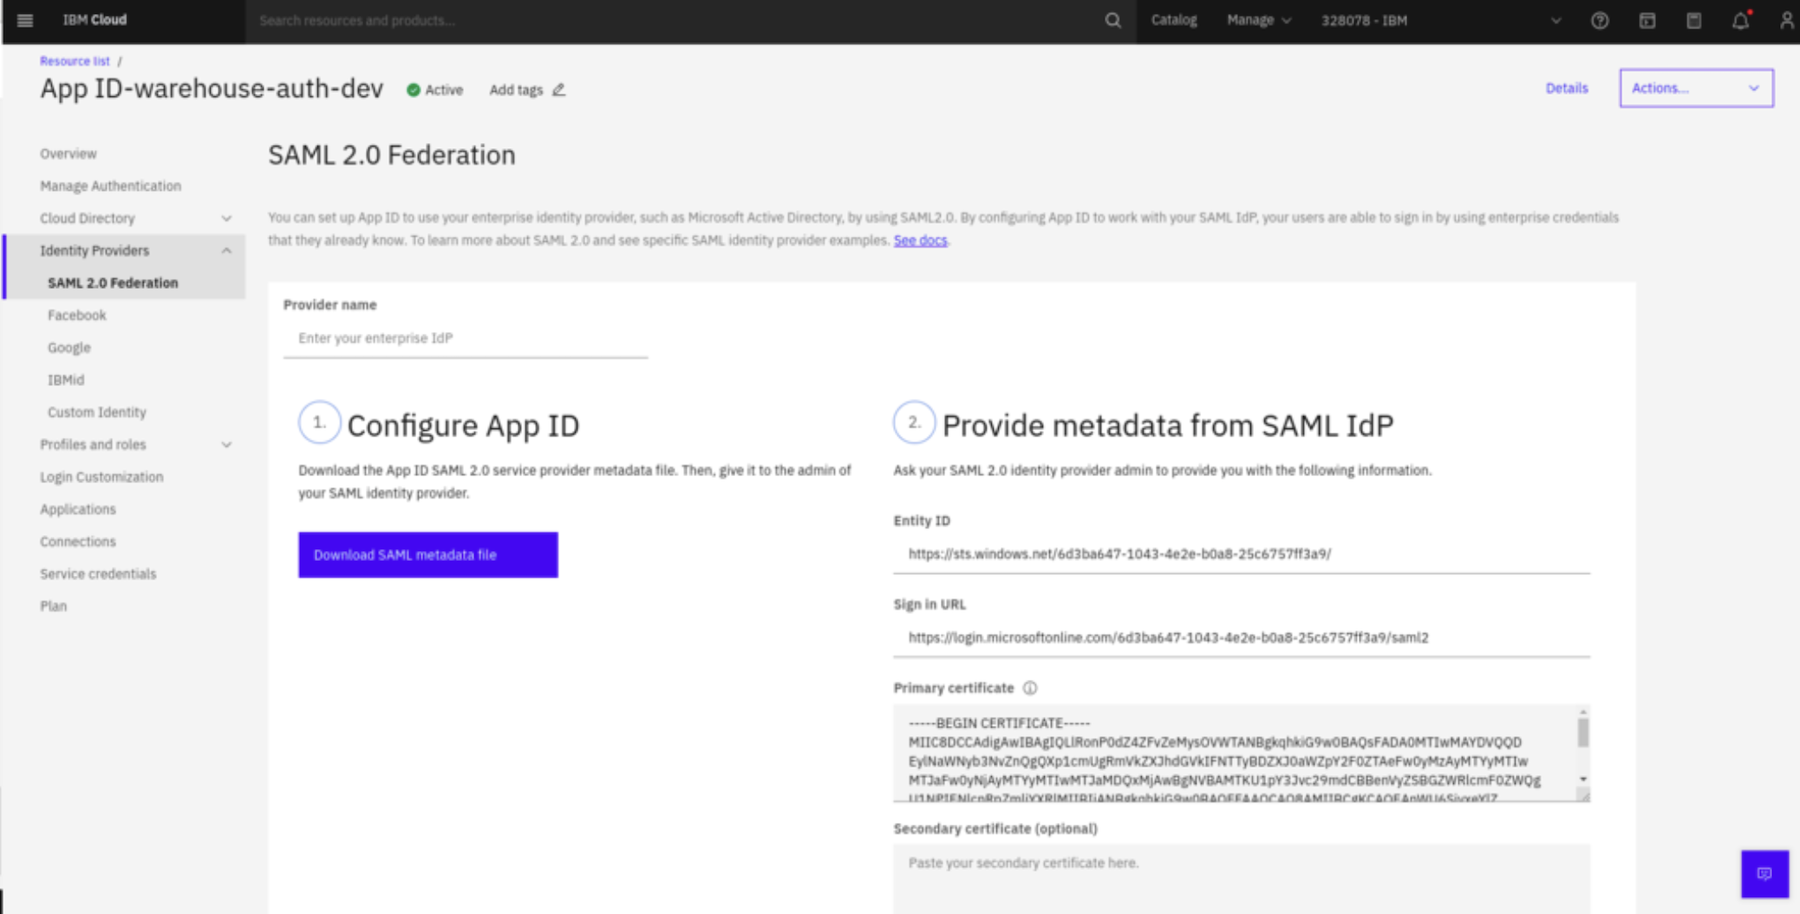
- Click Save and then Test to verify the setup.
Figure 16. Saving and testing the setup 
Figure 17. Sucess Message 
- Create a new application under 'Enterprise Applications', then click 'Create your own
application' and use the same settings shown in the second image on the right.
- Setup Login Details Note: The following steps 'a' to 'f'' will need to be done for every new user
- On cloud.ibm.com at the top bar, click on `Manage` → `Access (IAM)
Figure 18. Visiting the dashboard to manage access 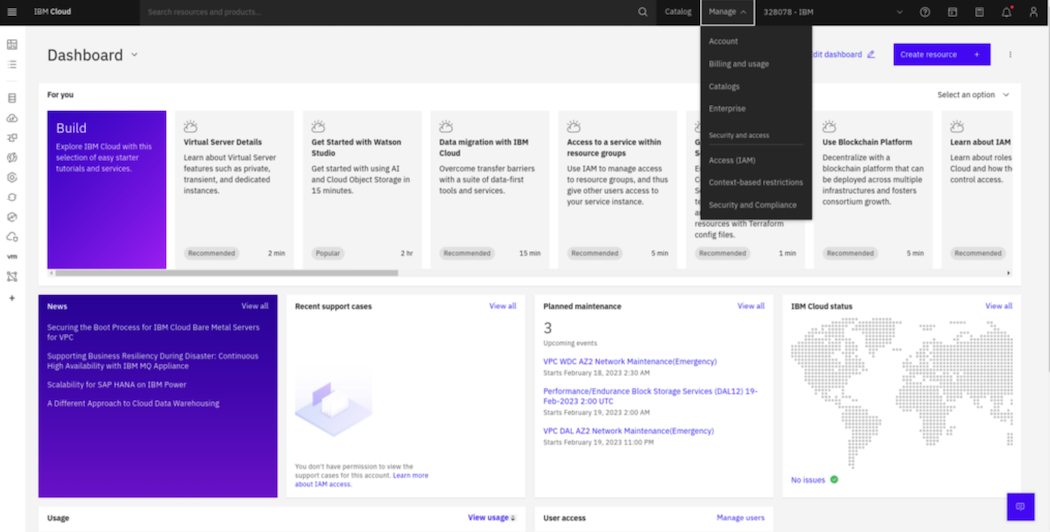
- Under Identity Providers, create a new IdP using the metadata.
Figure 19. Creating a new IdP 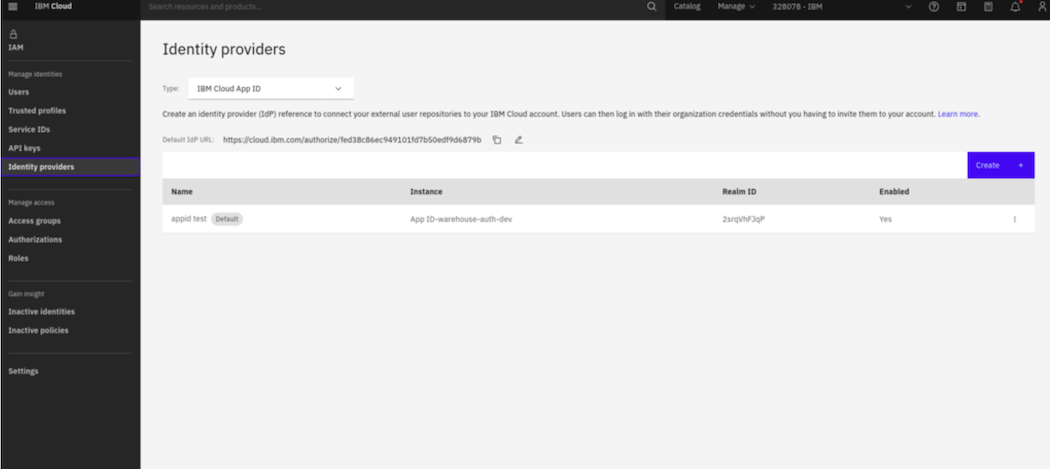
-
Set your setting according to your needs
Figure 20. Configuring Settings 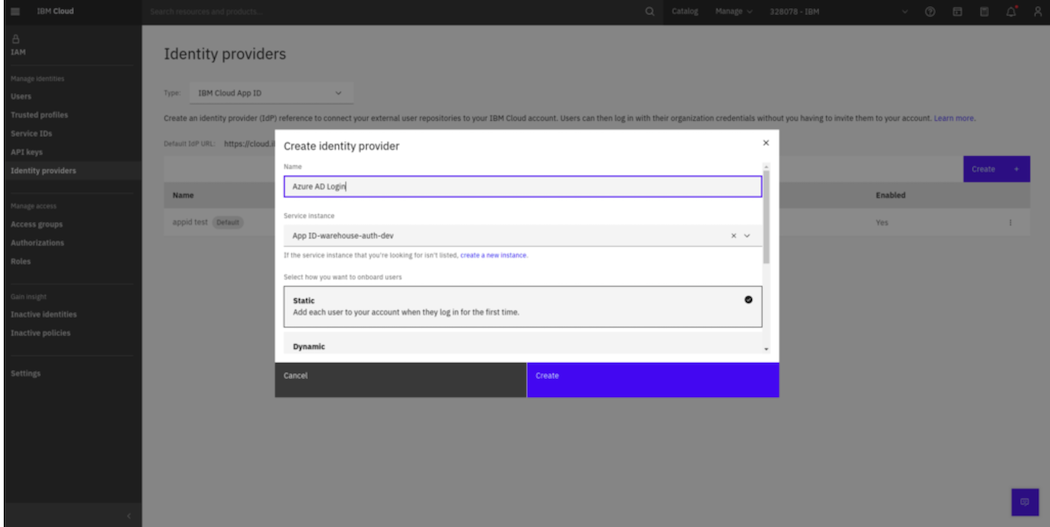
-
- With the entry created click the drop down on the right and select `View IdP
URL`
Figure 21. Viewing IdP URL 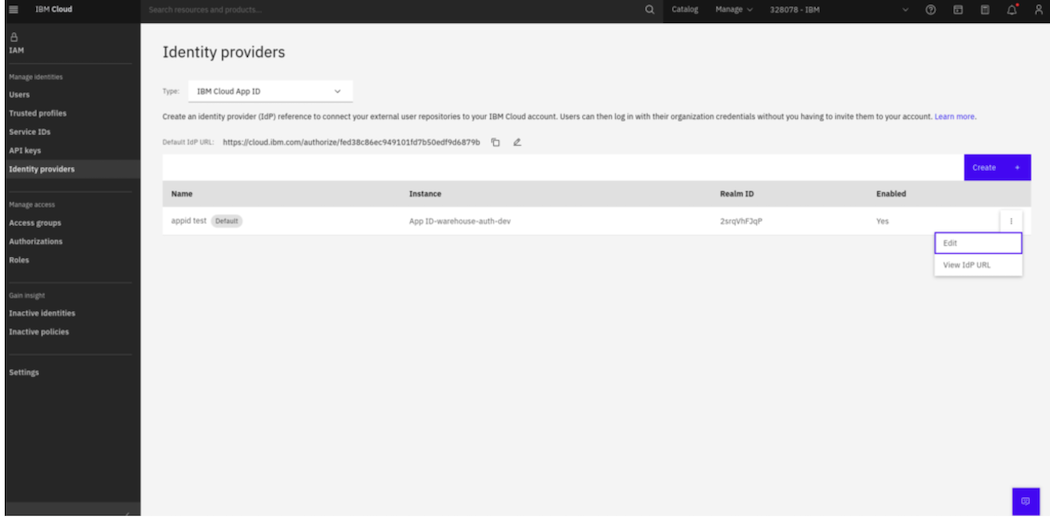
- Use either URL to login to cloud.ibm.com using app id
Figure 22. Viewing idP URL 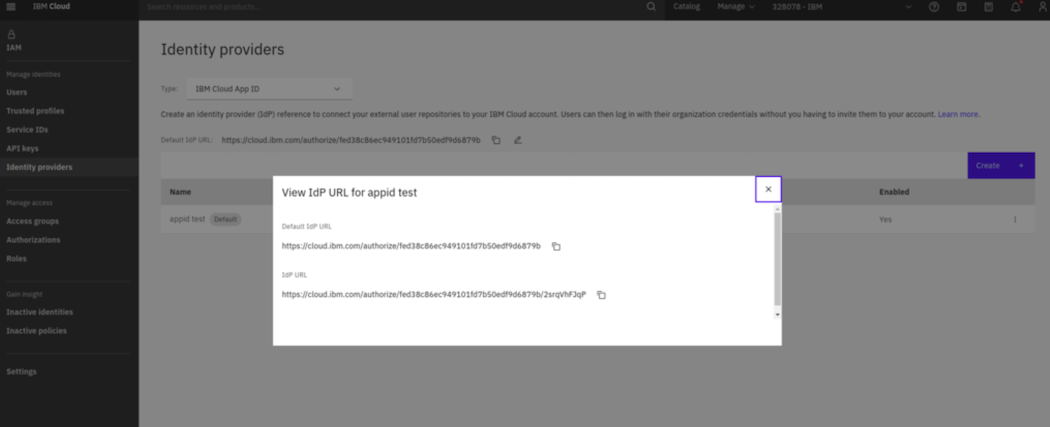
- After signing in, goto `Manage` → `Access (IAM)` like we did in step 'a' and copy the
field IAM ID:
Figure 23. Copying Field IAM ID 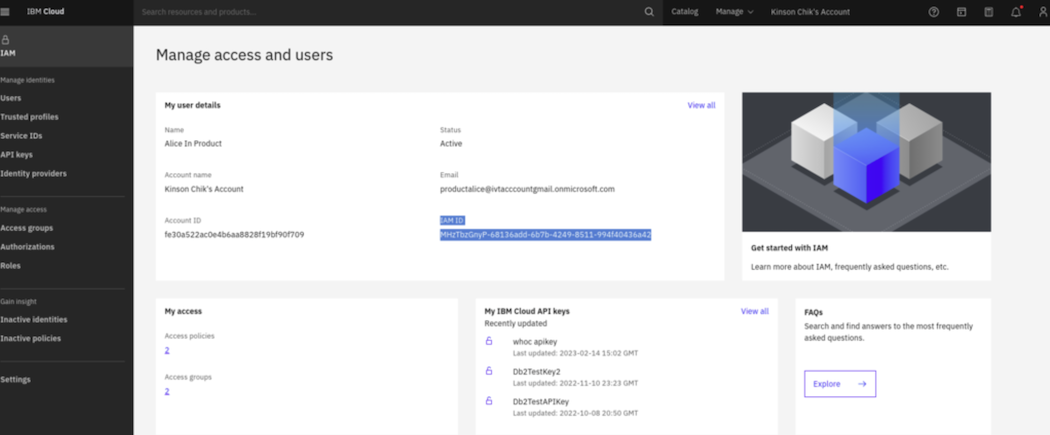
- Go to your cloud resources and access the console for your Warehouse on cloud service
instance ( you need to use a cloud.ibm.com account with access to this resource
Figure 24. Navigating to cloud resources 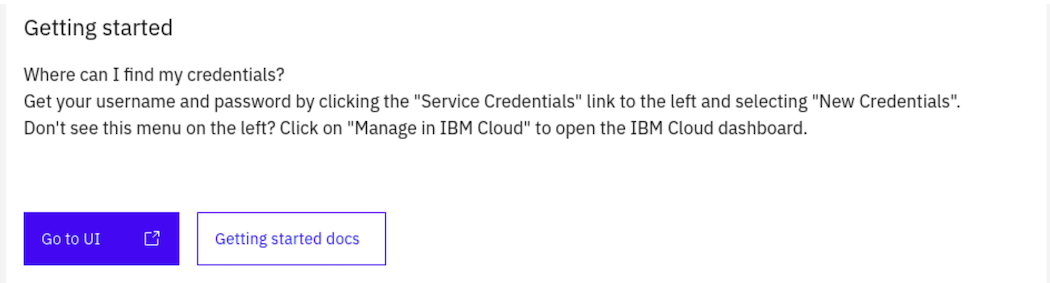
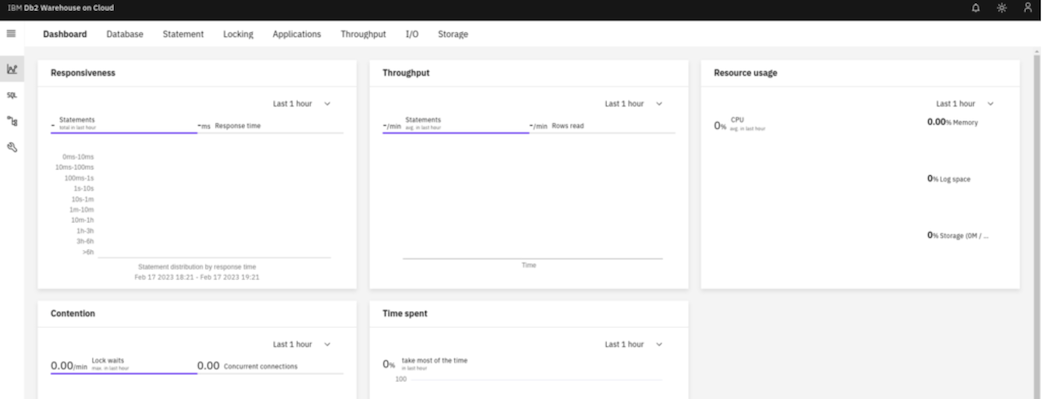
- Create a new IBM id user by clicking on the wrench on the left side and then on `User
management` on the top.
Figure 25. Craeting a new IBMid user 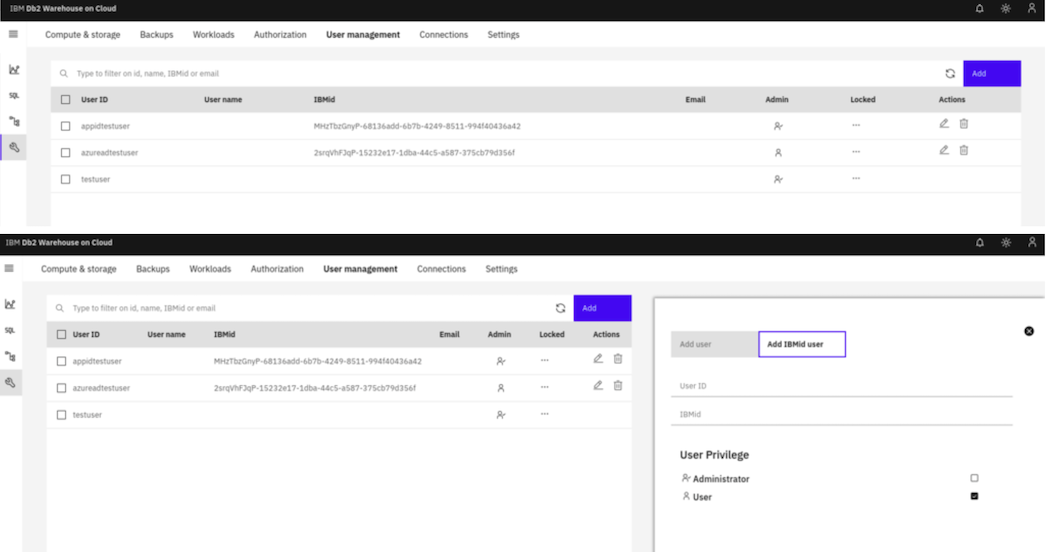
-
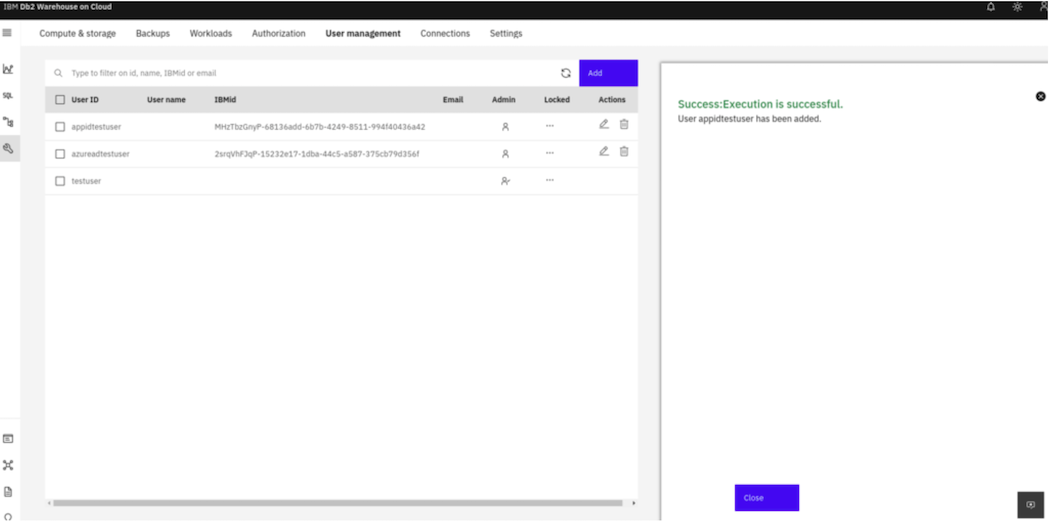
Use the IAM ID copied on step 'e' as the IBM
Figure 26. Using the IBMid 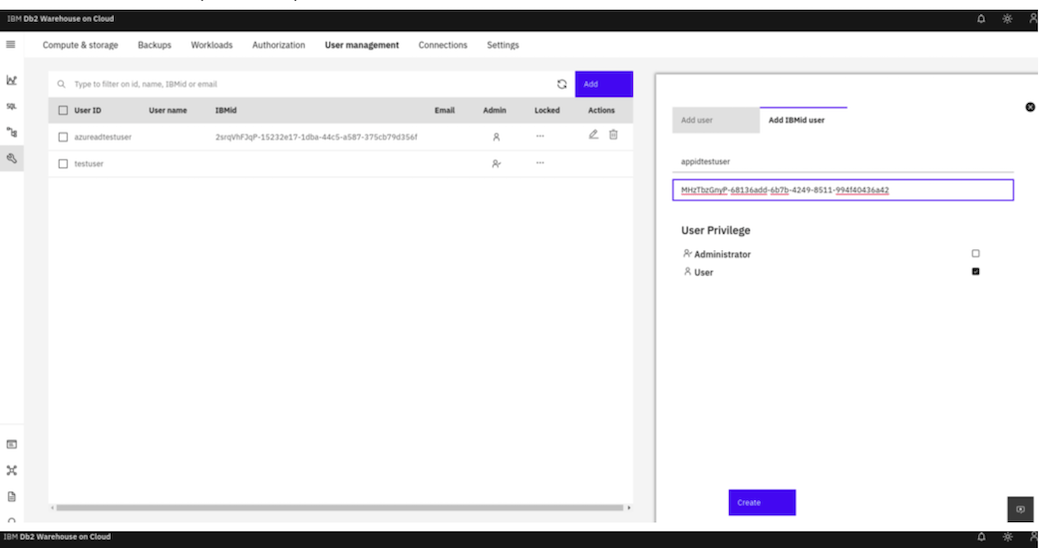
-
Figure 27. Craeting an API Key 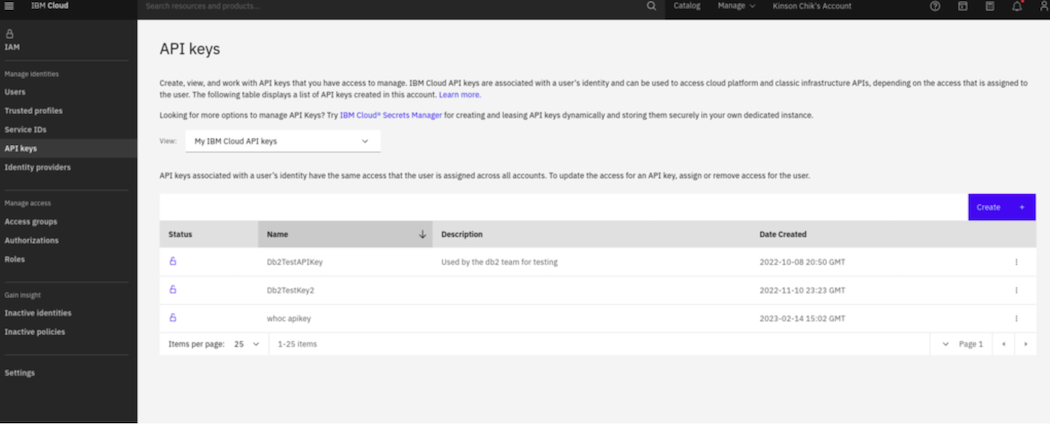
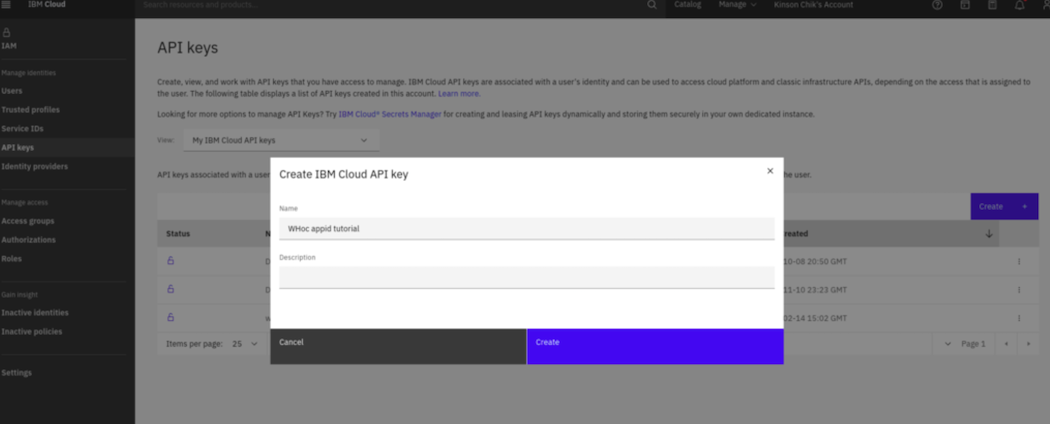
-
Copy the provided API key and save it somewhere as it will not be viewable again from the website
Figure 28. Saving the API key post creation 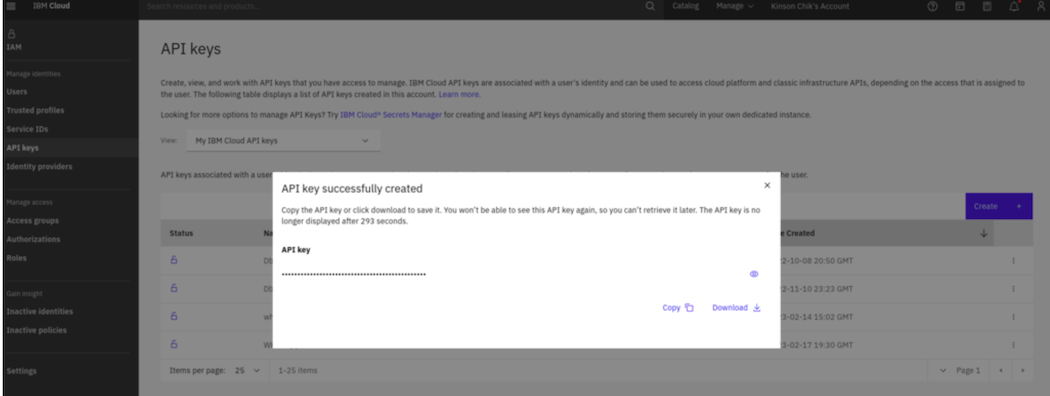
Figure 29. Provision App ID. Screenshot showing how to perform the step: Provision an AppID instance from IBM Cloud catalog.
- On cloud.ibm.com at the top bar, click on `Manage` → `Access (IAM)
- Accessing the Database (JDBC)
Use the following
curlcommand to obtain an access token that uses your IBM Cloud API key obtained in above step 'h':curl -X POST https://iam.cloud.ibm.com/identity/token \ -H "Content-Type: application/x-www-form-urlencoded" \ -d "grant_type=urn:ibm:params:oauth:grant-type:apikey&apikey=<your_api_key>"
Replace
<your_api_key>with your actual IBM Cloud API key.Use the access token in your JDBC connection string:
jdbc:db2://<host_name>:<port>/BLUDB:sslConnection=true;sslCertLocation=
<access_certificate>;enableClientAffinitiesList=1;maxRetriesForClientReroute=10;retryIntervalForClientReroute=5;clientRer
outeAlternatePortNumber=<port>,<port>;clientRerouteAlternateServerName=<host_name>,
<host_name>;enableSeamlessACR=true;enableSeamlessFailover=true;allowNextOnExhaustedResultSet=1;accessToken=
<access_token>;securityMechanism=15;
Replace the placeholders:
<host>: Db2 Warehouse hostname<port>: Port number (typically 50001 for SSL)<access_token>: Token received from the curl command
Once completed, users can authenticate to Db2 Warehouse SaaS using Azure AD credentials via IBM Cloud AppID, and securely connect that uses JDBC with access tokens.