Preparing the 9040-MR9 system to permanently remove an adapter
To prepare the system to permanently remove an adapter from the system, complete the steps in this procedure.
Before you begin
Procedure
-
Review the locations of the adapter slots and the service indicators for the adapter that
you want to service. The adapters are installed in the rear of the system.
Figure 1 shows the locations of the
adapters in a 9040-MR9 system and the locations of
the light-emitting diodes (LEDs) for the adapter.
The number of adapter slots that are available in the system depends on the number of system processors in the system. For the adapter placement information for the available slots in this system, see Adapter placement rules and slot priorities for the 9040-MR9.
The adapter has two LEDs that indicate the status:- A power/activity LED (green)
- An error and identify function LED (amber)
The status of the LEDs are as follows:- (B) Indicates that the adapter is operating correctly. The green power LED (top LED) is lit solid and the amber fault LED (bottom LED) is off.
- (C) Indicates that the adapter is not operating correctly. The green power LED (top LED) is lit solid and the amber fault LED (bottom LED) is lit solid.
- (D) Indicates the faulty or failed adapter was selected by using the identify function. The green power LED (top LED) is lit and the amber fault LED (bottom LED) is flashing.
Attention: If the adapter is operating correctly, then the Activity LED is ON (green) and the Error amber LED is OFF, as shown in (B). Do not attempt to remove a working adapter.Figure 1. Adapter slot and LED locations in a 9040-MR9 system 
-
Label and disconnect the power cords from the system unit as shown in the
following figure.
Notes:
- This system might be equipped with two or more power supplies. If the removing and replacing procedures require the system power to be turned off, ensure that all power sources to the system are disconnected.
- The power cord (B) is fastened to the system with a hook-and-loop fastener (A). If you are placing the system in a service position after you disconnect the power cords, ensure that you unstrap the fastener.
Figure 2. Removing the power cords  (L003)or
 or
or or
or or
or

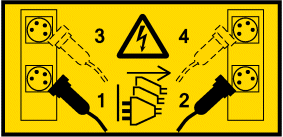
 DANGERMultiple power cords. The product might be equipped with multiple AC power cords or multiple DC power cables. To remove all hazardous voltages, disconnect all power cords and power cables. (L003)
 -
At the rear of the system, put the cable management
bracket in the service position. See the following figure.
- Pull out the quarter-turn fasteners (B) and turn them to disengage them while you lift the cable management bracket (A) to its raised position.
- Turn the quarter-turn fasteners (B) to engage and lock the bracket into position.
Figure 3. Placing the cable management bracket in the raised service position 