Preparing the 5148-21L, 5148-22L, 8247-21L, 8247-22L, 8284-21A, or 8284-22A system to install a memory module with the power turned off
Learn to prepare the system to install a memory module in the system.
About this task
To prepare the system to install a memory module, complete the following steps:
Procedure
- Determine the slot in which you want to install a memory module.
Each system processor module supports eight memory modules. See Plugging rules for memory modules in the 5148-21L, 5148-22L, 8247-21L, 8247-22L, 8284-21A, or 8284-22A system to understand the plugging rules and ensure that the memory modules are plugged in the correct sequence.
The memory module slots are on the system backplane. The memory module slots are visible after you have removed the service cover as instructed in this procedure.
Figure 1 shows the locations and service indicators for the memory modules in the 5148-21L, 5148-22L, 8247-21L, 8247-22L, 8284-21A, or 8284-22A system.Figure 1. Locations for the memory modules and service indicators in the 5148-21L, 5148-22L, 8247-21L, 8247-22L, 8284-21A, or 8284-22A system 
- Disconnect
the power source from the system by unplugging the system. For instructions,
see Disconnecting the power cords.
Note: The system might be equipped with redundant power supply. Before you continue with this procedure, ensure that all power to your system is disconnected.(L003)or
 or
or or
or or
or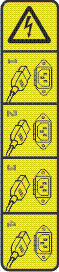
 DANGERMultiple power cords. The product might be equipped with multiple AC power cords or multiple DC power cables. To remove all hazardous voltages, disconnect all power cords and power cables. (L003)