POWER7 information
Installing 8233-E8B or 8236-E8C memory modules
Learn about installing memory modules.
If your system is managed by the HMC or SDMC, see Table 1 for the order in which you must place the memory modules, and then use the HMC or SDMC to complete the steps for installing memory modules in the server.
If you do not have an HMC or SDMC, complete this procedure to install memory modules.
Before
installing or replacing a feature, ensure that the software required
to support the feature is installed on your system. For
information about software prerequisites, see IBM Prerequisite.
If the required software is not installed, see the following web sites
to download it, and then install it before continuing:
- To download firmware and software updates and fixes, see Fix Central.
- To download Hardware Management Console (HMC) updates and fixes, see Hardware Management Console Support and downloads .
If your system is managed by the IBM® Systems Director Management Console (SDMC), use the SDMC to install memory modules in the server. For instructions, see Installing a feature by using the Systems Director Management Console. If you do not have an SDMC, complete this procedure to install memory modules.
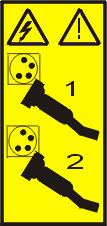
- Disconnect the power source from
the system by unplugging the system. Note: This system is equipped with a second power supply. Before continuing with this procedure, ensure that the power source to the system has been completely disconnected.
(L003)
or
- Determine the slots in which the memory modules will be
placed. Each system processor assembly has eight memory
module slots. See Table 1 to
ensure that memory modules are balanced on each processor assembly.
Plug the memory modules into the slots shown in the table. For the
memory module slot locations in the system processor assembly, see Figure 1.Notes:
- The minimum memory that can be installed is 8 GB (two 4 GB DIMMs).
- On the 8233-E8B, the maximum memory that can be installed is 512 GB (eight 16 GB DIMMs in each of the four processor cards). 16 GB DIMMs are not supported on the 8236-E8C system.
- Memory modules installed on the same processor assembly must be identical in size, speed, and feature code.
- Memory modules installed on different processor assemblies can be different sizes and speeds.
- Each memory feature consists of one pair of dual inline memory modules (DIMMs). Each processor card can have two, four, or eight DIMMs. A memory feature is not required in all processors, although it is recommended.
- After the second pair of memory modules is installed in each of the existing processors, the memory modules must be installed as a quad.
Table 1. Memory module balancing Processors and memory Where to install memory modules Memory plugged in pairs - Plug the first pair of memory modules into memory module slots P1-Cn-C2 and P1-Cn-C4 for each processor.
- Plug the second pair of memory modules into memory module slots P1-Cn-C3 and P1-Cn-C5 for each processor.
One processor card, memory plugged in quads - Plug the first quad of memory modules into memory module slots P1-Cn-C2, P1-Cn-C3, P1-Cn-C4, and P1-Cn-C5.
- Plug the second quad of memory modules into memory module slots P1-Cn-C6, P1-Cn-C7, P1-Cn-C8, and P1-Cn-C9.
Multiple processor cards, memory plugged in quads Balance the memory on each processor card: - Plug the first quad of memory modules into memory module slots P1-Cn-C2, P1-Cn-C3, P1-Cn-C4, and P1-Cn-C5 on the first processor card.
- Plug the second quad of memory modules into memory module slots
P1-Cn-C2, P1-Cn-C3, P1-Cn-C4, and P1-Cn-C5 on the second processor
card.Note: After the first quad of memory modules, plug all additional quads into slots P1-Cn-C2, P1-Cn-C3, P1-Cn-C4, and P1-Cn-C5 on the second through fourth processor cards, sequentially.
- After all the P1-Cn-C2, P1-Cn-C3, P1-Cn-C4, and P1-Cn-C5 slots are filled on all processor cards, then plug additional quads of memory modules into memory module slots P1-Cn-C6, P1-Cn-C7, P1-Cn-C8, and P1-Cn-C9 on the first processor card, followed by the second processor card, and so on.
Note: n = 13, 14, 15 or 16 for processor cards 1, 2, 3 or 4.Figure 1. Memory module slot locations in the processor assembly
- Push the memory module (A) firmly
into the connector until the connector locking tabs engage. Figure 2. Replacing a memory module

- Close the memory module cover (C) until
it locks in place, as shown in Figure 3. Figure 3. Closing the memory module cover

If you are installing memory modules as part of another procedure,
return to that procedure now.
Parent topic: Memory for the 8233-E8B or 8236-E8C
