You might need to install rails into the rack. Use the
procedure in this section to perform this task. In addition to related
safety information, this section also includes illustrations of the
related hardware components and shows how these components relate
to each other.
Attention: Installing the rails in the rack
is a complex procedure. To install the rails correctly, you must perform
each task in the following order. Failure to do so might cause rail
failure and potential danger to yourself and the system unit.
To
install the expandable rails into the rack, complete the following
steps:
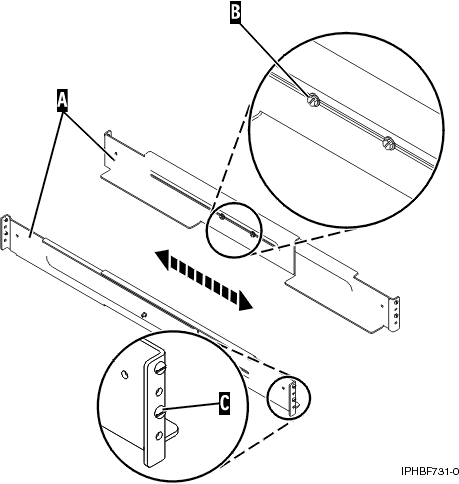
- Loosen the two screws (B) in
the middle of both rails (A) to allow each
rail to extend.
Figure 1. Extending the rails
- Starting at the rear of the rack, extend the left rail.
Insert the rail pins (C) into the marked locations
on the rack so that it is facing upward (L shape).
- From the rear of the rack, extend the right rail and
insert the rail pins (C) into the marked locations.
- Move to the front of the rack, extend the left rail
and insert the rail pins (C) into the marked
locations.
- Extend the right rail and insert the rail pins (C) into
the marked locations.
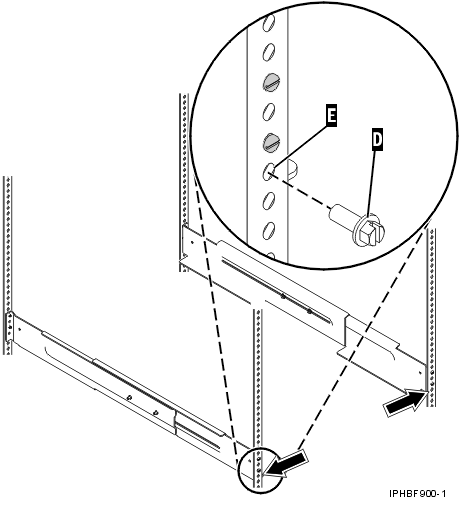
- Using one M5 screw (D), secure
the left rail to the front of the rack into the lower location (A).
Important: Do not install a screw in the top location at this
time. It will secure the shell to the assembly.
Figure 2. Attaching the rails to the front of the rack
- Using one M5 screw (D), secure
the right rail to the front of the rack into the lower location (A).
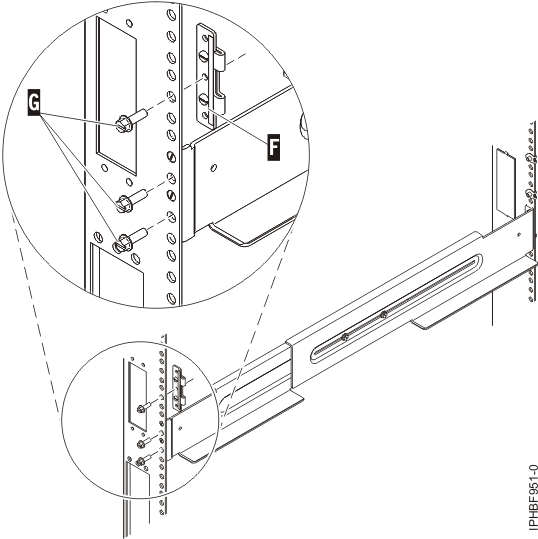
- Move to the rear of the rack and locate the marks that
were previously made on the back-left rail. Using two M5 screws (G),
secure the rail arm to the rack at the location of the two lowest
marks.
Figure 3. Attaching the rails to the back of the rack
- Align the top alignment pin of the bracket (F) with
the highest mark, and use one M5 screw (G) to
secure the bracket to the rack at this location.
Note: The bracket
will face inward.
- Locate the marks that were previously made on the back-right
rail of the rack. Using two M5 screws (G),
secure the rail arm to the rack at the location of the two lowest
marks.
- Align the top alignment pin of the bracket (F) with
the highest mark, and use one M5 screw (G) to
secure the bracket to the rack at this location.
- Tighten the two screws (B) in
the middle of the left rail and the two screws (B) in
the middle of the right rail. See Figure 1.