Signing up for IBM watsonx
IBM watsonx contains three components: watsonx.ai, watsonx.governance, and watsonx.data. You can sign up for a trial of all three at no cost, or sign up through an email invitation to join your organization's account. Watsonx.ai provides all the tools that you need to work with foundation models and machine learning models. Watsonx.governance provides the tools that you need to govern models. Watsonx.data provides an open lakehouse storing and processing the unstructured data that you need for your generative AI solutions.
- Signing up for a personal account
- Signing up for your organization's account
- Switching to your organization's account
- Logging in to watsonx
- Signing up and logging in on AWS
Signing up for a personal account
When you sign up for watsonx as a Service, you need an IBMid for an IBM Cloud account. If you don't already have an IBMid, you can create one during signup. For your IBM Cloud account, you enter your email address, personal information, and credit card information, which is used to verify your identity. You are charged only if you upgrade to a billable plan and then consume billable services. Lite plans do not incur charges.
The free version of watsonx.ai contains Lite plans for the IBM watsonx.ai Studio and watsonx.ai Runtime services that provide the tools for working with foundation models and machine learning models. The free version of watsonx.governance contains the watsonx.governance service that provides the tools for governing models. The watsonx.data service provides a Milvus vector store. The Cloud Object Storage service provides storage.
To sign up for watsonx:
- Go to Try watsonx for free.
- Select the IBM Cloud service region.
- Enter your IBM Cloud account username and password. If you don't have an IBM Cloud account, create one.
- If you see the Select account screen, select the account and resource group where you want to use watsonx. If you belong to an account with existing services, you can select it instead of your account. The Select account screen does not display if you have only one account and resource group.
- Click Continue. The account activation process begins.
Stay with your default browser during the activation process. If you land on the IBM Cloud Dashboard, return to the Try IBM watsonx.ai page and follow the link to log in with an existing account.
After the activation process completes, your watsonx home page is shown.
Bookmark your home page so that you can go directly to the watsonx site for your region to log in with your personal credentials.
If you're in your own account, you have the necessary permissions for complete access to projects and deployment spaces. You can access another account by switching to that account.
To set up an account for your organization, so that other users can share services and resources, see Set up an account for your organization.
Watch this short video to see how to sign up for a personal free trial account.
This video provides a visual method to learn the concepts and tasks in this documentation.
Signing up for your organization's account
Before you can access your organization's watsonx account, you must be a member of your organization's IBM Cloud account. Account administrators can invite users to join their organization's IBM Cloud account.
The administrator provides the following information:
- The IBM Cloud account name for watsonx.
- The resource group name for the watsonx account.
- The IBM Cloud service region.
When the account administrator invites you, you receive an email from IBM Cloud with the title "You are invited to join an account in IBM Cloud." with the name of the account.
To join your organization's account:
- Click the Join now link. The expiry is 30 days.
- You are asked to log in with your IBMid. IBMids are assigned to IBM Cloud account members. If you don't have an IBMid, one is created for you when you join.
- Continue to the next screen and confirm that your information is correct, then accept the invite.
- Login in from the Welcome screen. You are now logged in to the IBM Cloud account.
- Go to Try watsonx for free.
- Follow the prompts to sign up with your IBMid.
- On the Select account screen, select your organization's account and resource group.
- Click Continue.
You can see the name of the account you are currently working in on the menu bar.

Switching to your organization's account
You can switch to your organization's existing IBM Cloud account (or any other account for which you are a member) to share watsonx resources that are provisioned for that account.
If you are not already an account member, the account administrator must invite you to the IBM Cloud account. You receive an email invitation to join the account. After you accept the invitation, you can access the account and watsonx.
To switch to your organization's account:
- Log in to watsonx with your personal credentials.
- Select your organization's account name from the account list on the page header. If you don't see the account list, click the Account Switcher icon
 to open it.
To switch regions:
- Select the region from the region list on the page header. If you don't see the region list, click the Region Switcher icon
 to open it.
Signing up and logging in on AWS
To add new users, an administrator uses the IBM SaaS Console, and assigns Account Viewer role and Service roles to new users. When added, you will receive an invitation email. Then:
- Click Access the product in the invitation email. You are taken to the IBM SaaS Console for AWS.
- Log in with your IBMid when prompted. If you don't have your IBMid yet, click the link to create an IBMid and provide all the required information.
- When you're logged in, click the link to your instance and then launch watsonx.
- Click the Switch platform icon
 that is located next to your avatar to make sure that you're using the watsonx
platform.
that is located next to your avatar to make sure that you're using the watsonx
platform.
Logging in to watsonx
To log in, you must:
- Click https://dataplatform.cloud.ibm.com to open the login page.
- Select the IBM Cloud region where the resources that you want to work with are located.
- Select the login method:
IBMidRed Hat idIBM Cloud IdP / AppID(if federated login is configured by your administrator)
- Select the checkbox to remember the ID for future logins.
- Click Log In, and go through the remaining login steps.
- Click the Switch platform icon that is located next to your avatar to make sure that you're using the watsonx
platform.
Alternatively, select Log in with Google to log in through Google Single Sign-On (SSO) and go through the remaining login steps.
After logging in, you might see a list of trusted profiles that you were granted access to by an account administrator.
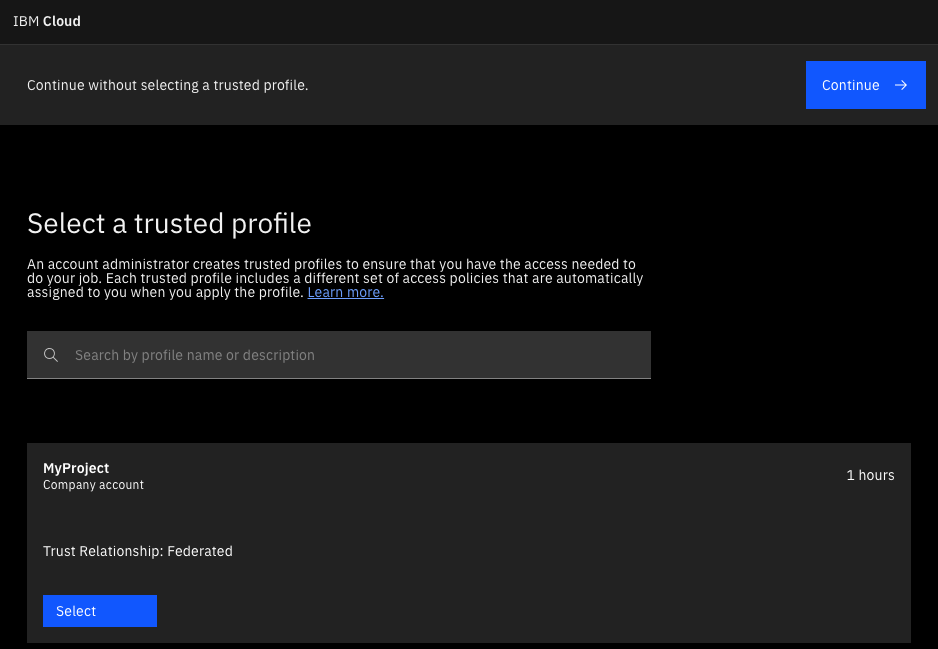
Select one of these profiles, depending on your specific use case. If you want to log in without selecting a trusted profile, click Continue.
If a User API key is needed to authenticate runtime operations, this API key must be generated by one of the static users of trusted profiles.. Static users are referred to as Individual users during the setup process and are
added to a trusted profile based on their IAM ID. If you're a federated user of trusted profiles (authenticated by an external identity provider), you must ask one of the static users to generate and share an API key for you. You won't
be able to generate an API key yourself.
Next steps
- Go back to Get started and choose the right path for you.
- Add services from the services catalog. See Creating and managing services.