Classification modeling
You use a classification model to classify unstructured text into one of the several learned classes. You use the Design Studio to create and train new classification models.
The Classification Model tab in the Design Studio provides access to the classification modeling features.
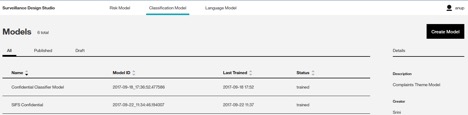
Create a classification model
- On the Classification Model tab, click Create Model.
- Enter a name and description for the model.
- Click Create.
- After the model is created, the consolidated risk node appears on the Design Studio canvas.
Prepare training data
The classification training data is a CSV file with a text and label columns, as shown in the following image:
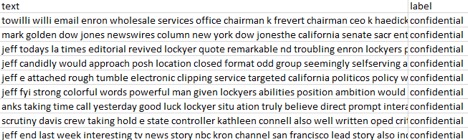
The text column represents the actual unstructured training text and the label represents the class to which the text belongs. This classification is expected to be provided by the SMEs.
Train and publish the classification model
- Select a model from the home page of the Design Studio.
- Click Select A File to Upload and choose the training data file. The file must be a CSV file in which the first column contains the text and the second column contains the class to which the text belongs.
- After the file is uploaded, click Train.
- After the training is done, the Precision, Recall, and F1 scores are displayed. Based on these scores the modeler can decide whether the training is sufficient for production. If required, the modeler can alter the training data and train the model again to get better results.
- If the modeler is satisfied with the level of training, they can publish the model, in which case the model moves to the published state.
Retraining a classification model
To retrain a classification model, repeat the steps to train and publish a classification model but choose a new training data file.
Delete a classification model
- Select a model from the home page of the Design Studio.
- Click Delete.