Tutorial: Exploring the Engineering Workflow Management JUnit example project
This brief guide is a companion to the IBM® Engineering Workflow Management JUnit example project, which is available in the Eclipse client. It provides you with a high-level overview so that you can begin exploring on your own.
Learning objectives
This tutorial helps you to start experimenting and learning more, but it does not guide you step by step through the project.
Time required
20 minutesCreating the JUnit example project
To create the JUnit example project, you must have JazzAdmin permissions and be assigned a Developer Client Access License.
Procedure
JUnit Project Area users and client access licenses
The JUnit example project includes eight users. You can log in to the JUnit project as any of these team members to get different perspectives on roles and assignments. However, to fully explore the JUnit project as one of these users, the user must be assigned a Developer Client Access License. The number of licenses you can assign for this example is limited by the number of licenses remaining on your server.
About this task
| User | user ID / password | Role/Description |
|---|---|---|
| Bill Cassavelli | bill / bill | JUnit team lead. Bill is the component lead for the JUnit team. He set up the plans and is the owner of several high-level work items for the release. He also runs the builds. |
| Freddy Freund | freddy / freddy | |
| Jason Mitchell | jason / jason | JUnit team member. A number of work items are assigned to Jason. |
| Jennifer Ginness | jennifer / jennifer | |
| Markus Kent | markus / markus | JUnit team member. A number of work items are assigned to Markus. |
| Marlene Stamp | marlene / marlene | |
| Rick Yuen | rick / rick |
For more information, see Managing licenses.
To assign licenses to users:
Procedure
- Log in to the JUnit project area as a user who has administrator privileges (ADMIN/ADMIN on a new server installation).
- In the Team Organization view (), in the upper-right corner, click the View Menu icon; then click Show Users.
- Right-click Markus Kent; then click Open.
- In the User editor under Client Access Licenses, select Engineering Workflow Management - Developer and click Save.
Results
The Team Organization view only shows the users who are part of the JUnit project. To assign client access licenses for other users, use the Jazz® Team Server web interface: navigate to . The Active Users interface appears; use it to manage user accounts and licenses. This interface lists all users on the server:

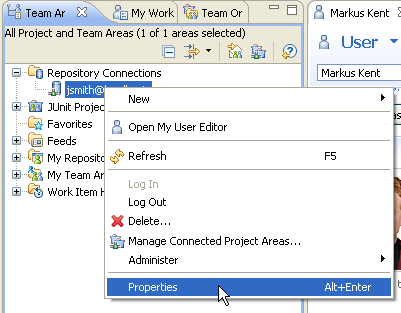
To log in as a different user, modify the properties of your repository connection and specify a different user ID:
JUnit project sprints and planned work
The JUnit project uses the scrum process. The scrum process is an approach to managing projects in an agile way. For each iteration, called a sprint, the team has created a plan document, and has defined work items for that sprint iteration.
Procedure
- You can see the Process sprints by opening the JUnit project
in the Project Area editor: Note: Plans can be accessed in the Engineering Workflow Management application's web interface from the Plans menu on the action bar.
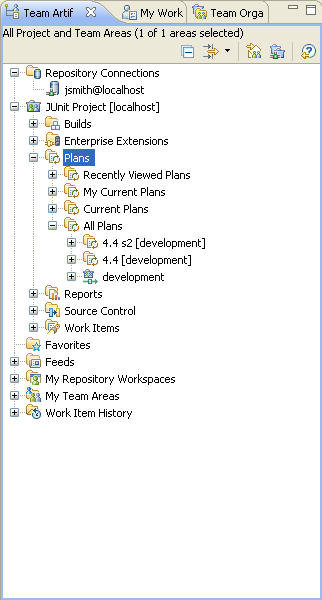
- To examine the iteration plans, from the Team Artifacts
view, open a plan:
 Tip: Plans open in the web client only. You can choose to open plans in an internal or external browser by setting the web browser preferences in Eclipse client. For more information, see Web Browser preferences in the Eclipse documentation.
 - Look at the JUnit 4.4 s2 Sprint Backlog plan. On the Planned
Items tab, the Plan Details section has a view that gives
you an inline work item editor that shows planning attributes.
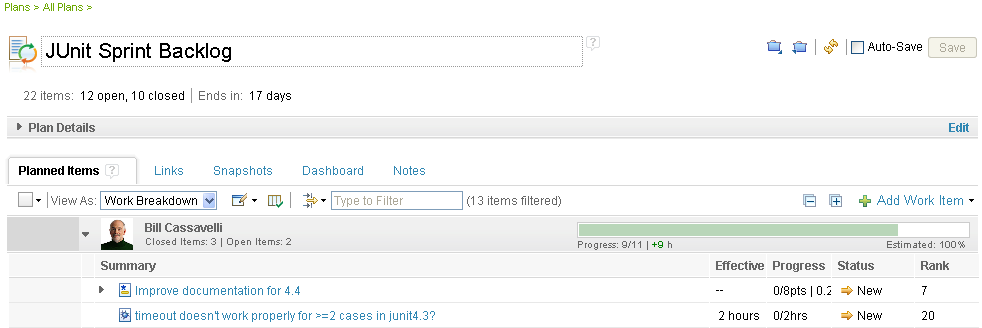 Tip: From the Planned Items tab, you can quickly change certain attributes of work items by clicking on one of those work item's attributes.
 - To see the details of a work item, from the Planned
Items page, click the item. It opens in the work item editor,
where you can make changes, depending on your role and the process
configuration.
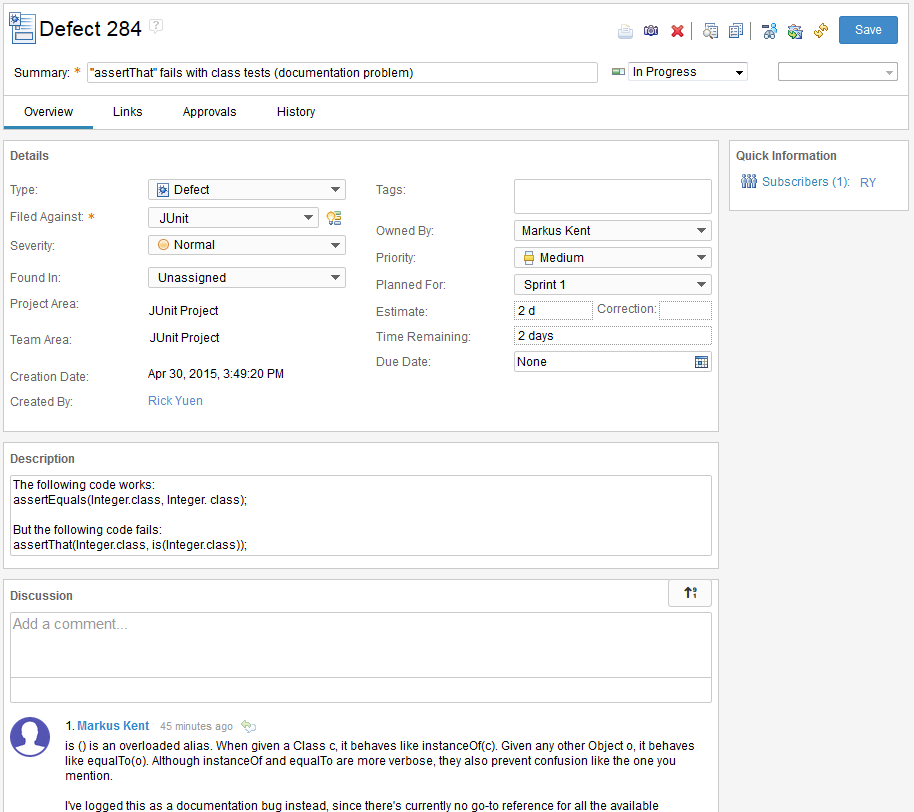
For example, if you are logged in as JUnit project member Markus Kent, try using the Discussion section to add a comment to the work item:
JUnit project files
The JUnit files are under source control in the Engineering Workflow Management repository. Markus and other project members (to whom you assigned a Developer Client Access License) are able to deliver changes to the stream.
About this task
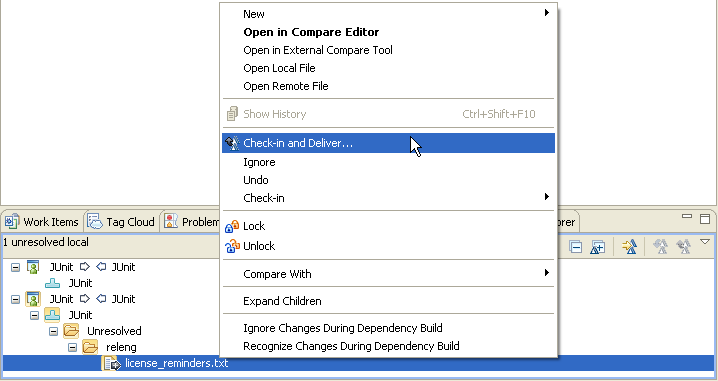
In the Team Artifacts view, you can see that the JUnit project includes a single source control stream called JUnit. The stream includes a single component, also called JUnit. In the following screen capture, the JUnit component is at the initial baseline.

The current user loads a repository workspace called JUnit. You can search for other user repository workspaces, then duplicate and load them; or you can create your own repository workspace.
When a repository workspace is loaded, the projects that are part of the loaded components are available for you to work on within your development environment. In the JUnit component, there are two projects:

Read the Overview of Engineering Workflow Management source control section to learn more about streams, components, repository workspaces, and other concepts.
Procedure
JUnit project builds
The JUnit project includes one build definition and one build engine. To explore and experiment with the JUnit builds, you must set up and start a build engine using the separately installed build toolkit.
Before you begin
- To run a build engine, you must have the Engineering Workflow Management installed. The toolkit can be installed from the installation launchpad or can be downloaded from jazz.net. If it is installed, you have an installdir/buildsystem folder.
- In this example, the user ID bill must be assigned a Developer Client Access License to run the build.
About this task
Procedure
- Enter the following command:
jbe -repository https://hostname.example.com:9443/ccm -userId bill -pass bill -engineId junit -sleeptime 5where hostname.example.com is the path to your repository URL.
When you successfully start the engine with the build toolkit, it waits for build requests. Only build definitions that are defined to run on this particular build engine are supported.
- Request a junit build:

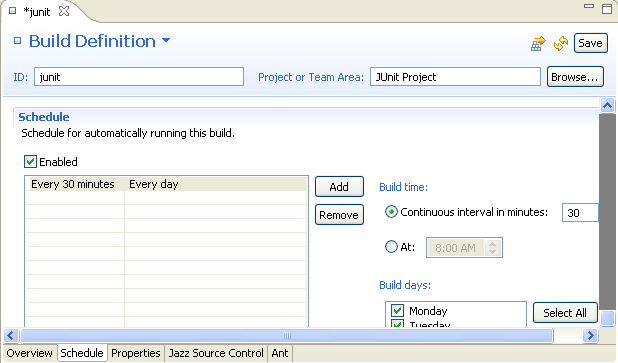
- Optional: To schedule the junit build
to automatically run every 30 minutes:
- In the Team Artifacts view, right-click the junit build; then click Open Build Definition.
- In the Build Definition editor, click the Schedule tab.
- Select the Enabled check box.
- In the Continuous interval in minutes field, type 30.
- Click the Jazz Source Control tab.
- At the bottom of the Jazz Source Control page, to ensure that a build runs even if there are no changes since the previous build, clear the Build only if there are changes accepted check box.
- Click Save.
What to do next
JUnit project reports
If you plan to explore the JUnit project in depth, you can use reports to track the progress and monitor the JUnit project areas and teams. However, because reports require historical, aggregated data, the JUnit project does not have any initial data points to start building reports.
About this task
To manually initiate a snapshot of the data:
Procedure
Results
What to do next
- The Reports page of the web interface:
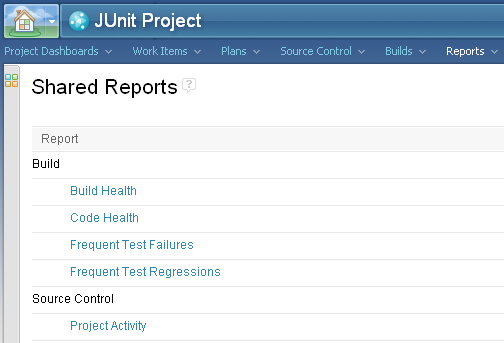
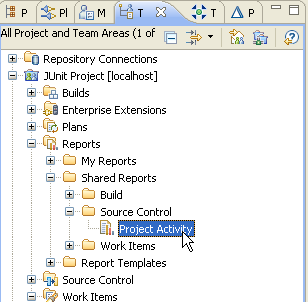
- In the Team Artifacts view, under the JUnit
project, under the Reports node:
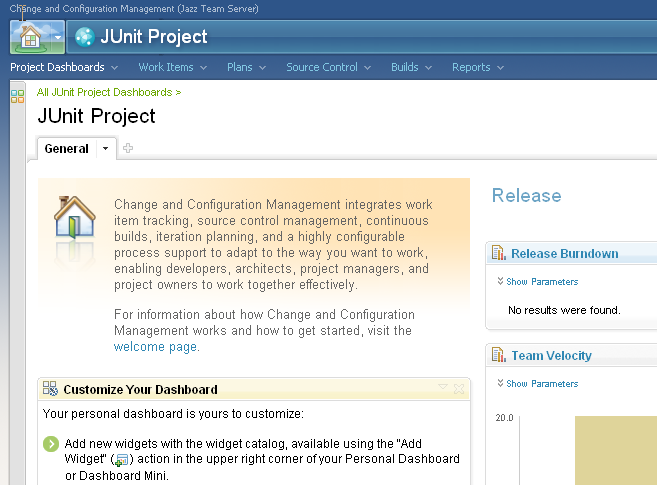
Exploring the JUnit project in the web interface
Most of this guide has taken you through the Eclipse client. The Engineering Workflow Management web interface also provides a rich environment where you can meet many of the same goals of collaborating with your team.
About this task
Procedure
Summary
In this tutorial you learned about the basics of the JUnit example project. The JUnit project is a great way to explore and start learning how to use Engineering Workflow Management to collaborate with your team on a development project.
- Getting started: Server and repository administrator
- Getting started: Project administrator
- Getting started: Team lead
- Getting started: Team member
- Tutorial: Get started with Engineering Workflow Management
- Share changes with your team in the Engineering Workflow Management client for Microsoft Visual Studio IDE