Create and edit a message flow by using keyboard navigation in the toolkit
Create and edit a message flow by using keyboard navigation in the toolkit. Optionally, use JAWS screen-reader software to hear what is displayed on the screen.
Before you begin
Creating and editing a message flow is done in the Integration Development perspective of the IBM® App Connect Enterprise Toolkit. For more information, see Integration Development perspective.
About this task
Users who have a physical disability, which prevents them from using a mouse, can create a message flow by using keyboard navigation in the IBM App Connect Enterprise Toolkit. Visually impaired users can use screen-reader software to hear what is displayed on the screen. The following procedures were run on a Windows 10 laptop with an external keyboard set to the default layout of English (United Kingdom).
Create a message flow
Procedure
To create a message flow by using keyboard navigation, complete the following steps:
Edit a message flow: add message flow nodes
Procedure
To add message flow nodes to a message flow, complete the following steps:
- Open the Views menu.
Keystrokes:
Ctrl plus F7
JAWS announcement:
"Control F7 dialog list view. Properties. Three of twelve. To move through items use the arrow keys."

- Select the Editor view Keystrokes:
Continue to hold down the Ctrl key and use the up and down arrow keys to select Editor.
JAWS announcement:
JAWS announces the names of the items in the list as they are highlighted; for example, "Application Development", "Patterns Explorer", "Properties"
Keystrokes:
Enter to confirm selection and place focus in Editor view
JAWS announcement: "Enter tab"

- Open the Context menu.
Keystrokes: Shift plus F10 to open the context menu.
JAWS announcement: "Shift F10 Context menu to navigate use up or down arrow add node dot dot dot A"

- Select "Add Node"
- Keystrokes: when cursor is on "Add Node" press enter to confirm selection
JAWS announcement: "Enter Leaving menus"

- Keystrokes: when cursor is on "Add Node" press enter to confirm selection
- Open the list of Node Types.
JAWS announcement (continued from above) "Add Node dialog filter node name left parent? Equals any character star equals any string right parent colon edit type or text alt plus F"
Keystrokes: Enter to open list of node types.

- Select the type of node required.
Keystrokes: Up down arrow keys to select type of node required from list of node types (in this example, HTTP is selected as the node type)
JAWS announcement: "Blank. Tree view. HTTP closed. One of twenty. To move through or expand use the arrow keys. "

- Expand the list of available nodes under selected node type.
Keystrokes: Right arrow key to expand list of available nodes under selected node type.
JAWS announcement: "Level zero. HTTP opened. Six items. To move through or expand use the arrow keys."

- Select the required node from the expanded list.
Keystrokes: Down arrow key to select required node.
JAWS announcement: "Level 1. HTTP input. One of six."

- Confirm the node that you selected.
- Keystrokes: Space to confirm. (Node is added to the message flow)


- Keystrokes: Space to confirm. (Node is added to the message flow)
Edit a message flow: reposition message flow nodes
About this task

Procedure
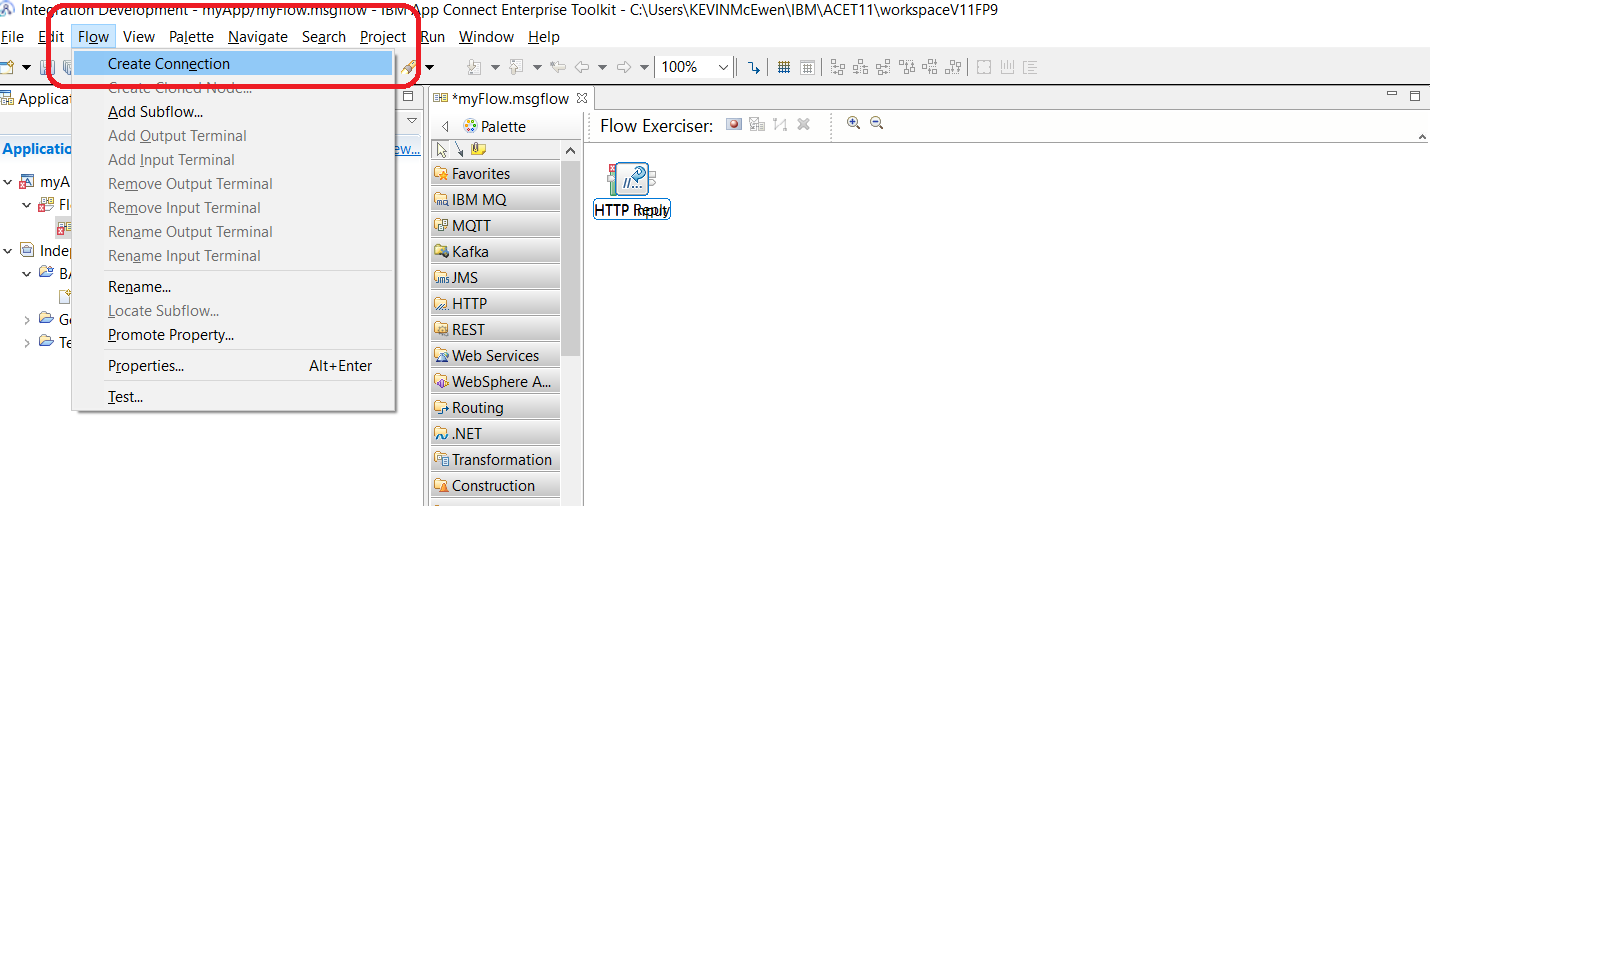
- Open the Flow
menu
Keystrokes:
Alt plus o
JAWS announcement: "Alt O. Flow menu. Create connection. To navigate, press up or down arrow."
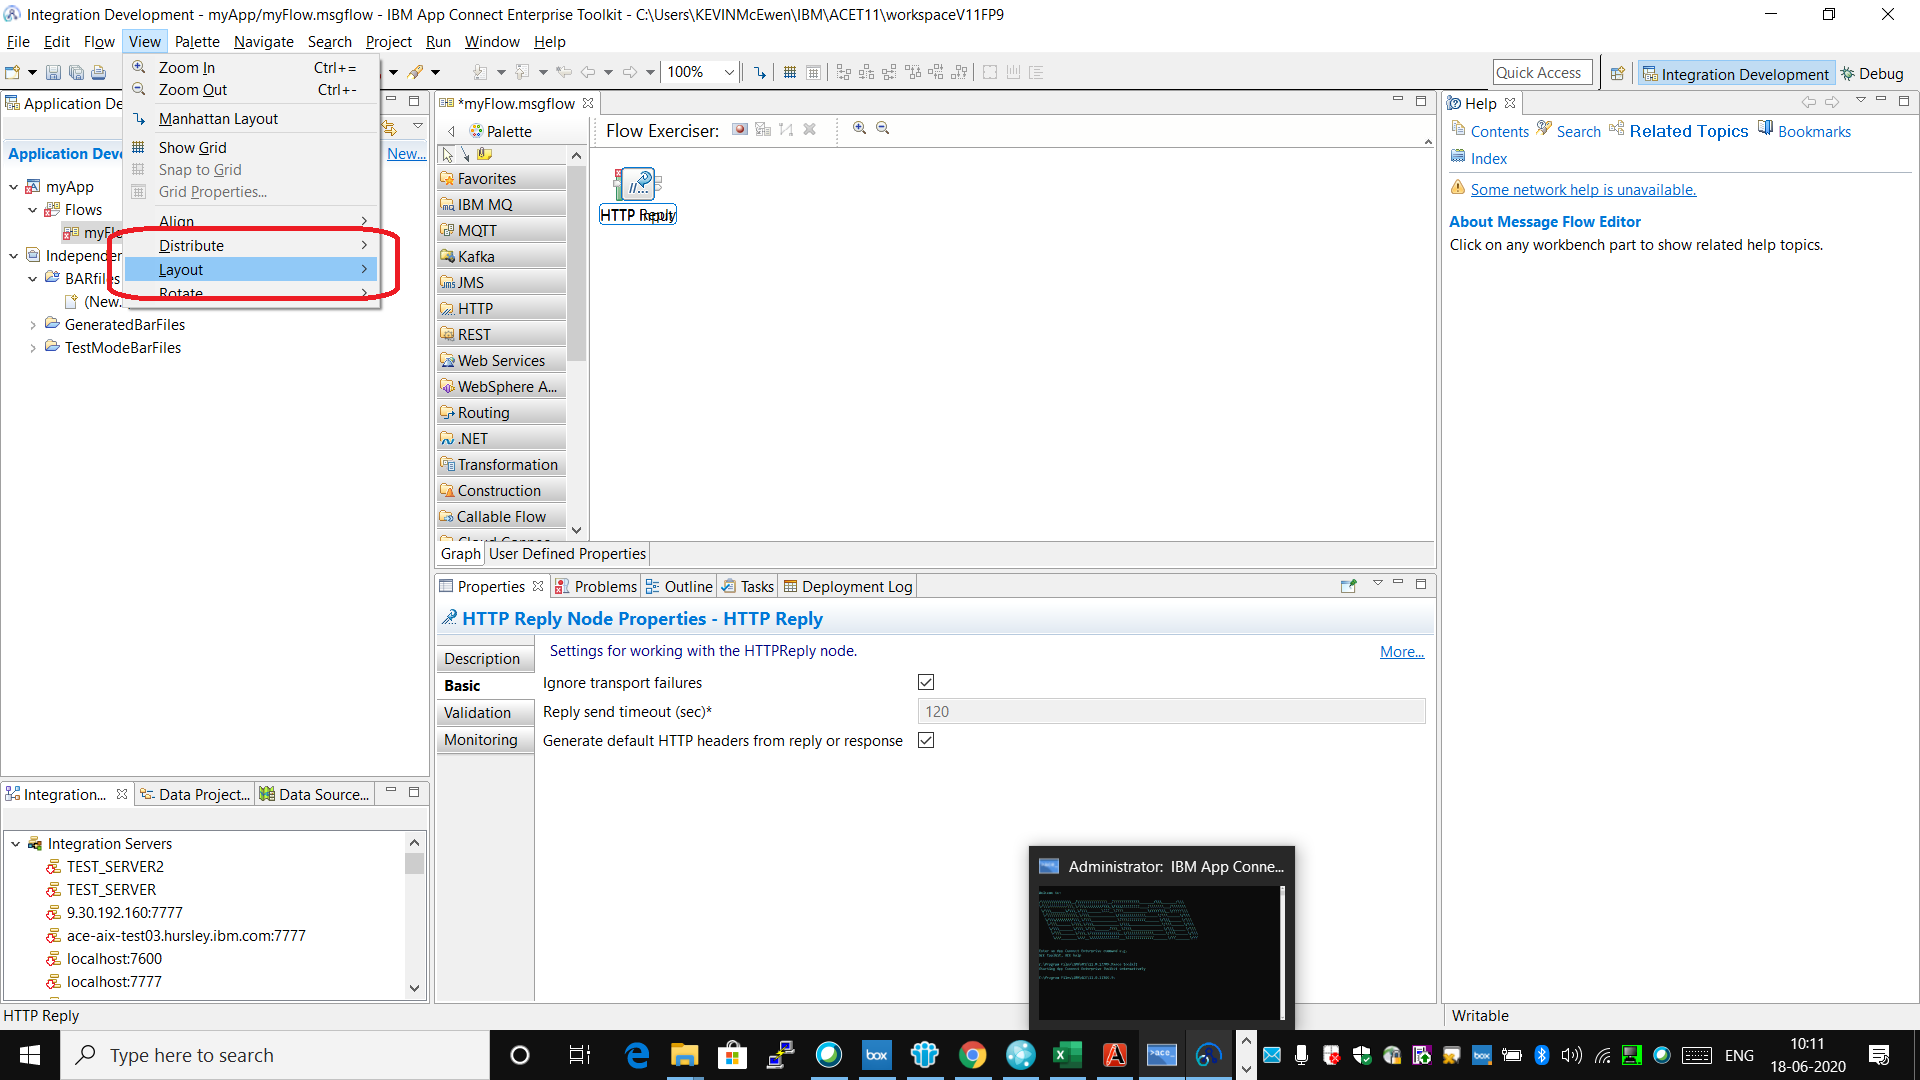
- Select the View
menu
Keystrokes:
Right arrow press one time to go to View menu.
JAWS announcement: "View menu. Zoom in. Control plus equals."

- Select Layout from the View menu.
Keystrokes:
Down arrow press to go to Layout.
JAWS announcement:
JAWS announces the names of the items in the list as they are highlighted; for example, "Zoom in", "Zoom out", "Manhattan layout" JAWS then announces "Layout submenu L."
- Open Layout submenu
Keystrokes:
Right arrow
JAWS announcement:
"Left to Right. L." Left to Right is the first item in the submenu and is highlighted by default.

- Select and confirm required layout.
Keystrokes:
up and down arrow keys to select required layout. For example, Left to Right
JAWS announcement:
JAWS announces the names of the items in the list as they are highlighted; for example, "Left to Right", "Right to Left", "Top to bottom", "Bottom to top"
Keystrokes:
Enter to select highlighted menu item. For example, Left to Right
The message flow nodes are separated in the message flow editor. The visual focus appears on one of the message flow nodes.
 Note: After you select a layout, you can reposition individual message flow nodes in the message flow editor by completing the following steps.
 - Configure the up,
down,left, and right arrow keys
to move the message flow node.
Keystrokes:
period (.)
JAWS announcement:
"Period"
A four way direction arrow icon appears in the message flow editor next the selected message flow node.

- Confirm the new position of the message flow node.
Keystrokes:
Esc
JAWS announcement:
"Escape"
The message flow node appears in the new position in the message flow editor.

Edit a message flow: Configure message flow nodes
About this task
Procedure
- Open the Context Menu.
Keystrokes: Shift plus F10 to open the context menu.
JAWS announcement: "Shift F10 Context menu. To navigate use up or down arrow. U undo control plus Z unavailable"

- Update fields in Properties view
Keystrokes: Tab to move through the fields. For example, Path suffix for url.
JAWS announcement: "Path suffix for url star edit. "

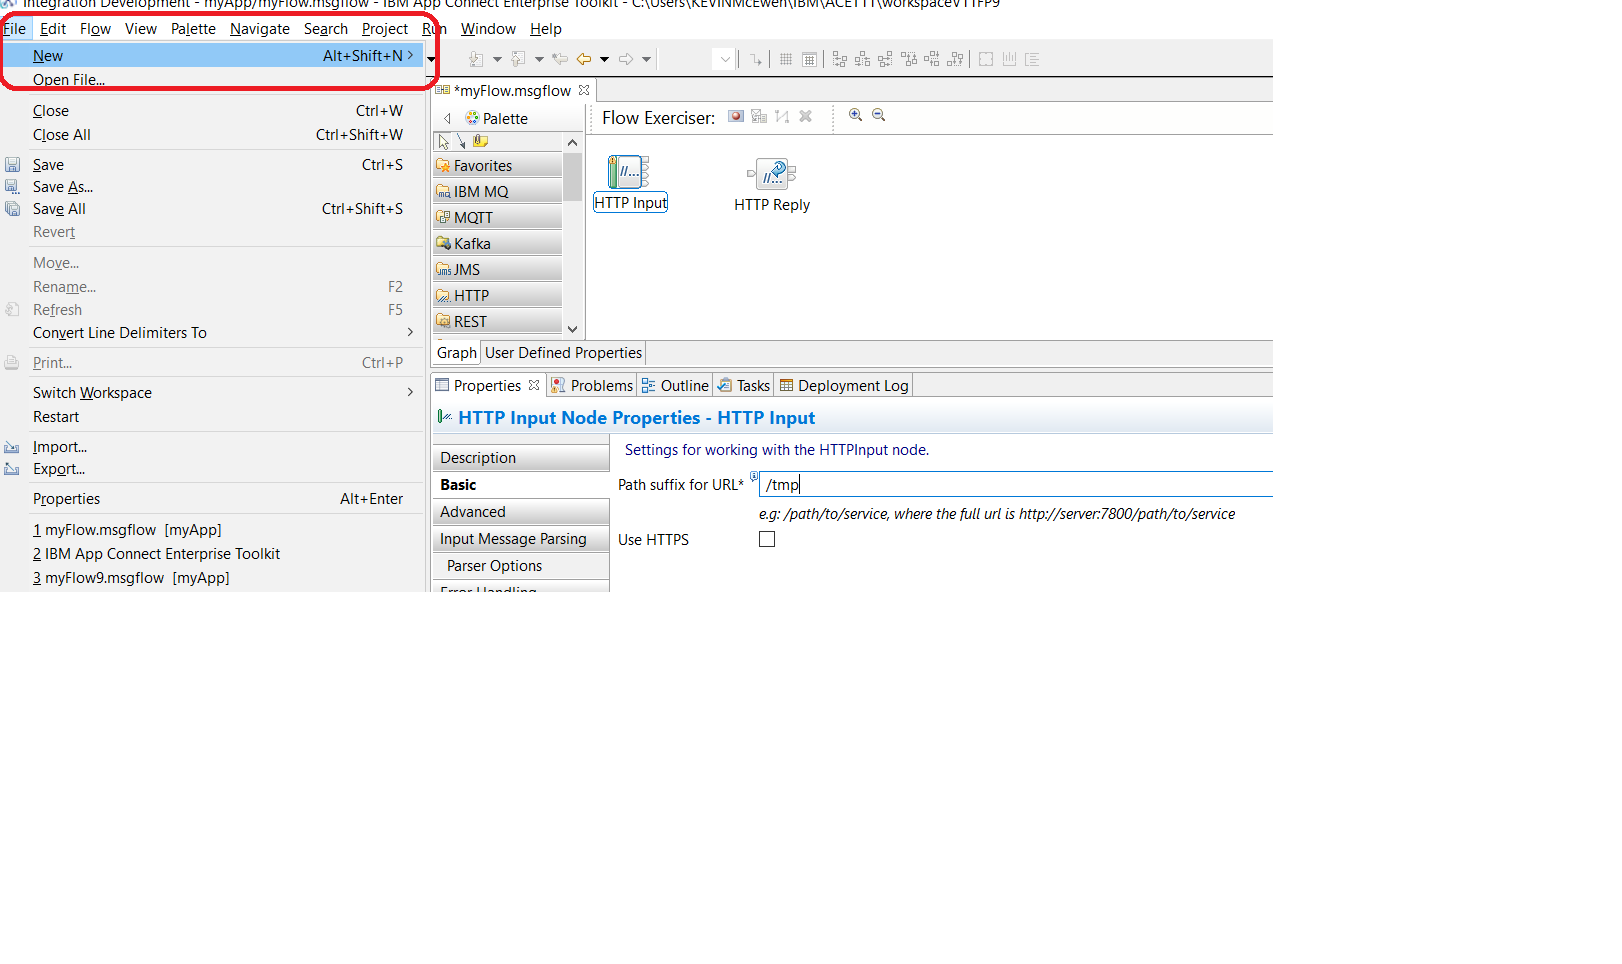
- Save the changes.
Keystrokes:
Alt plus F to open the File menu
JAWS announcement:
"Menu, File menu, New, Alt plus shift plus N sub-menu. To navigate, press up or down arrow keys."
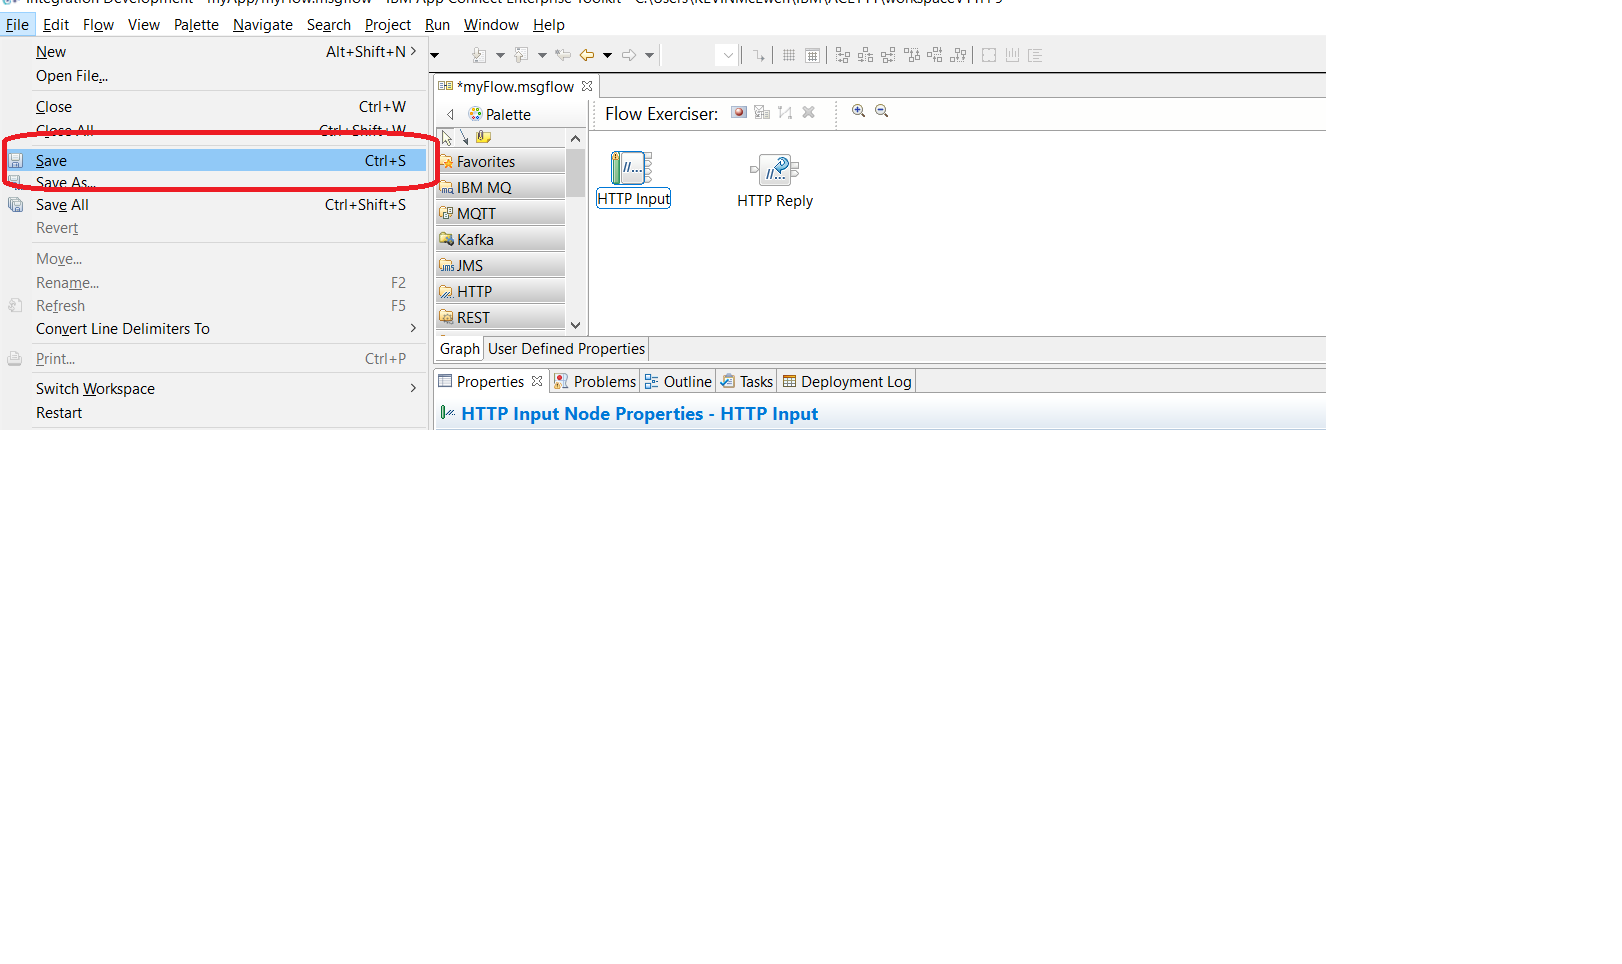
Keystrokes:
up and down arrow keys to select Save
Enterto confirm.
Edit a message flow: Add connections between message flow nodes
About this task
Step 1: Display the node terminals, which are available for connecting.
Keystrokes: Shift plus F10 to open the context menu.
JAWS announcement: Shift F10. Context menu. To navigate, use up or down arrow add node dot dot dot A.

Step 2: Use the up and down arrows to select “Add connection”.
Keystrokes: up / down arrow keys to select "Add Connection"
JAWS announcement: JAWS announces items as the focus moves through the menu items. Listen for “Add Connection”

Step 3: Press Enter to confirm your selection. The Add Connection window opens.
Keystrokes: Enter to confirm selection.
JAWS announcement: "Enter Add Connection dialog"
The menu that is shown in the next screen capture appears.

- The column labeled "Filter source terminal names" shows all the available output terminals from the nodes in the flow (shown as "source terminals")
- The column labeled "Filter target terminal names" shows all the available input terminals from the nodes in the flow. (shown as "target terminals")
Connections can be made from any of the output terminals of one node to any of the input terminals of another node.
JAWS announcement: JAWS announces titles of the two columns in the dialog and reads out the characters, which can be used as wildcards.
Filter source terminal names left parent question mark equals any character star equals any string right parent.
Filter source target names left parent question mark equals any character star equals any string right parent.
Step 4: Select source terminal.
Keystrokes: Press Tab to move to list of source terminals.
JAWS announcement: Select source terminal colon list view MQ input dot failure one of five to move through items use the arrow keys.
Keystrokes: up / down arrow keys to select required terminal
JAWS announcement:MQ input dot out.

Step 5: Select Target terminal.
Keystrokes:Press Tab twice to enter list of target terminals
JAWS announcement: Select target terminal colon list view MQ output dot in one of one to move through items use the arrow keys.
Keystrokes: up / down arrow keys to select required terminal
JAWS announcement: MQ output dot in.
Keystrokes: Press Tab to go to OK.
JAWS announcement: OK button. To activate press space bar.

Step 6: Complete the connection.
Keystrokes: Enter to complete connection.
JAWS announcement: "Enter"
(Focus returns to editor tab and nodes appear connected as shown in the following screen capture.)

Step 7: Complete all connections.
Repeat the previous steps until all required connections are completed.
Package a message flow into a bar file
About this task
Procedure
To package a message flow into a bar file by using keyboard strokes, complete the following steps: