Entering data in message fields
Enter the data for message fields according to the message standard. If the number format is configured (see Configuring the number format) and you are editing a message, you must edit numbers according to this format. The text of the field labels reflect the individual fields according to the SWIFT User documentation, whereas the field tag (for example 103) can be used to directly identify the field. While entering data, you can use the tab key to jump to the next input field.
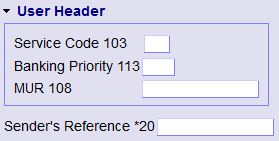
Mandatory fields are marked by an asterisk (*) before the field tag, as shown for field 20 (Sender's Ref) in Figure 1. The contents of disabled or read-only fields (shown in Figure 2) cannot be changed.

When the cursor is in an input field, press Ctrl+F1 to display a help text for that field, if available. The result is shown in Figure 3. The help text disappears when you press Escape, continue to enter data, or move the cursor. For some fields in MX messages, there is no help text available. The number format described in the field help always describes the format of numbers according to the message standard.

Text which is copied from an application (for example text editor) to an input field using cut/paste operation is formatted according to the field specification for multi-line input fields. If the field is empty, data will be pasted and formatted automatically based on row and column width. Line breaks are inserted on word boundary. If the input contains line breaks, they will be preserved. Words longer than the allowed column length (for example column length=20, word length=30) will be split using line-feed. Pasted text which is longer and which will not fit after the automatic formatting is truncated after the last word that fits into the last allowed row. A beep will occur to indicate that text was truncated if the pasted text overflows the field.
If the field is not empty, usual paste functionality will be available and the user has to do the formatting of the data according to the field rules.
Field-level validation is available for input fields with multiple lines. The data in a field is validated in the browser when you enter the field, press F1, or leave the field. Depending on the available information, the field-level validation checks for the number of lines, line length, character set, and field structure. If a problem is detected, the field is highlighted with a red border. A problem description, as shown in Figure 4, is displayed while the cursor is in the field. You can continue to enter data in this or other fields. The red border around the field remains until the data is fixed and revalidated, or until the page is refreshed from the server. Field-level validation in the browser is performed only on fields that contain data. Empty fields are ignored, even if they are mandatory. Use the Validate button to validate the whole message on the server, including checks for mandatory fields, allowed codewords, and cross-field consistency.
