Creating batch deployments in Watson Machine Learning
Create a batch deployment to process input data from a file, data connection, or connected data in a storage bucket, and write the output to a selected destination.
Creating a batch deployment
Unlike an online deployment, where data is submitted directly to the endpoint URL for real-time scoring or processing, a batch deployment provides more control over the scoring process. Follow this sequence to create a batch deployment job:
- Organize your resources in a deployment space. You can promote or add the deployable asset, and optionally add data files or data connections for scoring the deployment.
- When you deploy the asset, such as a machine learning model, you choose Batch as the deployment type.
- Create and configure a batch deployment job. You must specify the input data for the deployment, location for writing the output, details for running the job on a schedule or on demand. You can also configure optional settings such as hardware configuration details or options for notification.
- Running the job submits the input data to the deployment endpoint, and writes the output to the output file. You can view or download the output from the Assets page of the space after the job completes successfully.
Deployable asset types for batch deployments
You can create batch deployments for these types of assets:
Ways to create a batch deployment
You can create a batch deployment in one of these ways:
- Use a no-code approach to create a batch deployment from a deployment space.
- Use code to create a batch deployment programmatically in notebooks.
Creating a batch deployment from a deployment space
Follow these steps to create and test a batch deployment.
Before you begin
You must promote the saved model from your project to your deployment space. For more information, see Deployment spaces.
Creating a batch deployment
Follow these steps to create your batch deployment from a deployment space:
-
From the Assets tab in your deployment space, click the name of the model that you want to deploy.
-
Click New deployment.
-
Choose Batch as the deployment type.
-
Enter a name and an optional description for your deployment.
-
Select a hardware specification.
Restriction:If you want to use a custom hardware specification, you must create and select the custom hardware specification by using the
hardware_specifications.storefunction from the Python client or Environments API. You cannot create or select a custom hardware specification from the user interface in a deployment space. -
Select a software specification that is compatible with your asset.
-
Click Create. When status changes to Deployed, your deployment is created.
Testing a batch deployment
To test a batch deployment from your deployment space, you must create a batch job to submit data for processing.
- Click New job to create a batch job for the deployed asset.
- Follow the prompts to define the job, specifying input data, and details for running the job.
- Save and run the job manually or on a specified schedule.
To learn more about creating, running, and managing jobs, see Creating jobs in a deployment space.
Retrieving the endpoint for a batch deployment
You must retrieve the endpoint URL to access your batch deployment from your applications. Follow these steps to get the endpoint URL for your batch deployment:
- From your deployment space, click the name of your batch deployment.
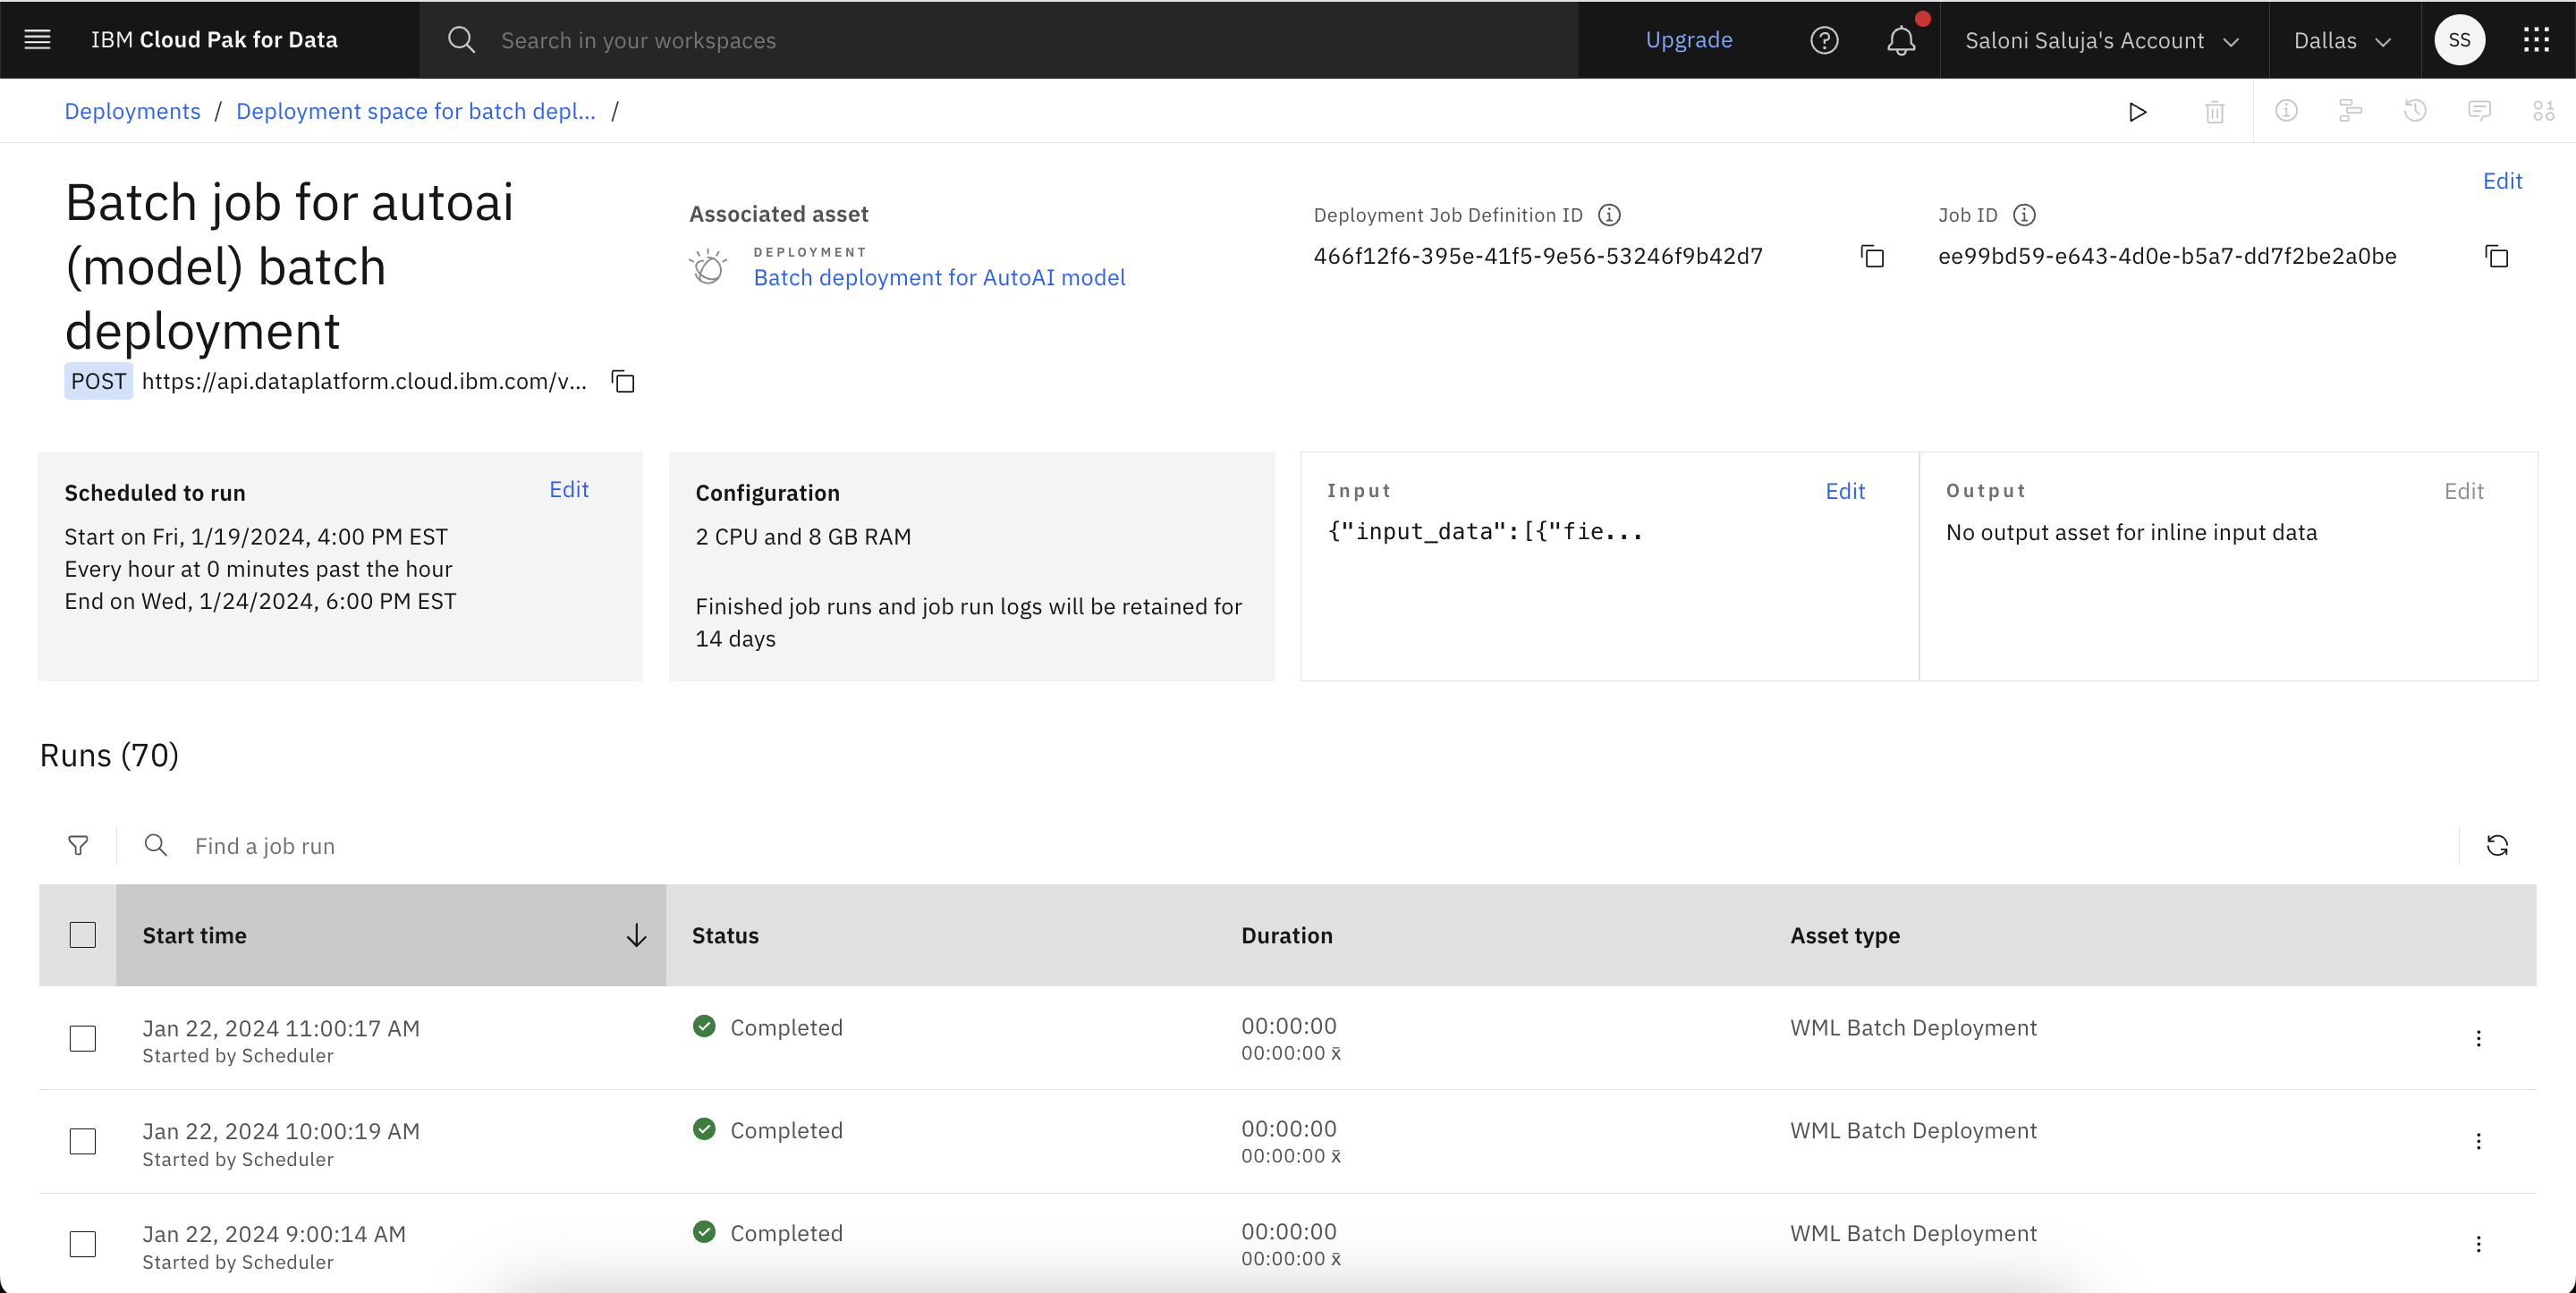
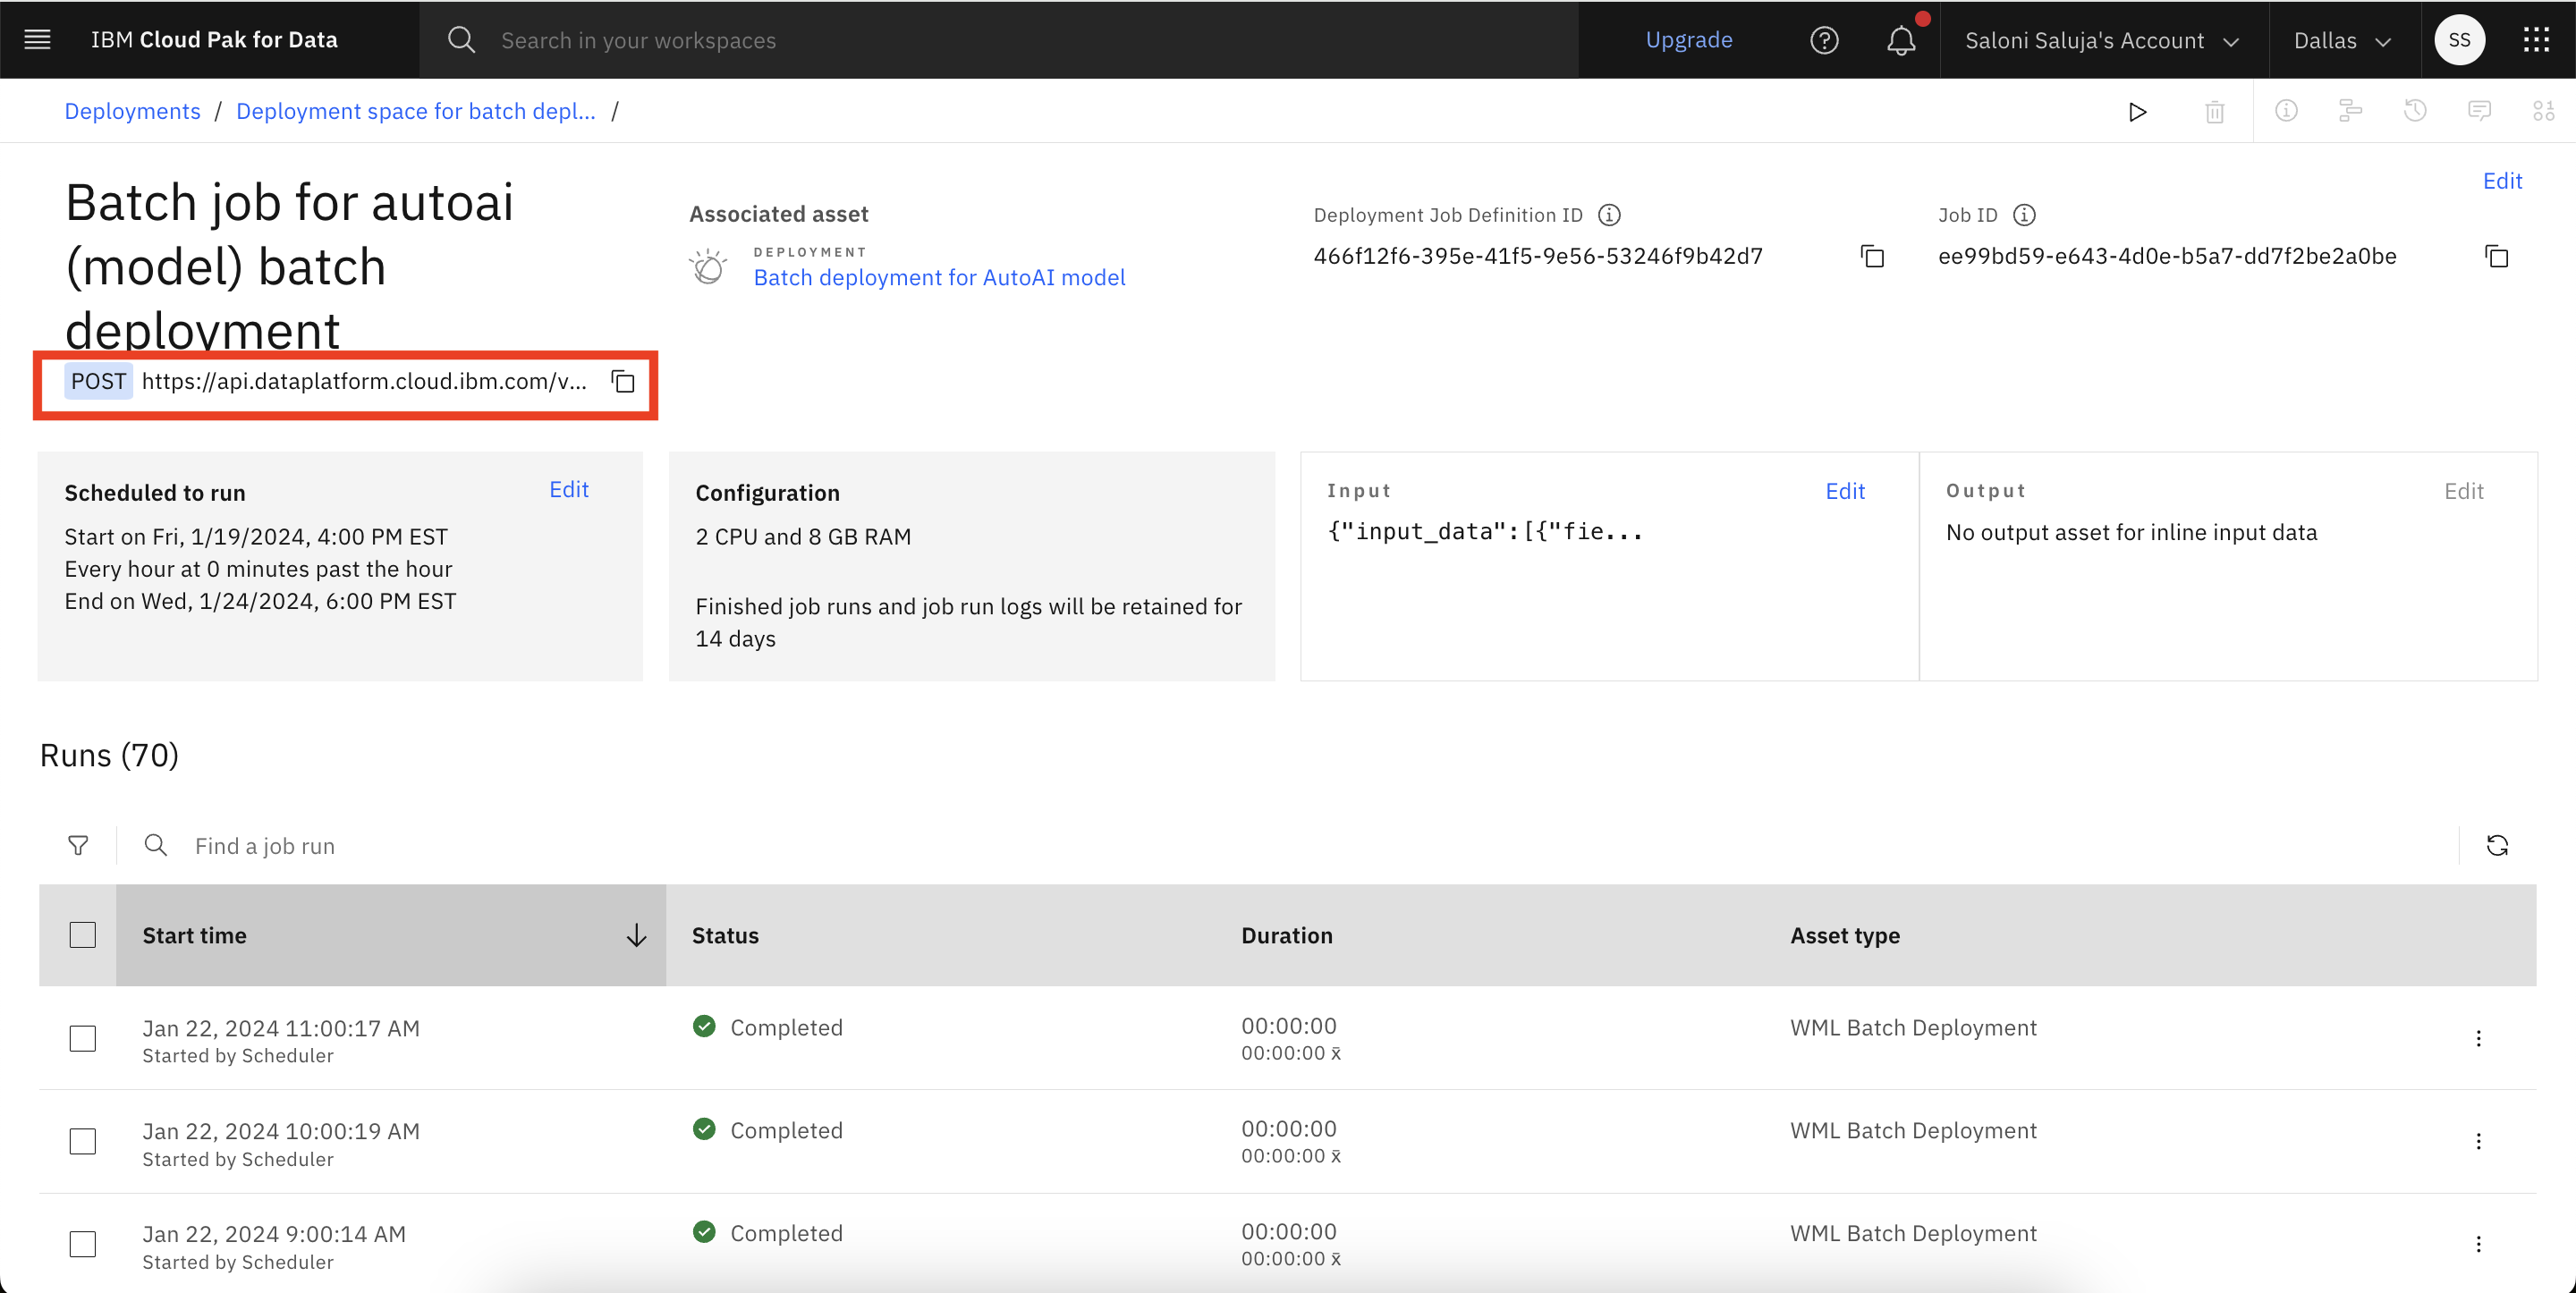
- From the deployment details page, click the name of your batch job.
If you don't have an existing batch job for your batch deployment, you must create one. For more information, see Creating jobs in a deployment space.
- From the batch job details page, you can access the endpoint URL for your batch deployment. Click the copy (
 ) icon to
copy the endpoint URL to your clipboard.
) icon to
copy the endpoint URL to your clipboard.
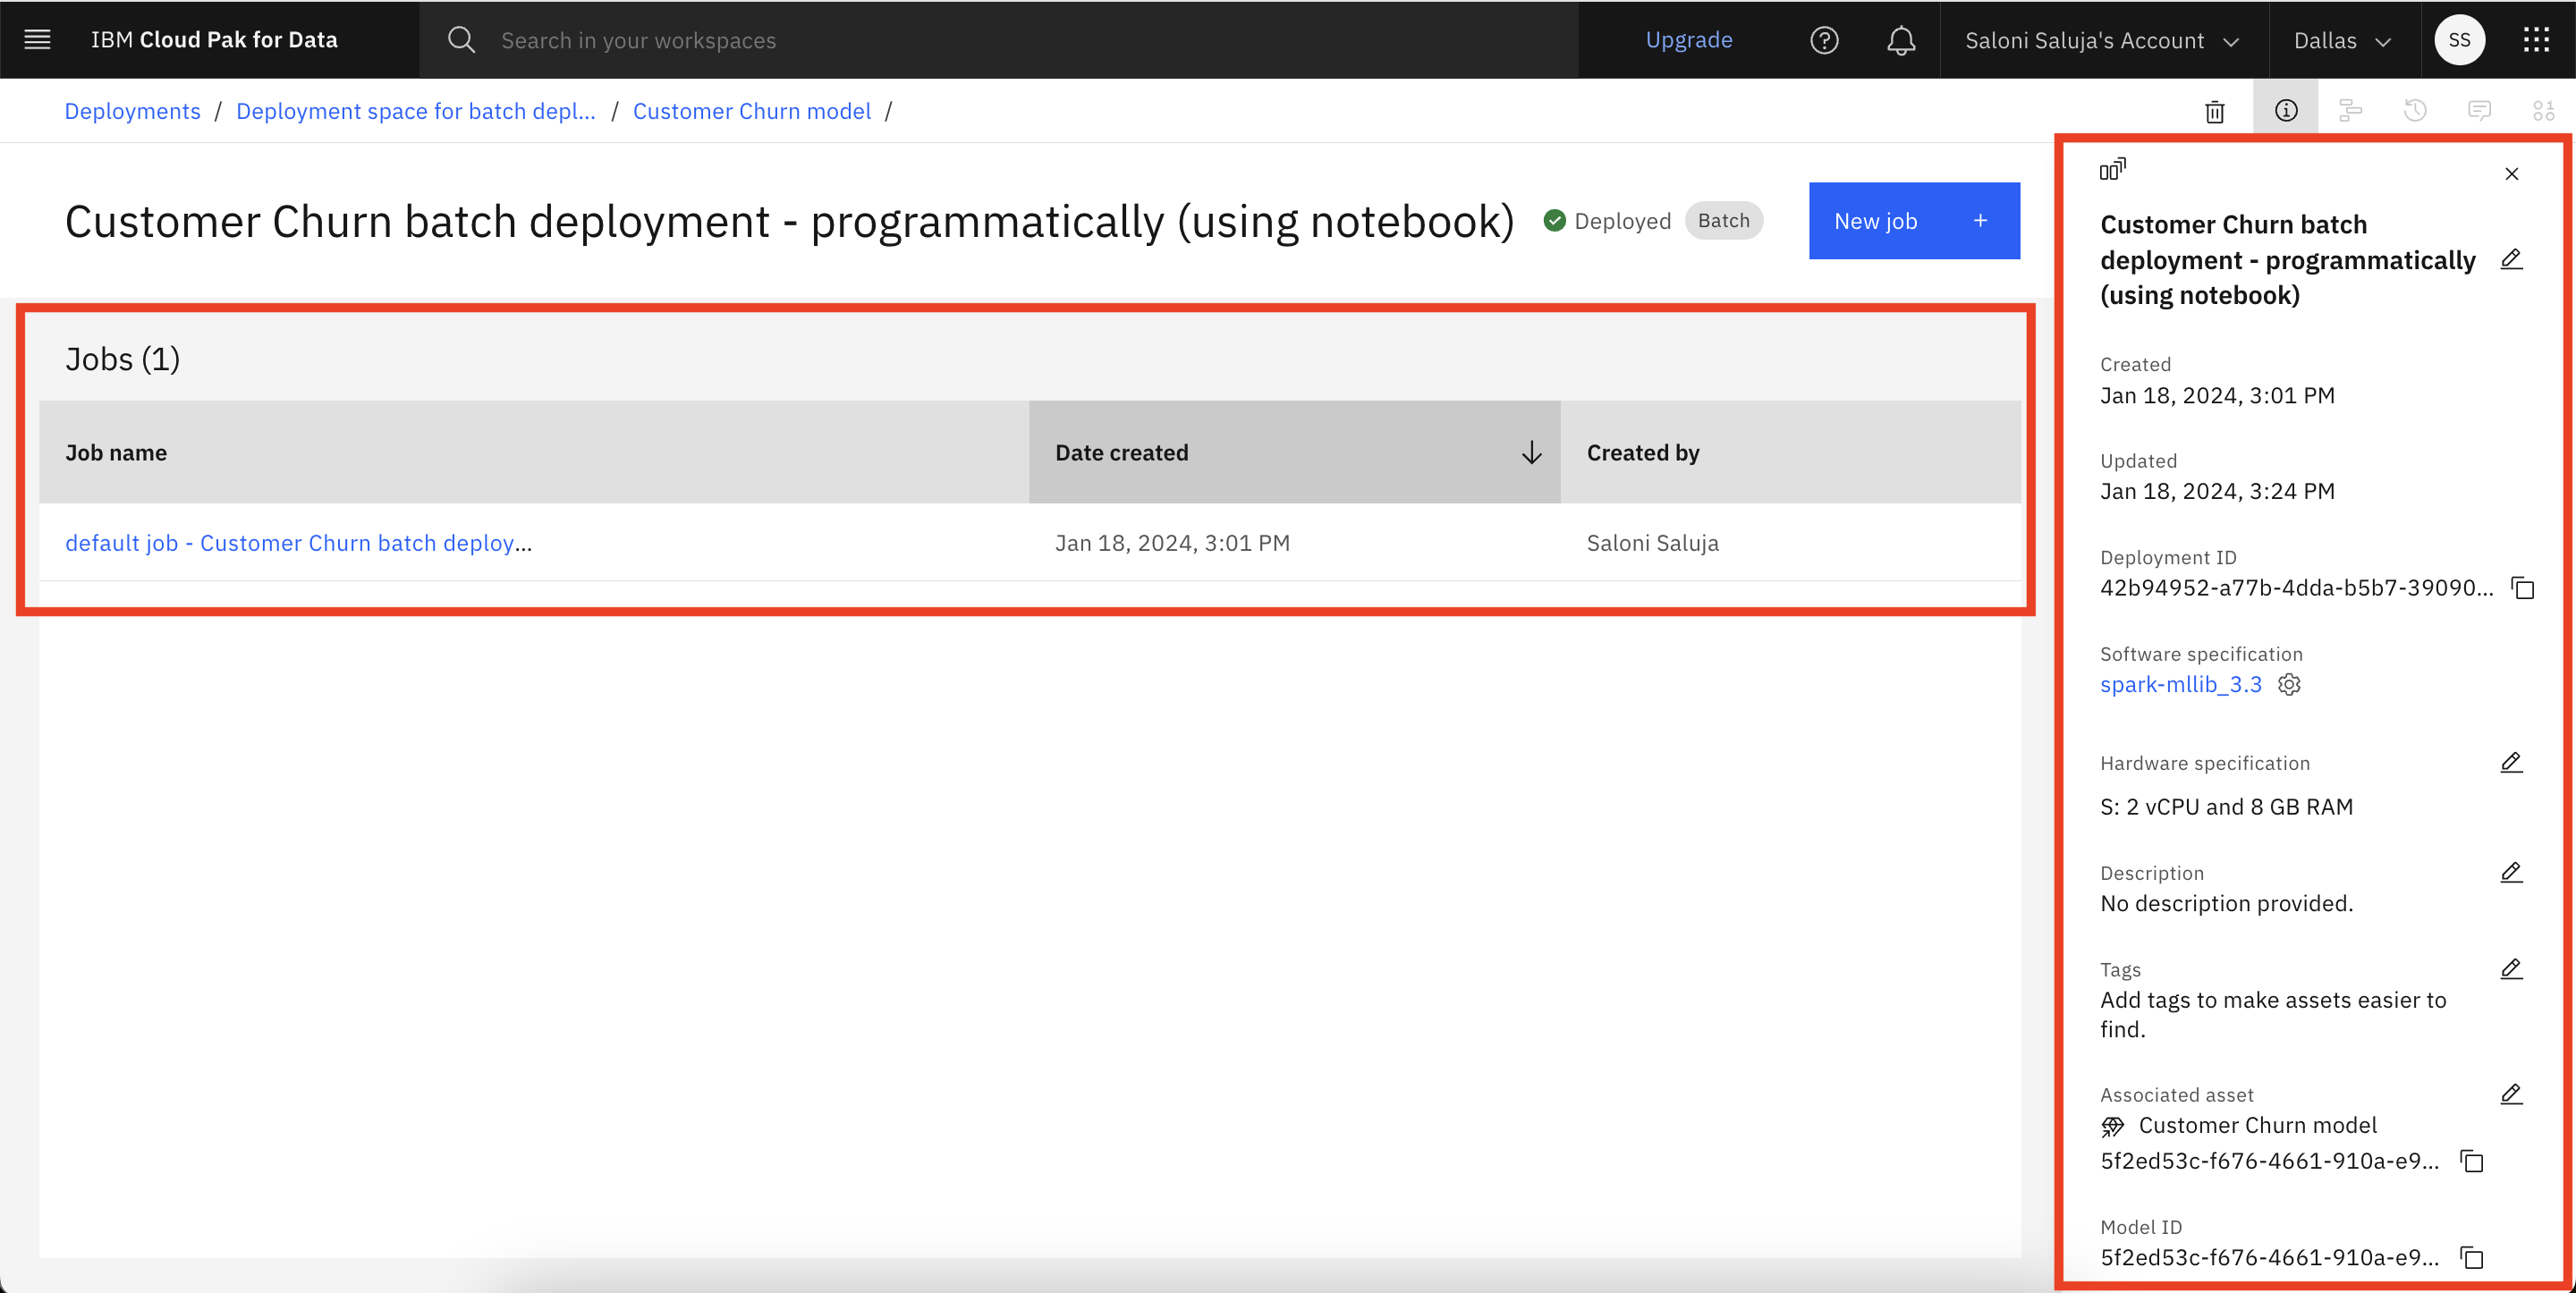
Accessing batch deployment details
You can view the configuration details such as hardware and software specifications. You can also get the deployment ID, which you can use in API calls from an endpoint.
Follow these steps to review or update the details for your batch deployment:
- From the Deployments tab of your space, click a deployment name.
- Click the Deployment details tab to access information that is related to your batch deployment.
If your organization is using any of the use cases to track and govern assets, deployment information for a tracked asset is recorded in a factsheet in the associated use case.
Creating a batch deployment programmatically by using notebooks
You can create a batch deployment programmatically by using:
To access sample notebooks that demonstrate how to create and manage deployments by using Watson Machine Learning Python client, see Watson Machine Learning Python client samples and examples.
Testing your batch deployment programmatically
To test your batch deployment programmatically, you must create and run a batch job. After the batch-scoring runs successfully, the results are written to a file.
Retrieving the endpoint for a batch deployment programmatically
To retrieve the endpoint URL of your batch deployment from a notebook:
- List the deployments by calling the Python client method
client.deployments.list(). - Find the row with your deployment. The deployment endpoint URL is listed in the
urlcolumn.
Learn more
- To learn more about testing your batch deployment by creating a batch job, see Creating jobs in deployment spaces.
- To access sample notebooks for batch deployments, see:
Parent topic: Managing predictive deployments