Managing Tags
Managing Tags
Cost and Asset Management provides central management of tags across the multi-vendor hybrid cloud landscape of public and private cloud providers. Tags are the most essential capability in Cost and Asset Management. Tags allow assets and charges to be categorized and assessed by making data line items searchable. You can filter by both provider and custom tags.
You can quickly ingest provider bill and asset details with provider tags to have a central inventory cloud configuration management database (CMDB) of your assets. Then you can establish a library of your own tag keys and values that are more relevant to your specific needs. You can search provider data and map assets to your own custom tags.
Tags can be ingested by Cost and Asset Management from the provider if the tags were defined in the provider account (provider tags) or defined and created on the system (custom tags). Provider tags cannot be modified in or deleted from the Cost and Asset Management system and remain applied only to the item(s) that they were associated with when they were ingested by Cost and Asset Management.
Custom tags are created by users. Custom tags can be applied to as many items as needed. Each item can have multiple provider and custom tags applied to it.
Note: Tags created and applied in IBM Cloud Cost and Asset Management are not uploaded to the provider.
This section contains the following topics:
- Tagging Rules
- Searching for Tags
- Creating Custom Tags
- Applying Tags to a Single Line Item
- Bulk Tagging Multiple Line Items
- Designating Tags as Favorites
- Removing and Deleting Tags
Each tag consists of a key-value pair to which the following rules apply.
Tagging Rules
- The tags on assets are mapped to individual billing line items so that the user can track cost and chargeback by tag key and value.
- The system maintains this tagging relationship even when tags from providers change or the assets are deprovisioned.
- Users can add up to 50,000 tag keys, and each key can have up to 1000 unique values.
- No custom tags in the UI display a prefix; they display the tag key name (example: dept: value, costcenter: value). Custom tag key names and values are case-insensitive and display in lowercase.
- A tag key can have up to 128 characters, and a value of up to 1024 characters.
- Users are not allowed to enter commas, semicolons, colons, the new line character, single and double quotes, and carriage return characters for tag key or value while adding custom tags.
- Users are not allowed to enter duplicate key-value pairs while adding custom tags.
- Users are allowed to apply and remove custom tags.
- Users are allowed to apply and remove bulk custom tagging.
- Users are not allowed to alter or remove Provider tags (tags that are already applied to assets on the provider side).
- Users are allowed to untag custom and favorite tags associated with assets and delete custom tags only if a tag is not associated with an item.
- User tags are saved and retrieved with case insensitivity.
- Tag name length must be consistent with Microsoft Excel standards.
- Tags are applied to the current (partial) month and the previous (last completed) month.
- Tags applied to or removed from a current (partial) month in either the Costs or Assets dashboards are also applied to/removed from the previous (last completed) month in the other dashboard and correlated costs and assets.
- Tags applied to or removed from a completed month in the Assets or Costs dashboards are applied/removed only to that month in both Costs and Assets dashboards and all correlated costs and assets.
- Tagging Inheritance: i. If a cost line item has an asset associated with it (via an asset identifier), then the line item inherits the custom tag values from the asset. ii. If a cost line item is custom tagged and it has an asset, the asset inherits the tag. iii. If a tag is applied to an asset or cost line item in the current period, it will be applied to the current period and the previous period. iv. A tag applied to or removed from an asset or cost line item in any historic data (i.e. prior to the previous period) will be applied only to that period. v. If a custom tag is removed from an asset, it is removed from all of the associated cost line items (via an asset identifier) that have inherited the tag from the asset. A tag should not be removed if the cost line item has inherited the tag from any other associated assets. vi. If a tag is applied to or removed from the current period, the tag should be added to or removed from the line item going forward.
Costs and assets inherit the custom tag values of associated assets and costs regardless of how the item was originally tagged.
Searching for Tags
View all of your custom and provider tags and search for specific tags from the Tags screen.
To search for a tag:
- Navigate to the Tags screen by clicking the settings
 icon in the upper left corner of the screen and then selecting Tags.
 - In the Search Tags field, enter the tag name you want to search for and click return/enter. User tags are case insensitive. The tag is displayed along with all of the costs or assets associated with the tag. You can also search for tags from the Filters screen. See "Local and Global Filters" earlier in this guide.
Creating Custom Tags
To create a custom tag:
- Navigate to Settings > Tags.
- Click Add New Tag. The Create Tags screen displays.
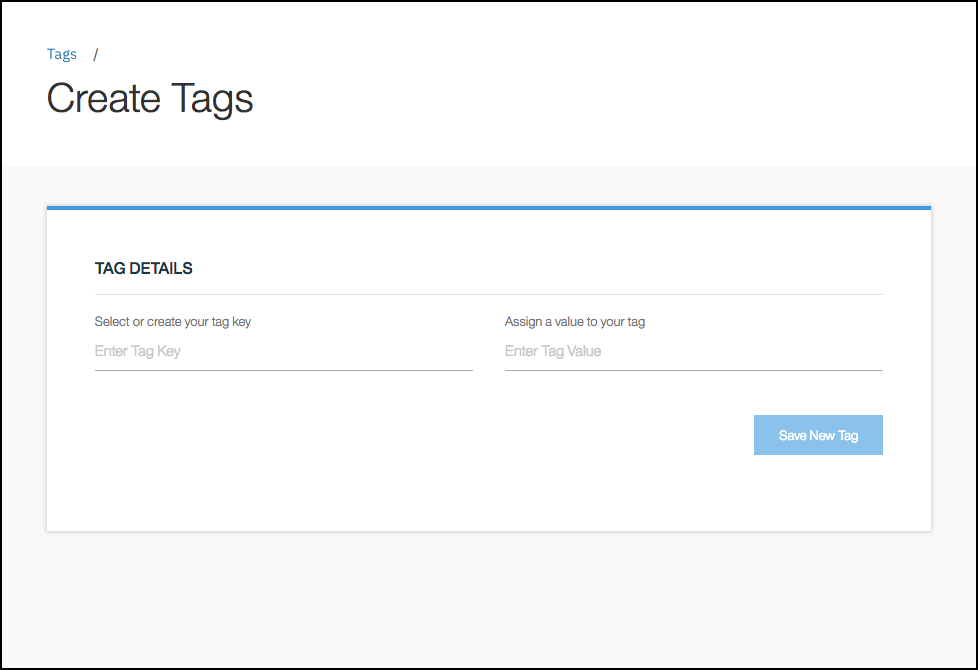
- In the Select or Create Your Tag Key text field, type in the key. Cost and Asset Manager searches for an existing key with matching characters. For new keys, no match is found.
-
In the Assign a Value to Your Tag text field, enter a value for the key. The tag key and value together is called a key-value pair. The values chosen for these fields should be meaningful definitions for you to use in the future. The following table shows examples of key value pairs.
| Key | Value | |:--------------|:--------------| | Business Unit | Finance | | Region | North America | | Person | J Smith |
Note: Tag keys must be at least three characters long.
When both the tag key and value fields have text, the Cancel option becomes visible.
-
Click Save New Tag. The screen displays a message stating that the tag key was created. The Tags screen includes your new tag. Alternatively, click Cancel to clear the fields.

Note: User tags are saved and retrieved with case insensitivity.
Applying Tags to a Single Line Item
Note: If you apply a tag historically (any month prior to the most recently completed month) in either Costs or Assets, then the tag is applied to the associated asset or cost for that month only. The tag does not apply retroactively, nor does it apply to future months. But if you apply a tag in Costs or Assets in the current month (i.e. for Costs, the most recently completed month; for Assets, the current period in Assets and the last completed month in Assets), then it applies to the last completed month and to each month going forward.
To apply a tag to a single line item:
- In any of the dashboard tables, click anywhere in the row that you want to tag. The associated Details screen is displayed.

- In the Search Tags field, search for the tag(s) that you want to apply to the asset.
- Click to select the tag.
- Click Apply Tag.
Bulk Tagging Multiple Line Items
To bulk tag multiple line items:
- From the any of the list item tables, select multiple assets by clicking the box at the beginning of each row. The bulk tagging icon appears on the far right side of the table.

- Click the Tag
 icon on the right side of the screen. The Bulk Tagging screen displays.
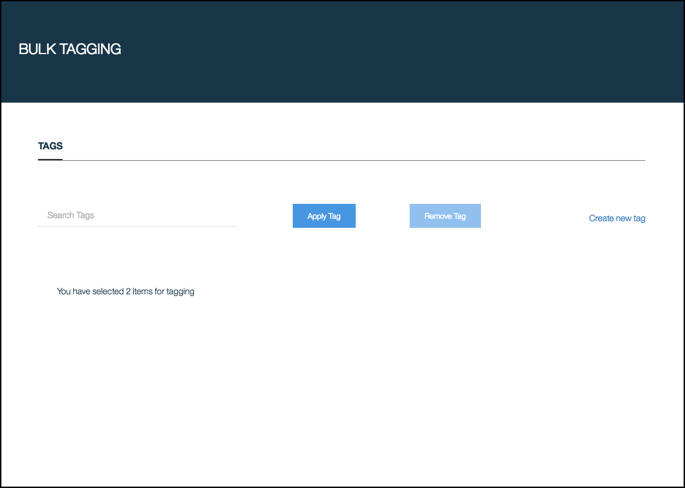
- In the Search Tags field, search for the tags that you want to apply to the invoice line items.
- Click to select the tag.
- Click Apply Tag. You can also create a new tag for bulk tagging by clicking Create New Tag and following the instructions for creating a new tag that are given earlier in this section.
- If the search does not display the tag, create a new tag here by clicking the Create New Tag link on the right side of the screen.
Designating Tags as Favorites
A favorite key is a provider or custom tag key that is of particular use. Designating a tag key as a favorite enables users to customize the data displayed in the donut charts on the Assets and Costs dashboards. Up to 5 tag keys can be designated as favorites. They can be selected from the drop-down lists on the donut charts from the Assets and Costs dashboards. Favorites can be added to and deleted from the favorites list.
To designate a tag as a favorite:
- Navigate to Settings > Tags > Manage Favorites Tag Keys to view the Favorite Tags screen.
- Click Add New Favorites Key.
- Select or search for the tag key to be used as a favorite. To search for a tag key, click on the Favorite Key number to display the search field. Type the tag key you want to search for.
- Click to select the tag. You can add up to five favorites.
- Click Save Changes. Remove a favorite key from your favorites list and the Costs donut chart by clicking the remove
 icon beside it.

Removing and Deleting Tags
Removing tags means disassociating the tag; deleting tags means deleting them from the system.
Removing Tags
Users can remove tags from the Costs and Assets line items to which the tags were previously applied. A tag can be removed from multiple line items on the Bulk Tagging screen. A tag can be removed from a single line item on the associated Details screen.
To remove a tag on the Bulk Tagging screen:
- In the Costs or Assets screen, select at least two line items from the Invoice Line Items list (for Costs) or the Assets list (for Assets) toward the bottom of the screen.
- Click the tags icon at the top of the line items list. The Bulk Tagging screen displays.
- Enter the tag you want to find in the Search Tags text box and select the full tag name from the option(s) given. The Remove Tag button becomes enabled.
- Click the Remove Tag button to delete the tag from the selected line items.
Note: When the Remove Tag button is clicked, the tag is removed from the selected items and all associated items. Only user-created tags can be deleted. Provider tags cannot be deleted.
To remove a tag on the associated Details screen:
- On the Costs or Assets screen, click in the row of the item you want to change. The associated Details screen displays.

- Search for and select the tag you want to delete from the item.
- Click the remove
 icon beside the tag name at the bottom of the screen to disassociate the tag from the asset.
Note: When the delete icon is clicked, the tag is removed from the selected item and all associated items. Only user-created tags can be deleted. Provider tags cannot be deleted.
Deleting Tags
To remove a custom tag:
- Navigate to Settings > Tags.
- Search for the tag you want to remove.
- Click the checkbox to select it.
- Click the delete icon. If the tag is associated with assets, a message displays stating that you must first disassociate the tag from the asset. After that you can delete it.