Adding and configuring fields on views
Displaying a URL launcher field as a button or link
About this task
The property that controls how a URL launcher field is displayed is valid in Creation Views and Task Views.
URL launcher fields can be configured as a button or link. Whereas, URL fields always display as links. Display Type is not shown in the property panel for URL fields.
For more information about URL launcher fields, see Using object fields to launch JavaServer Pages and external URLs.
On the JSON tab, display type is defined by setting subDisplayType to button or link. The field's display type must be set to URL. If subDisplayType is not provided, the URL field displays as a link.
Procedure
- In the View Designer, click the Design tab. The palette is displayed.
- Click a URL launcher field.
- In the properties panel, set Display Type to Button or Link.
Displaying a number field as a progress bar
About this task
You can configure a number field to display as a progress bar. The field must be an integer or decimal, and it must have a minimum and maximum value that is defined at the field level.
For information about defining color ranges, see Colors for field value ranges.
On the JSON tab, a progress bar is defined by setting subDisplayType to Progress for a number field.
Procedure
- In the View Designer, click the Design tab. The palette is displayed.
- Click the field that you want to display as a progress bar.
- In the properties panel, set Display Type to Progress.
- Click Done.
Adding a classifier field that makes taxonomy suggestions
Before you begin
The natural language processing service must already be configured to make taxonomy suggestions. Find out the classier fields and classifier target fields before you get started. For information, see Natural language processing services.
About this task
Classifier fields that make taxonomy suggestions are valid in Creation Views and Task Views.
The UI supports making taxonomy suggestions and object association suggestions. For information about object association suggestions, see Adding a classifier field that makes object association suggestions.
When a user accesses a Creation View or Task View with a classifier field, an IBM Watson® Insights button appears in place of the classifier field. The button name changes to the classifier field label. Click the button and an IBM Watson Insights panel displays the results.
The classifier field and the classifier input field must both be in the view. The classifier target fields can optionally be included in the view. It is not necessary to configure the Watson statement on the classifier input field (Adding a description improves IBM Watson Suggestions), the IBM Watson Insights button, or the IBM Watson Insights panel. These elements display automatically for classifier fields.
The classifier field label is used as both the button label and the title of the IBM Watson Insights panel. Otherwise, they cannot be customized.
You can add multiple classifier fields to a view.
You cannot add classifier fields that make taxonomy suggestions to Grid Views. However, you can add classifier target fields to Grid Views.
In this example, the text in the Description is used as input to a natural language processing service that makes taxonomy suggestions. The loss event categorization field is configured to be a classifier field.

On the JSON tab, no properties are needed for taxonomy classifier fields.
Procedure
Adding a business entity selector field
Before you begin
The business entity selector field must already be configured. For more information, see Defining business entity selector fields.
About this task
Business entity selector fields can be added to Grid Views, Creation Views, and Tasks Views.
Business entity selector fields can be added as key fields in user guidance.
In GRC Workflow, business entity selector fields can be used in task view override fields. They can also be used in conditions and validations. The options are Empty or Not empty.

Procedure
- In the View Designer, click the Design tab. The palette is displayed.
- On the canvas, drag a field that is defined as a business entity selector field to the canvas. The field attribute panel opens.
- Set Read Only to true or false.
- Set Required to true or false.
- Add rules (optional). For more information, see Configuring rules.
- Click Done.
- Publish the view.
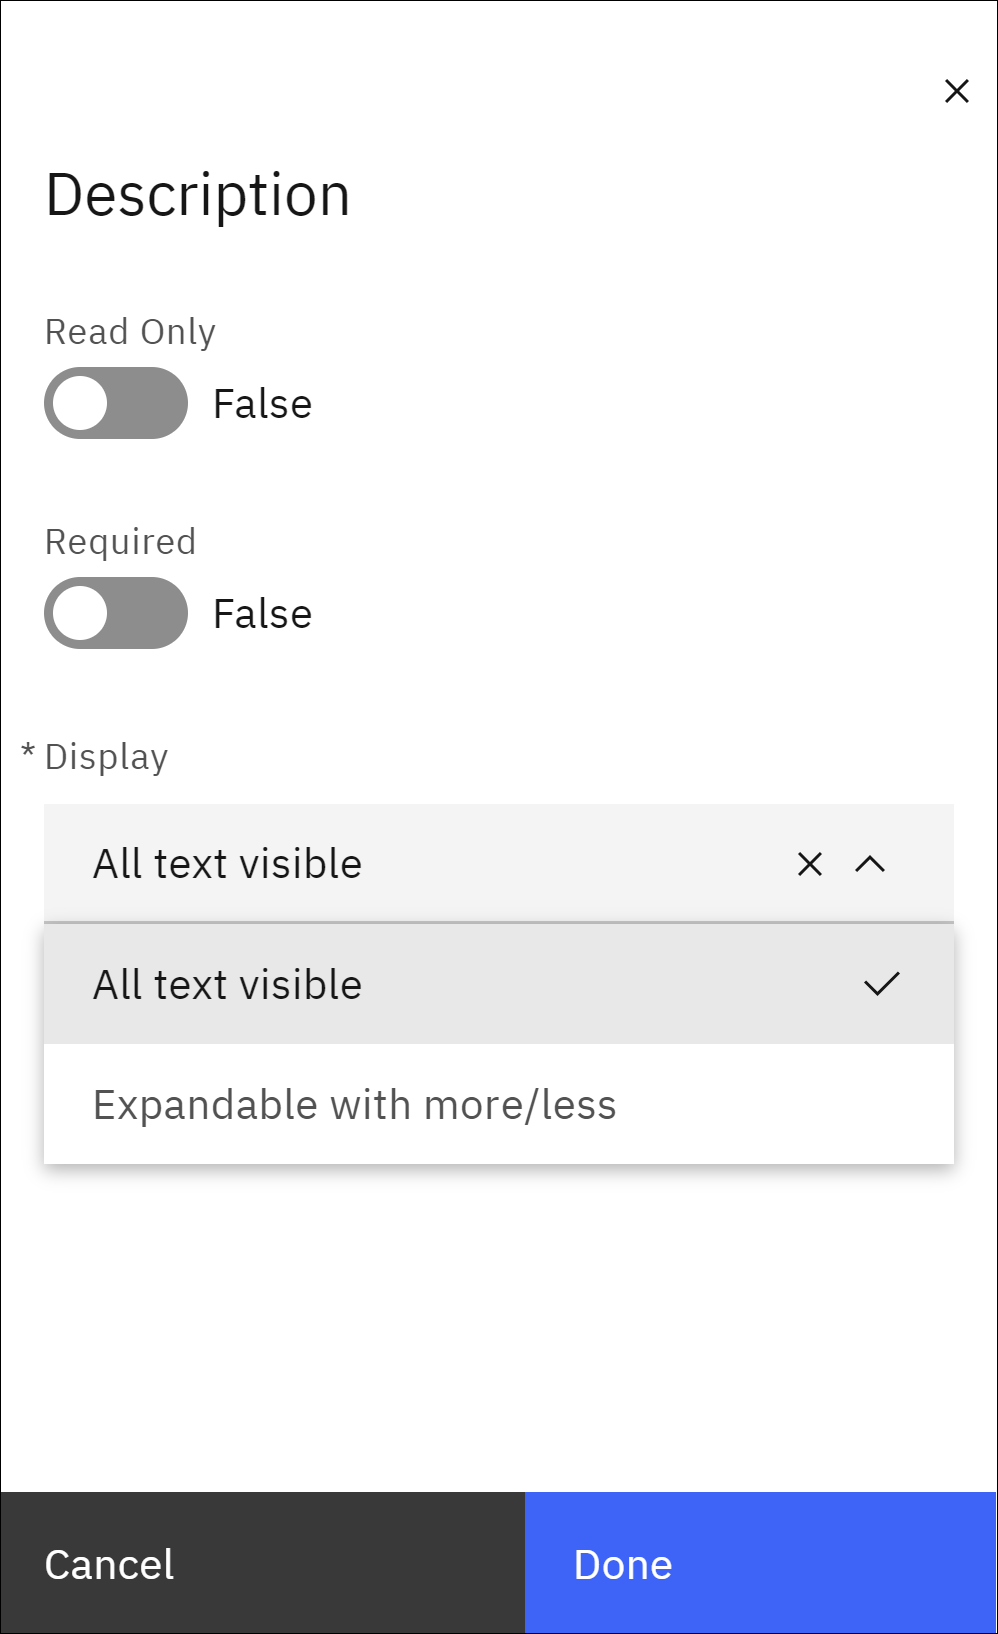
Configuring how text fields are displayed
You can configure how text fields are displayed. The fields can display all the text or show some of the text with the more or less option available to show the rest.
About this task
Fields with display types of text area or rich text can be configured to display all text or to be expandable. For Task Views, Grid Views, and Admin Views, the default display option is Expandable with more/less. For Report Views, the default display option is All text visible. This setting is not relevant for Creation Views. In Creation Views, all text is displayed because the fields are always in edit mode.
Procedure
- Choose one of the following options for Display:
- Select All text visible to show all the text in the field.
- Select Expandable with more/less to make the field expandable.
The following image is an example of the text display settings for the Description field: