Custom workflow stage notifications in 8.3.0.2
You can now edit and create email notification templates within the Workflow Designer and assign templates to workflow stages.
Administrative users can create email stage notification templates that are specific to a workflow stage. You are no longer constricted to using one universal template for notifications that are sent to assignees, subscribers, or end stage notification recipients.
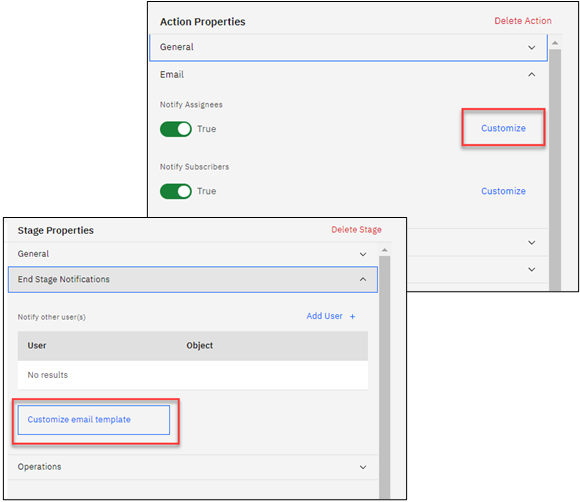
For notifications that are sent to assignees or subscribers, a new Customize selection is available on the Action Properties panel under the Email section.
For notifications sent when a workflow has completed, a new Customize email template button is available within the Stage Properties panel under the General section.
When you click Customize or the Customize email template button, a panel opens. Initially, it displays the default templates for the subject and body application text strings. You can select any Subject email template within OpenPages under the Subject section or any Body email template within OpenPages under the Body section. Any edits that you make to a template in this panel apply to all workflow stages that are assigned to the template.
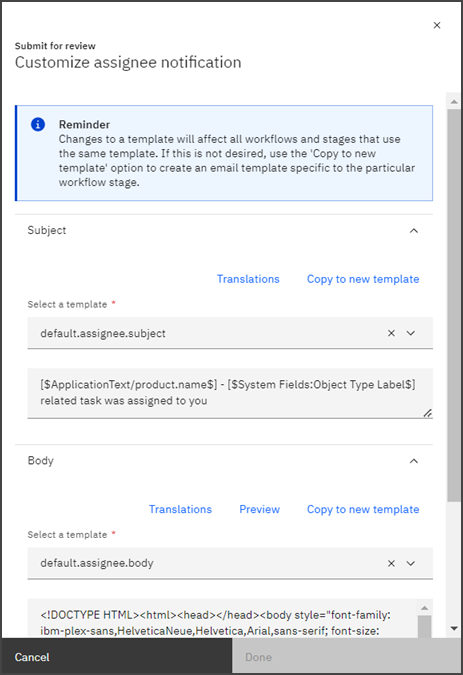
You can also select a template and click Copy to new template. With this option, you enter a name and description for the new template, and the strings that are supplied by the template you selected are made available for you to edit. A name for the new template is generated for you. You can modify it as needed.
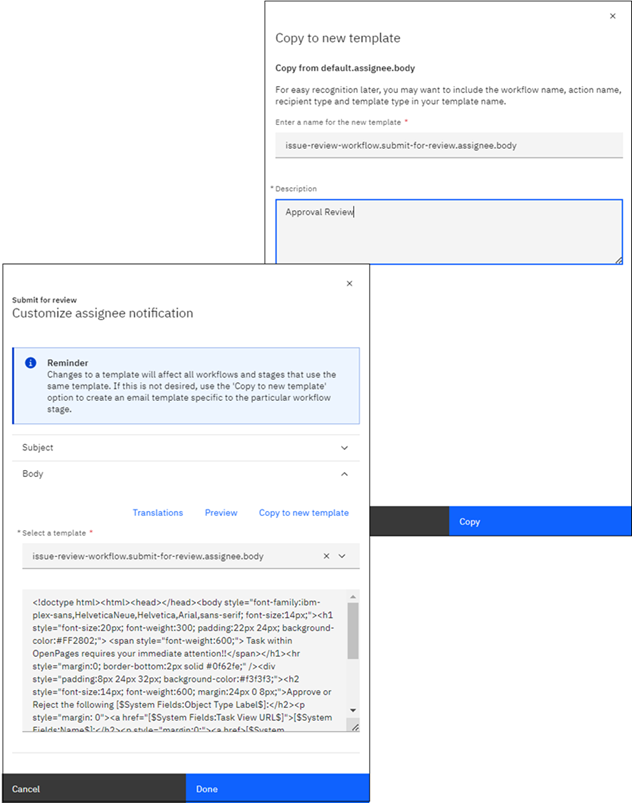
The text of the email template can be previewed by clicking Preview, which displays how the email will be presented to the recipient. If your environment integrates with Watson Language Translator, you can also translate the strings that are created or edited in a template. After you complete your edits on the email template and click Done, the notification for the selected action or end stage notification is sent to the recipient using the selected email template.
![The Customize Assignee Notifications panel shows a preview of an email notification. The preview shows the subject and body of the email, which includes links, colors, and application text strings such as [$System Fields:Description$].](nfg8302-wf_assignee_custn-2.png)
Any template that is created or edited within the Workflow Designer is reflected on the
Application Text screen, which is accessible from
![]() > System
Configuration. Additionally, any changes to an email template from the
Application Text screen get reflected within the Workflow Designer.
> System
Configuration. Additionally, any changes to an email template from the
Application Text screen get reflected within the Workflow Designer.