Agent Installation
Installation and Troubleshooting
The installation of the migration agent requires no reboot or downtime of applications running on the source machine. It can be installed as follows in the multiple ways.
Installation Token method
When you run the migration agent installer file on a source machine, you are first asked to enter your Installation Token. This installation token is generated when the IBM Live Migration Service account is activated. For security reasons using the installation token is best practice. You can use the default installation token or new token to install the agent. Once a new token is generated, all new installations need a new token while the replication with old tokens continue to work.
Utilizing existing installation token
Each project has its own unique installation token which is created when the IBM Live Migration Service account is created. Follow the below steps to locate the token.
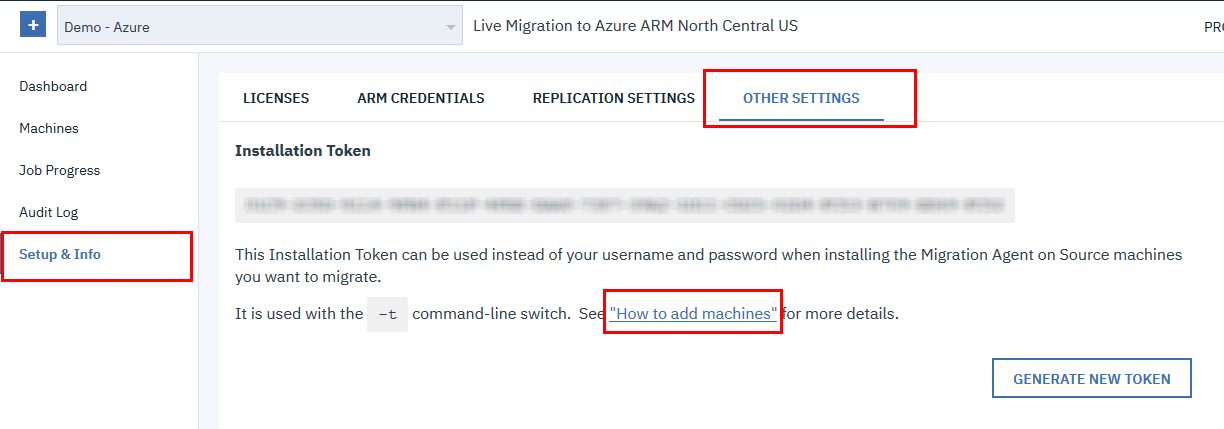
- Open the IBM Live Migration Service Console and Setup & Info >Other Settings.
Scroll down and click "How to add machines" link.. Your Installation Token will be shown in the upper part of the pane under the token header.
Generating new installation token
If you want to replace your existing Installation Token, you can generate a new one. After generating a new Installation Token, you will no longer be able to use the old Installation Token to install agents. However, the agents you installed with the old Installation Token will continue to run properly.
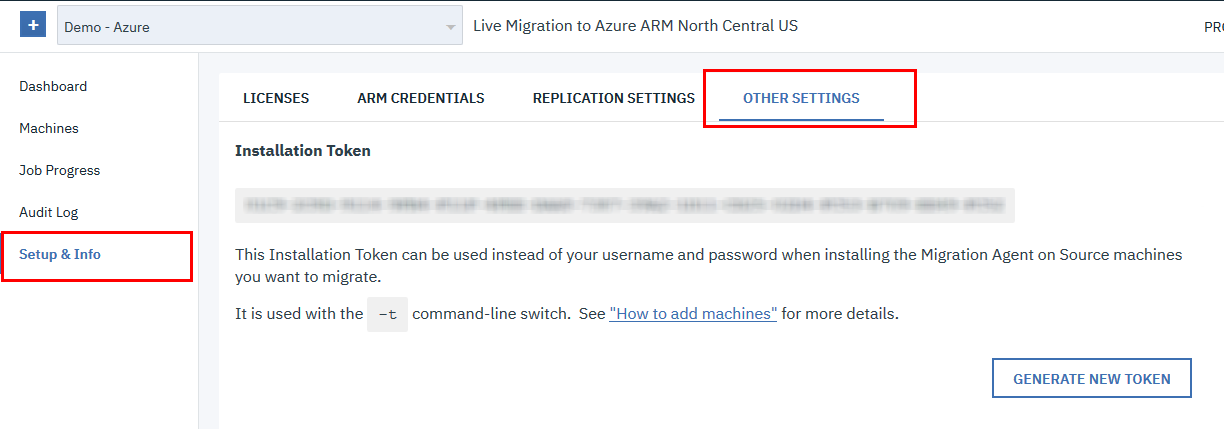
On the IBM Live Migration Service user console, navigate to Setup & Info > OTHER SETTINGS.
-
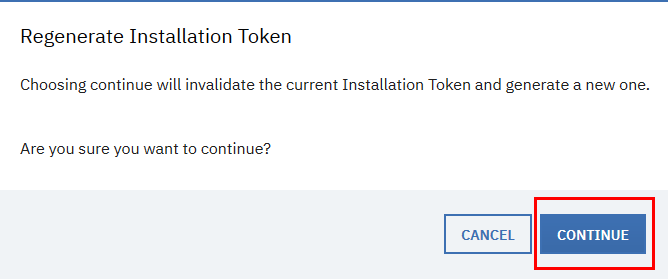
Click GENERATE NEW TOKEN button at the bottom of the page under the agent installation Token section.

-
A confirmation message will appear, asking you to confirm the generation of a new Installation Token and the invalidation of the existing token. Click CONTINUE to generate a new token.
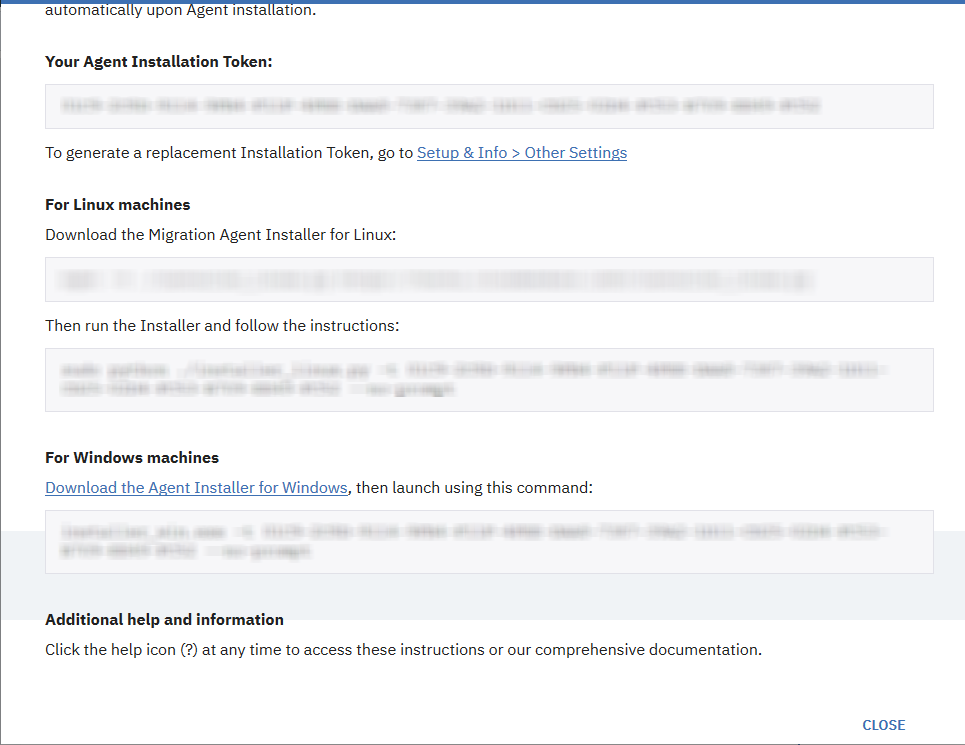
A new Installation Token will be generated, and you will be able to locate it on the OTHER SETTINGS page.
Standard Installation
The workflow of a standard installation of an agent on a source machine is as follows:
-
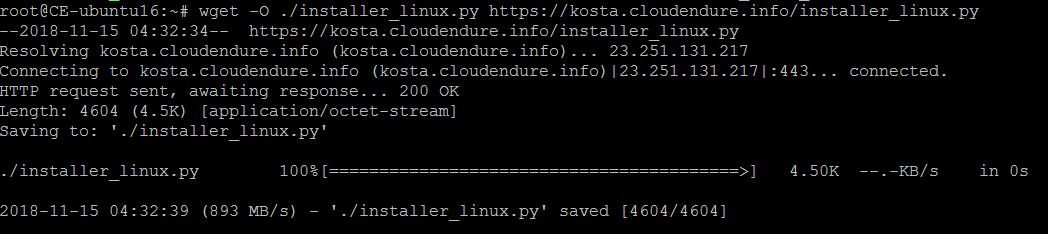
Download the agent installer file from the IBM Live Migration Service user console.
NoteMake sure to always download the latest version of the agent installer before installation rather than using a potentially outdated version that has been stored locally. -
Copy or distribute the downloaded agent installer file to each source machine that you want to migrate.
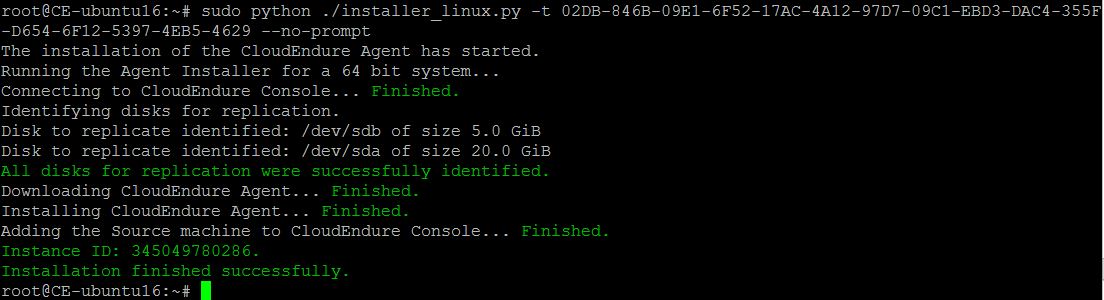
- Run the agent installer file on each source machine, either with your IBM Live Migration Service user credentials or your installation token.
- [Optional] Specify the disks you want to replicate.
- After performing these steps, the installation will begin. Once the installation is completed successfully, the replication of the source machine data will start automatically, and you will be able to monitor it through the IBM Live Migration Service user console.
Installation on Linux Machines
You should install the agent with installer file on each Linux source machine you want to include in your IBM Live Migration Service.
- Open the IBM Live Migration Service user console, and go to Setup & Info > OTHER SETTINGS.
- From the OTHER SETTINGS pane, select the How to Add Machines option.
-
The How To Add Instances popup window will appear. To download the agent installer file, copy the line that includes the download command and agent installer file from the For Linux Machines - Download the migration agent installer for Linux section.
-
On the source machine, paste the command and agent installer file you copied, and press Enter.
The agent installer will be downloaded onto your machine.
- To run the agent installer, copy the command below the agent installer file under the Then run the Installer and follow the instructions heading. This command also includes your installation token.
-
On the source machine, paste the copied command and press Enter.
-
When installation begins, the agent installer will automatically identify the source machine disks that can be replicated. Then, it will display the list of available disks for replication.
-
Once the list of available disks for replication is displayed, you will be asked to select the disks you want to replicate.
Perform one of the following actions:-
To replicate all the disks of the source machine, press Enter.

-
To replicate selected disks of the source machine, type the path of the disks you want to replicate, and separate them with a comma, as follows: /dev/sda,/dev/sdb. Then, press Enter.
-
-
After clicking Enter, the installation of the agent on the source machine will start.
- The root disk of the source machine is always replicated, whether you select it or not, since it is required for the launching of the target machine. Therefore, it always appears on the list of identified disks for replication.
- IBM Live Migration Service replicates whole disks. Therefore, if you choose to replicate a partition, its entire disk will appear on the list and will later be replicated. If several partitions on the same disk are selected, then the disk encompassing all of them will only appear once on the list.
-
Once the agent installation is completed successfully, the source machine will appear in the IBM Live Migration Service user console, and the initial replication process will begin.
-
The DATA Replication PROGRESS column message appears in red and a red icon is displayed in the STATUS column. This usually means a connectivity problem.
In this case, verify that all the network requirements are met.
- The message "Establish communication between the migration agent and the Replication Server" is not shown in red but is displayed for more than 5 minutes and the red icon is not displayed. This usually means that the agent failed to run or that the agent never established communication with the user console.
-
In this case, follow the troubleshooting steps described in the Error: agent is not Running Properly section.
Installation on Windows Machines
You should install the agent with installer file on each Windows source machine you want to include in your IBM Live Migration Service.
- Open the IBM Live Migration Service user console, and go to Setup & Info > OTHER SETTINGS.
-
From the OTHER SETTINGS pane, select the How to Add Machines option.
-
The How To Add Machines pane will appear. Click Download the agent installer for Windows link at the bottom of the pane under For Windows Machines header.
-
The agent installer will download onto your machine. Copy or distribute the downloaded agent installer to each source machine that you want to migrate.
- Copy the command below "For Windows machines" section. Then open a CMD window as administrator and paste the command and click Enter.
In this case, press Enter. After the CMD is closed, re-run the installer_win.exe file and repeat the process from the start.
- If you use your user credentials, you will be asked to enter the name of the project you are installing.
Type the Project name and press Enter.
- Once your IBM Live Migration Service credentials or installation token have been confirmed, the agent installer will automatically begin to identify the source machine disks that can be replicated. The list of available disks are displayed.
-
After the list of available disks for replication is displayed, you will be asked to select the disks you want to replicate.
Perform one of the following actions:- To replicate all the disks of the source machine, press Enter.
-
To replicate selected source disks, type the letters of the disks you want to replicate and separate them with a comma that is C:,D:,E:, and then click Enter.

After clicking Enter, the installation of the agent on the source machine will begin.
- The source machine’s root disk is always replicated, whether or not you select it, as it is required to launch the target machine. It will therefore always appear on the list of identified replication disks.
-
The IBM Live Migration Service replicates entire disks. If you choose to replicate a partition, it will replicate the entire disk. A disk is identified in Windows by the first partition disk letter. Therefore, only the first partition will listed, but all other partitions will also be replicated.
-
Once the agent installation is completed, the source machine will appear under the Machines category in the IBM Live Migration Service user console and the initial replication process will start.

-
The DATA Replication PROGRESS column appears in red and a red icon is displayed in the STATUS column. This usually means a connectivity problem.

In this case, verify that all the network requirements are met.
-
The message Establish communication between the IBM Live Migration Service agent and the Staging Server is not shown in red but is displayed for more than 5 minutes and the red icon is not displayed. This usually means that the agent did not run or that the agent never communicated with the user console was established.
Follow the troubleshooting steps described in the Error: agent does not run properly in this case.
-
-
Using Command Line Arguments for the Installation
After downloading the agent installer file, you can use command line arguments to install the agent. These arguments enable you to avoid the need to enter information in response to prompts during the installation process, and to customize the installation according to your needs.
The available installation arguments are:
-t TOKEN, --token=TOKEN
--no-replication – for stopping the replication from starting automatically.
--no-prompt – for running a silent installation.
[Linux] --device=disks to replicate; [Windows] --drives=disks to replicate.
[Linux] /dev/sda,/dev/sdb [Windows] C:,D:,E:--force-volumes – must be used with the --no-prompt argument - for canceling the automatic agent installer detection of physical disks to replicate, following your –-drives/–-device input. When using this argument, you will need to specify the exact list of physical disks.
[Azure] --storage-account – Select the ARM storage account
GCP] –application – Select the GCP license for target, values include 'RHEL6', 'RHEL7', 'MSSQL_STANDARD', 'MSSQL_WEB', 'MSSQL_ENTERPRISE'.
--log-file – agent installer log file name.
Installation with Manual Replication
By default, the replication of the machine starts automatically after you install an agent on a source machine. You can stop replication automatically by using the command line argument no-replication.
You may want to use the no-replication option when installing the agent on many source machines simultaneously. In this case you might want to replicate in stages, rather than start replicating all machines at once. You can also use the no-replication option if you prefer to complete the agent installation first because of the bandwidth and performance considerations and then start the replication in a more appropriate time.
Configuration on Linux:
Run the following command:
sudo python installer_linux.py -t <TOKEN> --no-Staging
Configuration on Windows:
Run the following command within CMD when installing the agent:
installer_win.exe -t <TOKEN> --no-Staging
Installation on windows servers with storage pools
For Windows 2012 & 2016 when installing an agent on a Windows server storage pools machine, the standard installation procedure identifies the virtual disks but not the physical disks. You must therefore cancel the agent installer’s automatic disk detection and manually enter the names of all source machine’s physical discs you wish to replicate.
Installing an agent on a windows server machine with storage pools:
-
Find the exact names of the physical disks you want to replicate. On Windows Server 2012 or 2016, navigate to Server Manager > File and Storage Services > Volumes > Storage Pools, and locate the names on the PHYSICAL DISKS pane.
NoteIf your Storage Pools section does not contain any information, then there are no storage pools configured on the machine. Learn more about storage pools in Windows.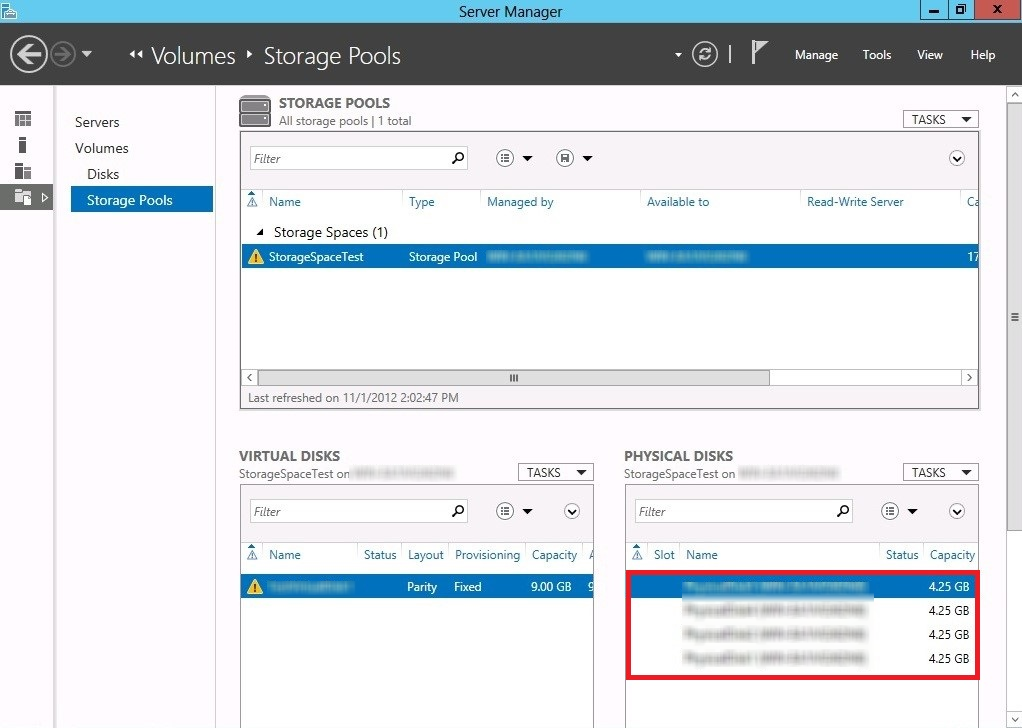
-
Run the agent installer in CMD as follows, where each disk volume is represented by its name.
 installer_windows.exe --no-prompt --force-volumes -t <TOKEN>
 --drives="\\?\DISK NAME,\\?\DISK NAME,\\?\
 DISK NAME,\\?\DISK NAME"
In the example below, we enter the disk names from the Storage Pool in the above screenshot:
 installer_windows.exe --no-prompt --force-volumes -t <TOKEN>
 --drives="\\?\PhysicalDisk1,\\?\PhysicalDisk2,\\?\
 PhysicalDisk3,\\?\PhysicalDisk4"
Silent Installation
IBM Live Migration Service allows you to perform a silent or unattended installation. The agent installer runs from beginning to end in this installation mode without any input on your part. This option allows you to install the agents without the need to enter your user credentials or installation token after running the agent installer and without any additional selections during the installation process.
You can use this silent installation option to simultaneously deploy and run the agent installer on multiple machines. You can use this option to run the agent installer on a remote machine or automatic mode.
Run the agent installer using the command line arguments and the no-prompt command line argument to use a silent installation. The command line arguments allows you to enter the necessary information in advance. If you do not specify the drives(Windows) or devices(Linux) you would like to replicate, all source machine disks will be replicated.
Silent Installation on Linux
Running the silent installation with your account credentials
Run the following command:
sudo python installer_linux.py --no-prompt -u USERNAME -p PASSWORD
Running the silent installation with your installation token
Run the following command:
sudo python installer_linux.py --no-prompt -t <TOKEN>
Silent Installation on Windows
Use the CMD with the following arguments:
Running the silent installation with your account credentials
Run the following command:
installer_win.exe --no-prompt -u USERNAME -p PASSWORD
Running the silent installation with your installation token
Run the following command:
installer_win.exe --no-prompt -t <TOKEN>