Preparing the 9040-MR9 system to install memory modules
To prepare the system to install memory modules, complete the steps in this procedure.
Before you begin
Record the plugging order of the memory module slots for the installation.
This information describes the rules for memory modules in the system.
- The system supports DDR4 memory modules of 8 GB, 16 GB, 32 GB, 64 GB, and 128 GB.
- The system has eight memory riser cards.
- Each memory riser card must have 8 DIMMs.
- Each system processor must have one memory riser card.
- Unused memory module connectors must have a memory module filler.
- Unused memory riser positions must have a memory riser filler.
- A memory riser card can have up to 16 DIMMs.
- Each system processor can have two memory riser cards.
- All memory modules must be of the same size and type on each memory riser.
- The memory module connector colors are black and white. The first eight memory modules must be installed in the white-colored DIMM connectors.
- If the memory riser cards for the processors have different capacities, populate the largest memory riser card with system processor CP0.
- Consider the following requirements when you add memory riser cards:
- After all of the first memory riser cards for the system processors are filled up, add a second memory riser card to system processor CP0. The second memory riser card of each system processor can have different memory module capacities from the memory module capacity of the first memory riser card. It is recommended that the memory modules of the second memory riser card have the same type and size as the first memory riser card.
- Add a second memory riser card to system processor CP1, then to system processor CP2, and finally to system processor CP3.
Procedure
-
Label and disconnect the power source from the system by unplugging
the power cords from the system.
Notes:
- This system might be equipped with two or more power supplies. If the removing and replacing procedures require the system power to be turned off, ensure that all power sources to the system are disconnected.
- The power cord (B) is fastened to the system with a hook-and-loop fastener (A). If you are placing the system in a service position after you disconnect the power cords, ensure that you unstrap the fastener.
Figure 1. Removing the power cords  (L003)or
 or
or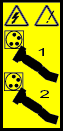 or
or or
or


 DANGERMultiple power cords. The product might be equipped with multiple AC power cords or multiple DC power cables. To remove all hazardous voltages, disconnect all power cords and power cables. (L003)
 -
Complete the following steps to place the system in the service position.
Do not pull out or install any drawer or feature if the rack stabilizer brackets are not attached to the rack. Do not pull out more than one drawer at a time. The rack might become unstable if you pull out more than one drawer at a time.

- If not already removed, remove the shipping screws (A) as shown in the following figure by using a Phillips screwdriver.
- Release the side latches (B) by pressing them downward as shown in the following figure.
- Pull out the system (C) as shown in the following figure. Ensure that any cables do not catch or bind as you pull out the system.
Figure 2. Placing the system in service position 
-
Remove the service access cover.
Attention: Operating the system without the service access cover on for more than 10 minutes when the system power is turned on might damage the system components.
- Push the release latches (A) in the direction shown in the following figure.
- Slide the cover (B) off the system unit as shown in the following figure. When the front of the service access cover has cleared the upper frame ledge, lift the cover up and off the system unit.
Figure 3. Removing the service access cover 
-
Remove the memory riser.
-
Pull out the memory riser from the slot
by holding onto the latches.
Figure 4. Removing a memory riser 
-
Pull out the memory riser from the slot
by holding onto the latches.