Technical Blog Post
Abstract
Solution to Use IBM Form with IBM Case Manager system
Body
During the BPF to ICM transition project, the CDL ICM team accumulates some best practices and solutions in Forms integration, lookup development, choicelist implement and dynamic logic parts, and so on, please see the solution series in blog. First let’s talk about part 1 how to use IBM Form with ICM, (Author: Ellen Liu, Dan BJ Liu/China/IBM)
1. Configuration IBM Forms with ICM
1.1 Install IBM Forms
To integrate IBM Forms, IBM Forms Server V4.0.0.2 is required to be installed on the Case Manager environment.
a) Click I accept the terms in the license agreement then click Next.
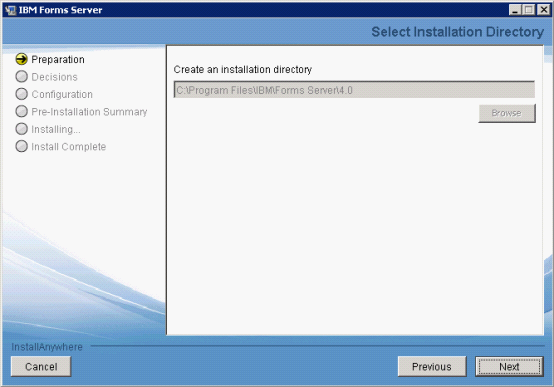
The installer configures the IBM Autonomic Deployment Engine. If the Autonomic Deployment Engine is not on your system, the installer installs it for you. When configuration is complete, 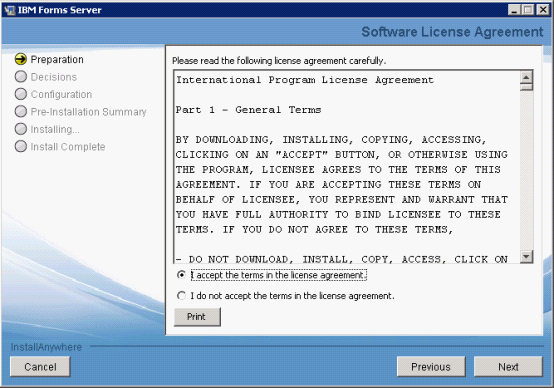
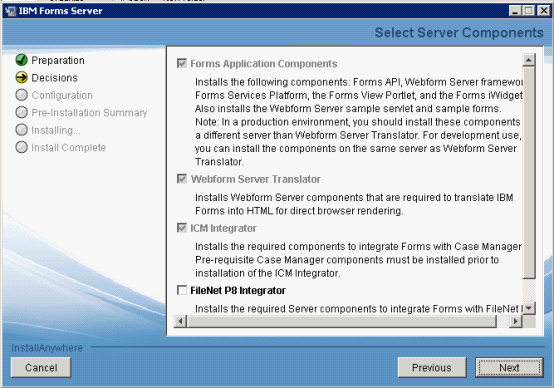
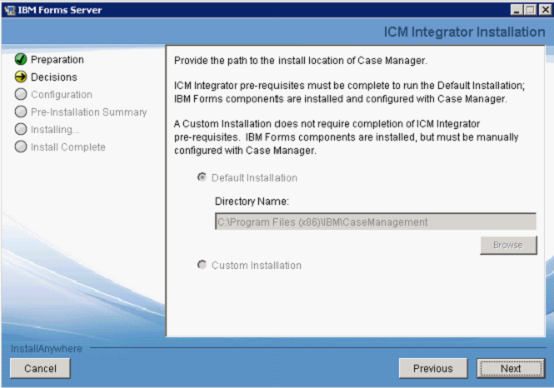
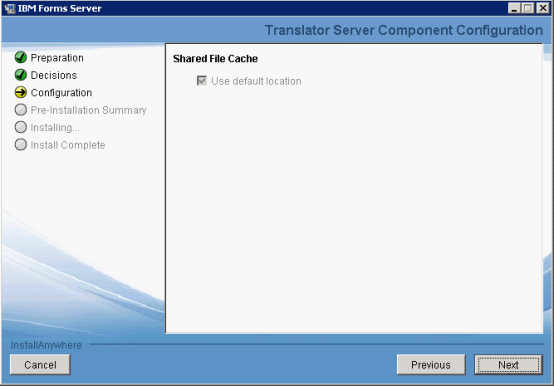
In our example, we assume that IBM Form Server 4.0.0.2 and Webform Server Translator is installed with ICM integrator.
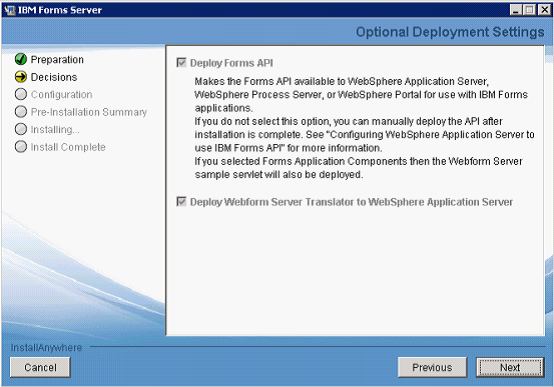
d) The Optional Deployment Settings panel opens. Select both Deploy Forms API and Deploy Webform Server Translator to WebSphere Application Server then click Next.
If you choose Deploy Forms API during the installation of Webform Server, sample forms and sample programs with source code are included.
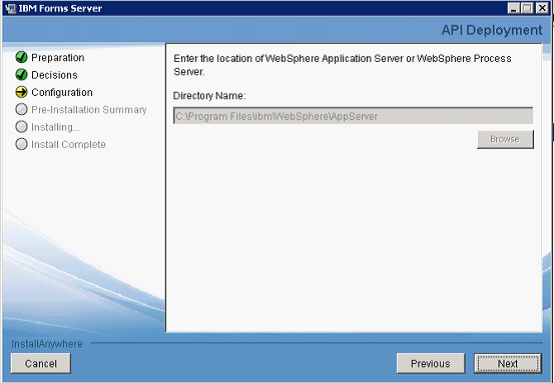
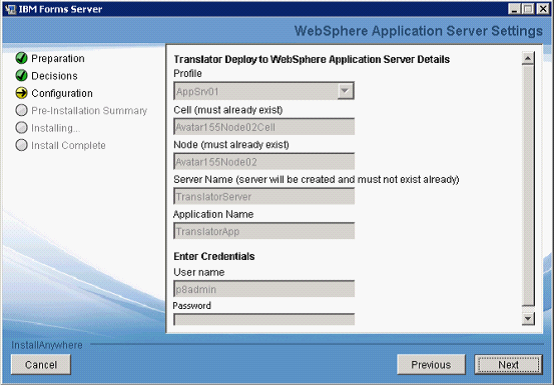
Important: Do not choose the Deployment Manager profile if it exists. You must use a profile of an application server. For example, AppSrv01 can be used.
Enter the User Name and Password information, and then click Next.
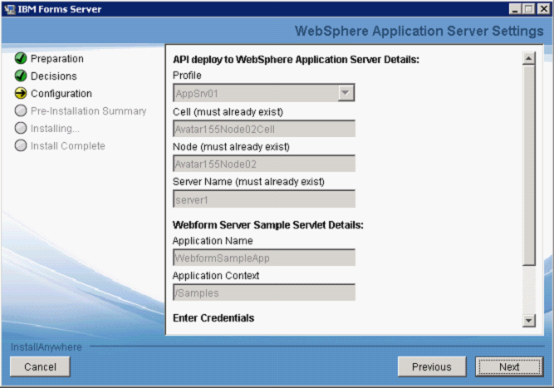
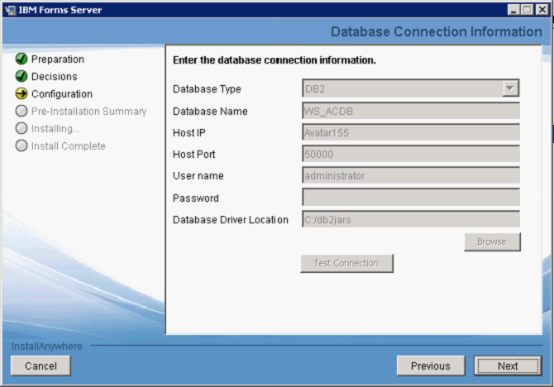
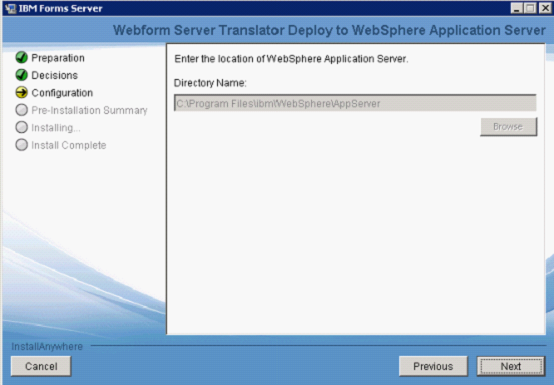
Select the profile that you want to use, make sure that the server information is correct, enter the WebSphere logon credentials, then click Next.
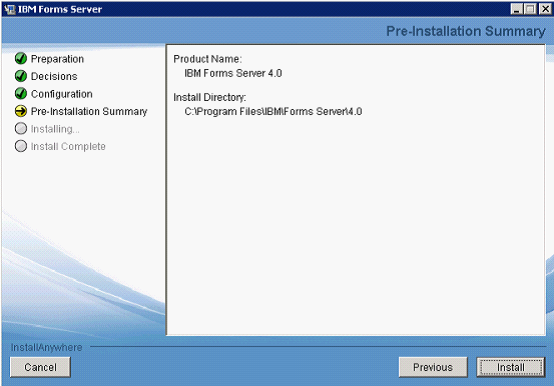
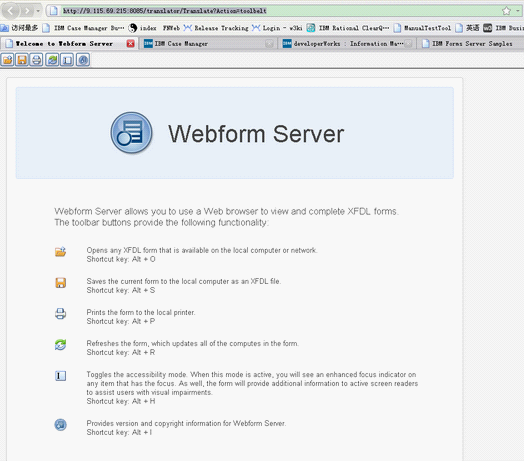
Use this link to check Translator Server installation.
http://servername:8085/translator/TranslateAction=toolbelt
You will see the page as below.
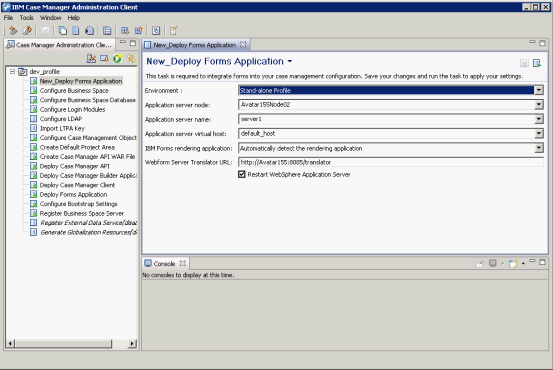
Restart the WebSphere Application Server when you run the task on a stand-alone server.
In a cluster or network deployment environment, run the Deploy Forms Application task on the deployment management server. Then run the Deploy Forms Application task on each managed node and restart the WebSphere Application Server cluster after running the task on the last node.
2.1 IBM Forms rendering application
Forms can be rendered at the client side using either Webform Server Translator installed on the server or IBM Forms Viewer installed on client side. The IBM Forms rendering application field helps to identify how the IBM Forms is to be rendered when integrating with Case Manager.
Figure 1-2 shows different options available when rendering applications.

Automatically detect the rendering application.
When the Webform Server Translator is installed on the Case Manager environment and also if IBM Forms Viewer is installed on the client machine, this option tells the client to detect the rendering application automatically. Viewer is given first preference than Webform Server Translator.
Use the Webform Server Translator
This forces the Case Manager environment to use Webform Server Translator.
Use the Viewer
This forces the Case Manager environment to use the viewer installed at the client machine.
None
If only P8 eForms is going to be integrated, None is to be selected.
In our example, we select the automatically detect the rendering application option.
2.2 Webform Server Translator URL
If the Webform Server Translator is installed on the Case Manager environment or on any remote server, the respective URL is to be entered.
In our example, we enter the following URL because the Webform Server Translator is installed on the Case Manager environment (see Figure 1-3):
http://localhost:8085/translator

After running this task, restarting WebSphere Application Server is mandatory. By selecting the check box Restart WebSphere Application Server (as shown in Figure1-3), the server is restarted automatically after running this task.
If it is not selected, the administrator is required to restart the WebSphere Application Server manually.
3. Designing IBM Forms
IBM Forms Designer is used to design the customer form based on the business requirements.
The IBM Forms Designer is a what-you-see-is-what-you-get (WYSIWYG) design tool that allows the business analysts to build forms by dragging and dropping items from a palette of choices.
Business analysts can recreate their existing paper forms to the IBM Forms format using IBM Forms Designer. For designing details, refer to the IBM Forms Designer 4.0 Information Center for more information.
For our Customer Complaints example, assume that we have designed the form with the items mentioned using IBM Forms Designer as shown in Figure 1-4.
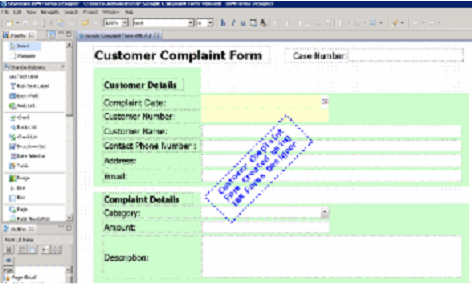
To integrate with Case Manager, save the form template as XFDD format file.
Important: To integrate IBM Forms with Case Manager, save the form template in XFDD file format. At the time of writing, Case Manager Version 5.1 does not support XFDL file format.
3.1 Mapping Case Properties to IBM Forms
To integrate IBM Forms’ items with case properties, the Public Data Element Name property of the form item is required to be updated with case property's Unique Identifier and the Data Element needs to be marked as Public as shown in Figure 1-5.
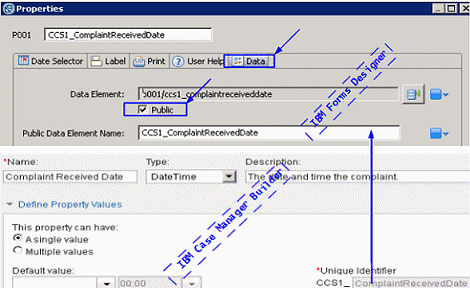
a) Right click on the item and select Properties.
In our example, right click on the text field of Complaint Date and select Properties.
b) Select Data tab.
c) Select the Public check box.
d) Update the Public Data Element Name with the case property's unique identifier.
In our example, update with the unique identifier CCS1_ComplaintReceivedDate
So as shown in Figure 1-2, the form item Complaint Date value is mapped to case property Complaint Received Date by updating the item's P001 property value with the unique identifier CCS1_ComplaintReceivedDate.
e) Save the form template as CustomerComplaint.XFDD which then integrates with our Customer Complaints Case Manager solution.
Important: By default, the IBM Form field is not public. Make sure that Public is checked, when the field is mapped to case property.
3.2 Add the form template into target object store
The developed form template is added into Case Manager's target object store with the document class ITX Form Template.
Important: The form template can be added to the target object store with the sub class of the document class ITX Form Template.
In our example, CustomerComplaint.XFDD is added into target object store.
4. Using Case Form widget
After you developed the form template with IBM Forms and added it into the object store, you can use Case Form widget to open form with the form template.
When creating Customer Complaints solution, you may decide to use the Case Form widget in place of the Case Data widget if plain representation of case data is not sufficient or when case data needs to be supplemented with form data or form functionality.
Figure 1-6 demonstrates how a new Customer Complaints case can be rendered with help of Case Form widget.
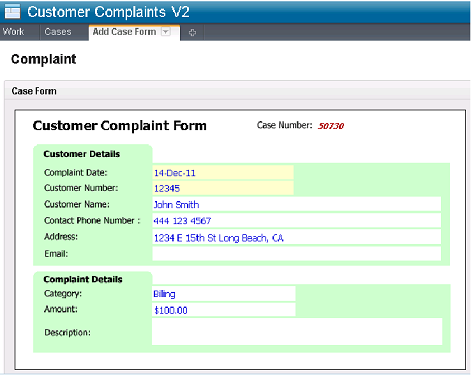
When the widget is configured to open a form by using form template, the Version ID or Version Series ID determines the specific product.
When the widget is configured to open a form by using attachment, then specific platform that is invoked at the runtime is determined by a MIME type of attached document.
Two forms products may coexist, and they can be used in the same solution. You can render case pages with the help of IBM Forms while render the step pages using FileNet P8 eForms.
A page may contain only one Case Form widget.
4.1 View and edit modes
Case Manager does not provide a case locking mechanism. This may cause unexpected overwrite of case data in multi - user environment. The Case Form widget provides mechanism aimed to lower probability of such an event.
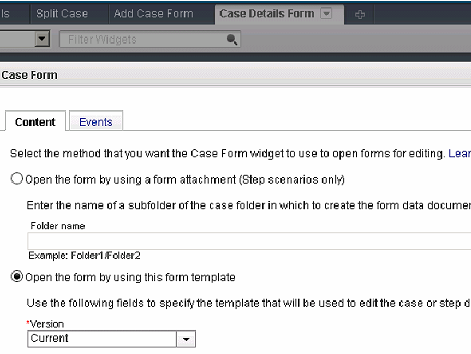
When a new Customer Complaints case is added as shown in Figure 1-7, the form can be rendered in the Case Details Form page initially in a view (read-only) mode.
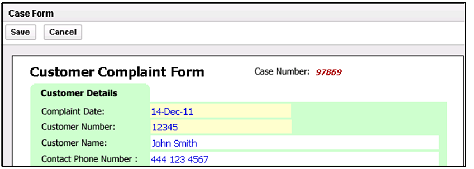
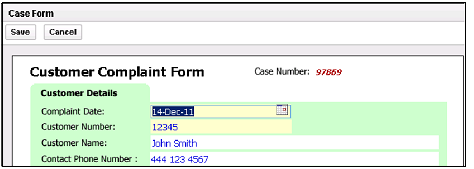
In the scenario where Case Form widget is left in the edit mode for a period of time long enough for other users to modify the case data, two outcomes are possible:
If user edited case properties that have not been modified by other users, then the properties that have been modified and saved by others would remain intact as save operation implies submitting only set of modified properties.
If user edited case properties that have been modified by other concurrent users, then the latter set of properties would be overwritten during save operation (last edit wins).
After the case is saved, the Case Form widget is rendered in view mode again, and user is presented with persisted case properties.
4.2 Overview of data merging rules
Case Form widget maps template fields with case properties and step parameters using field name and property or step parameter ID. When designing a template follow this pattern:
Assign prefix to your solution, for example for Customer Complaints solution, it can be CC.
When new property is added, Case Manager Builder constructs ID as prefix + underscore character + property name as you type. For our exapmle, the CustomerName becomes CC_CustomerName.
When designing a template name, a field to be mapped with that property as above is CC_CutomerName.
While the primary purpose of a Case Form widget is to present case properties to users for viewing and editing, in reality, things usually become more complicated.
Consider part of our Customer Complaints case: we configure the Case Form widget on Work Details Form page where it passedes two sets of data, one originating from Content Engine and the other originating from Process Engine.
These two data sets are received in no particular order; each of sets is constrained by its own, disparate data schema.
The Content Engine data may be modified by external data system. This process is transparent for Case Form widget.
In more complex cases, the Case Form widget also has to deal with form data, the data that is not stored in Content Engine repository.
The widget follows these steps to merge all the data sets:
If Case Form widget renders a form from the attached data document, then the form may contain fields that are not mapped with case properties. The form is first filled with data from that data document.
If Case Form widget renders a form from a template, then the template may contain fields with default data. The form is first filled with the default data.
The Case Form widget merges case and step data in such a way that properties value attributes are set according to the incoming case data. This approach is taken so that step data does not overwrite result of modification of case data by external data system. Another reason behind this logic is that Case Form widget presents user with case centric view while tasks are treated as means of case data modification and not as case data themselves.
The result of merged case and step data is then injected into form previously populated with form data or defaults.
When Case Form widget is placed on Case Details page, the process is much more simple. The widget injects case data into form previously populated with template default values.
The calculations defined in form template are applied at the end.
One merging rule worth mentioning is enforcement of required property attribute. As mentioned earlier, Content Engine and Process Engine use different data schema. One of notable differences is not null constraint on all items of step data. When Case Form widget encounters numeric mapped case property (there is a case property with ID that corresponds name of step parameter), it enforces required attribute on resulting internal data model item to be true regardless of setting that has been applied by Case Manager Builder at design time.
4.3 Configuring Case Form widget related pages
Case Form widget related pages need to be configured because they are not automatically registered as case or step related types by Case Manager Client and are not set as default layout pages by Case Manager Builder.
To start rendering your case on the Case Form widget page, follow these steps:
Assuming that the solution has been already created and deployed, create the Case Form related pages by copying the default Case Form pages. Default Case Form pages are created by Case Manager Builder. The copy operation is completed via Case Manager Client's Add Page operation.
Customize new case pages as needed.
The steps above are optional if custom layouts are needed to present user interface for different roles or different tasks. In simple scenarios, you may use default Case Form pages.
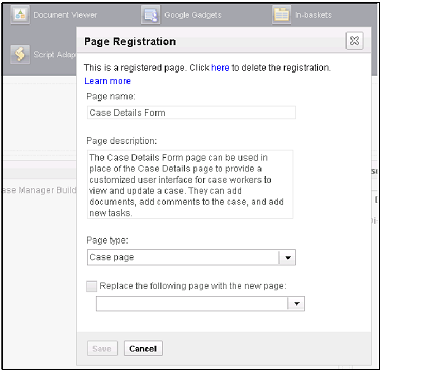
Register the case pages as case related, and step pages as step related:
Navigate to a page via Manage Spaces dialog, click the Actions menu item (Figure 1-9).
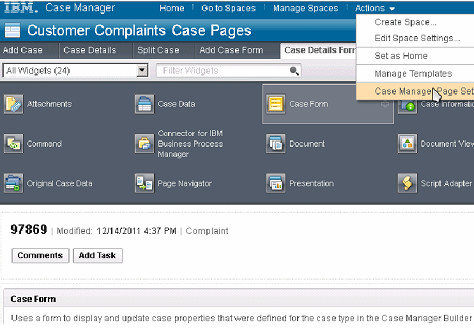
Figure 1-10
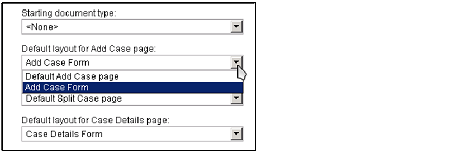
Associate default case layouts, both for Add Case Form (Figure 1-11) and for Case Details Form pages.
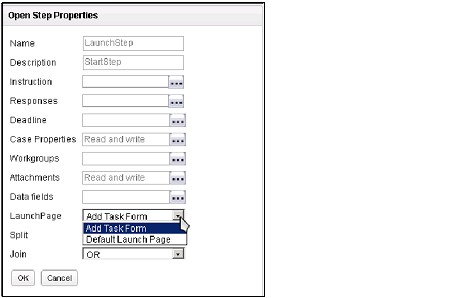
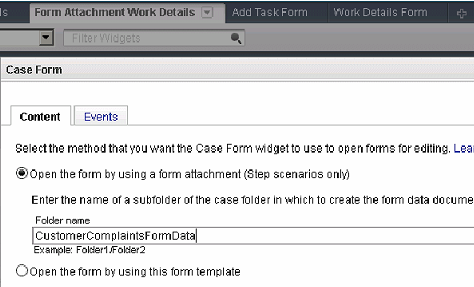
Case Form widget configuration process is described in details in the following documentation:
http://publib.boulder.ibm.com/infocenter/casemgmt/v5r1m0/index.jsp
Look for sections Designing case management applications-> Modifying the default case management client application->Widgets reference->Case Form widget Configuring the Case Form widget to use a form template and Designing case management applications->Modifying the default case management client application->Widgets reference>Case Form widget->Configuring the Case Form widget to use a form attachment.
Important: The form data can be saved only when Case Form widget is configured to open the form as attachment.
Form data needs to be saved as attachment when a form template has fields that cannot be mapped with case properties. This type of configuration is applicable only with step scenarios because attachments are not properties of a case; rather they are task related objects.
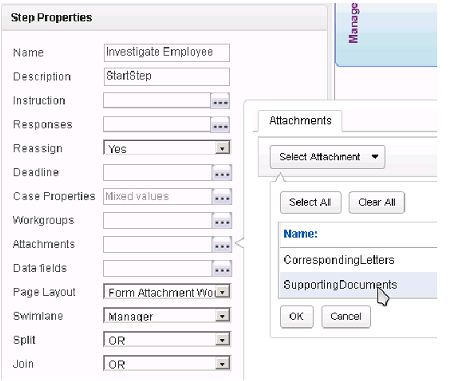
When designing a solution, use Case Manager Builder's Step Editor to sepcify a name for the attachment. Figure 1-13 shows the screen to add attachments.
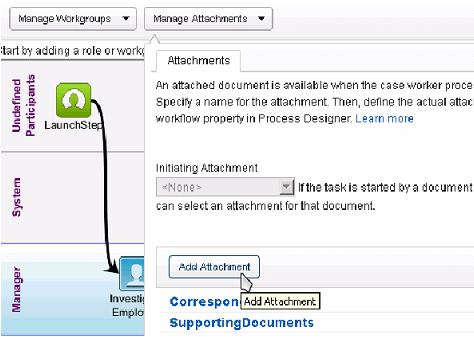
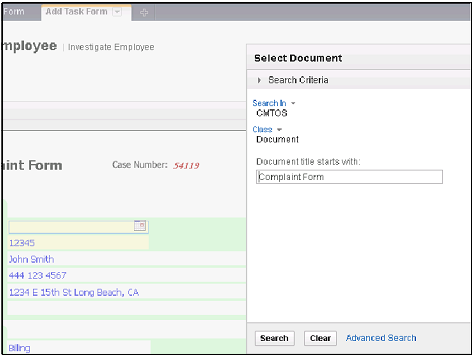
To do so, add a new case. Render the case on the Case Details Form page and add the new task. On the Add Task Form page, use Attachments widget. Search for a form template and add it under one of placeholders you created with help of Step Editor's dialog. See Figure 1-17.
Now that the Case Form widget related pages are registered and set as default layout, Case Form widgets on each page are configured, and attachment is added, the Customer Complaints case is ready for processing with forms. We have replaced the Case Data widget with the Case Form widget.
UID
ibm11281796