Technical Blog Post
Abstract
Seamlessly Accessing On-premise Enterprise Content from the Cloud - Part 2
Body
Facilitating Cloud Applications access Enterprise Content
Enterprises adopting Cloud solutions increased in the past decade due to very good cloud features like self-serviceability, flexibility/elastic resource allocation, in-built fault tolerance etc., However, the most prominent scenario is the Hybrid Cloud where applications on public cloud commonly called system of engagement (SOE) accessing on-prem/intranet/behind-firewall repositories (system of records). In the same context, the remaining section of the blog will cover an easy to understand hybrid cloud integration scenario.
The scenario is to access document content stored in an on-prem CMIS compliant ECM repository and email the content to Gmail. In this integration, we are going to leverage IBM App Connect a cloud integration platform.
The first step is to configure a Secure Connector to access the ECM repository behind the firewall.
Cloud: Open a browser and navigate to https://designer.appconnect.ibmcloud.com/dashboard - IBM App Connect Professional and select Studio to start the Web Management console
On the left pane of the Production tab, select System >> Secure Connectors >> New Secure Connector. Provide a name and save it. As the objective is to provide a secure connection to the on-prem host, it is required to download the config file and the host OS specific installer from the new secure connection created.
On-Prem: Login to the on-prem host where IBM CMIS is configured with ECM repository, install the downloaded secure connector installer and start it by feeding the config file. This will enable a VPN access to a global AppConnect gateway that maps the connection to our cloud instance. A message "Secure Connector Started Successfully" is flashed when the connection is established successfully.
Cloud: The Web Console Management also shows the status as "RUNNING"
The next step is to build an orchestration flow and deploy to the cloud.
On-prem: Download & install IBM App Connect Studio standalone installer from IBM Fix Central (currently it’s 7.5.2.0-WS-ACP-20180416-0836_H8_64-CUMUIFIX-008.studio ) and build the orchestration flow. For simplicity purpose, in this example we would start the flow with a scheduler that runs every minute, makes a CMIS REST (GET) request to extract document content from the ECM repository and sends the content to an email (Gmail).
From the right pane Activities tab select HTTP >> Get Request drag and drop on to the canvas to configure it.
To configure the end-point for the Get Request, select "Pickup Endpoint" and create new HTTP connection
As this orchestration would be deployed on to the cloud, select "Remote Server" and provide the IP & port of the hosted CMIS service and repository login credentials
To make sure this endpoint successfully connects to the CMIS server behind firewall, under the "Remote Endpoint configuration" section, it required to provide the App Connect Secure Connector that was created earlier.
Under the Configure section it is required to provide the REST URL. As in our scenario, we are trying to access a document content, the URL format is
<CMIS Contextroot>/browser/<Repository>/root?objectId=<document GUID>&cmisselector=connet
Example: openfncmis/browser/NexusDS/root?objectId=idd_3F092D96-A2D5-4628-9069-E77C8C92C2CF&cmisselector=content
It is required to map the Body of the Get Request to an orchestration variable. So, under the Map Outputs selection, create a new output variable and map it as below
This completes the Get Request configuration. To configure the email node, again from the right pane, Activities tab drag drop the "Send Email" node on to the canvas and create a new Email endpoint and provide the SMTP server details from where the email has to be sent
Under the Configure section of the Send Email node, provide the obvious details like To, CC, From, subject etc., Map the Orchestration variable that we created earlier holding the Get Request body to the email body variable
This completes the configuration and the final orchestration flow looks as below and can be tested by executing it from the right pane "Verify" tab. Finally, the "Publish Project" from the tool bar will deploy the orchestration into cloud
Cloud: Navigate to castiron.ibmcloud.com to open the App Connect Web Management Console and the deployed project should be visible. Start the orchestration with the control buttons that are available and status messages are logged to show the progress.
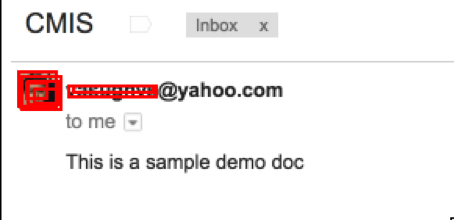
Finally, verify the email that contains the document content from the ECM repository.
To conclude, this approach could be extended for any CMIS REST operation to build a successful hybrid-cloud solution accessing content from an on-prem ECM repositories.
UID
ibm11280686


