Technical Blog Post
Abstract
Building FileNet usage reports with cognos Part 2
Body
In the first entry you had a little introduction on background searches, with the sample code now you are able to create your own search functions a continue with this part of the tutorial. In this entry i'll show you the code for the remaining search functions and how to create the datasource to our FileNet database on Cognos Analytics.
Put the remaining dimensions together
This section of the article will cover all the remaining dimensions but just a quick review, it won’t cover the detailed process as we did with the class dimension because you are already familiar with it. Before we start, let’s wrap-up the process:
- Design your data model.
- Code your own search functions if you need them.
- Create the search functions on FileNet and configure the code module.
- Create the background search template and background search result.
- Write the appropriate query to meet your business needs.
- Execute the search template and create the search sweep.
- Verify the data on the database.
Folder Dimension
The logic for the evaluate function is similar to the one we used on class dimension, the major difference to build hierarchy of folder and documents is that documents can have one parent and one child, the folders on the other hand can have multiple childs and multiple parents but for this case we are just considering it will be the same as documents.
The function will take the document object as input parameter and then we will retrieve the ReferentialContainmentRelationshipSet that will return all the relationships between the folders and that document. Then, iterate all the set and retrieve the tail from the ReferentialContainementRelationship which is the folder.
Listing 7 Inside FolderPopulationHandler Part 1
public Object evaluate(CmSearchFunctionDefinition sfd, Object[] param)
{
CmAbstractPersistable cap = null;
ObjectStore os = sfd.getObjectStore();
Document doc = Factory.Document.fetchInstance(os, (Id)param[0], null);
ReferentialContainmentRelationshipSet rcrs = doc.get_Containers();
if (!rcrs.isEmpty())
{
Iterator it = rcrs.iterator();
while (it.hasNext())
{
ReferentialContainmentRelationship rcr = (ReferentialContainmentRelationship)it.next();
Folder f = (Folder)rcr.get_Tail();
f.refresh();
cap = findFolder(os, f.get_PathName());
Having the folder, we can verify the existence on the Folder Dimension, before we finish with the evaluate functions, lets check the findFolder function first. Since the name of the folders its not unique because you can find folders with the same name at different levels of the hierarchy, we need another property to validate the existence of the folder on the dimension, you can use the property that contains the id of the last level of the hierarchy or even the path, if you use the id try to follow the same logic we used on the class dimension.
Listing 8 Inside FolderPopulationHandler Part 2
public CmAbstractPersistable findFolder(ObjectStore objectStore, String path)
{
CmAbstractPersistable userObj = null;
String useQuery = "SELECT Id FROM DIMFolder WHERE FolderPath = '" + path + "'";
SearchSQL sql = new SearchSQL(useQuery);
SearchScope ss = new SearchScope(objectStore);
IndependentObjectSet ios = ss.fetchObjects(sql, null, null, Boolean.valueOf(false));
IndependentObject io = null;
Iterator iter = ios.iterator();
if (iter.hasNext())
{
io = (IndependentObject)iter.next();
Id id = io.getProperties().getIdValue("Id");
userObj = Factory.CmAbstractPersistable.getInstance(objectStore, "DIMFolder", id);
}
return userObj;
}
Listing 9 Inside FolderPopulationHandler Part 3
Back on the evaluation function, you notice that if the findFolder function didn’t found an entry, it will retrieve the hierarchy related to that folder using the same logic we used before but instead using “document” as the level 1 ancestor we’ll use root (“/”).
if(cap==null)
{
cap = Factory.CmAbstractPersistable.createInstance(os, "DIMFolder");
cap.getProperties().putValue("FolderName", f.get_FolderName());
cap.getProperties().putValue("FolderId", f.get_Id());
cap.getProperties().putValue("FolderPath", f.get_PathName());
int depth = 1;
Folder temp = f;
while(!temp.get_PathName().equals("/"))
{
depth++;
temp = temp.get_Parent();
}
for(int i=5;i>0;i--)
{
if(i >= depth)
{
cap.getProperties().putValue("Level" + String.valueOf(i) + "AncestorID", f.get_Id());
cap.getProperties().putValue("Level" + String.valueOf(i) + "AncestorName", f.get_FolderName());
}
else
{
f = f.get_Parent();
cap.getProperties().putValue("Level" + String.valueOf(i) + "AncestorID", f.get_Id());
cap.getProperties().putValue("Level" + String.valueOf(i) + "AncestorName", f.get_FolderName());
}
}
cap.save(RefreshMode.REFRESH);
}
}
}
return cap;
}
Date Dimension
The date dimension is one of the easiest to build, you have two choices here, you can use the population handler as we are doing on this article to populate only the needed dates or you can create a batch application using the API to fill a range you are interested in for example 2006 to 2016, that way your search function will only validate the date already exists since all the possible dates will be already on the table.
To populate the properties, you just need to play with the Date object on java the get most of aggregation possibilities.
Listing 10 Inside DatePopulationHandler Part 1
cap = Factory.CmAbstractPersistable.createInstance(os, "DIMDate");
cap.getProperties().putValue("DayDate", d);
cap.getProperties().putValue("MonthKey", String.valueOf(cal.get(Calendar.YEAR)) + String.valueOf(cal.get(Calendar.MONTH)));
cap.getProperties().putValue("MonthNumber", cal.get(Calendar.MONTH) + 1);
cap.getProperties().putValue("QuarterKey", String.valueOf(cal.get(Calendar.YEAR)) + String.valueOf(((cal.get(Calendar.MONTH) - 1) / 3) + 1));
cap.getProperties().putValue("Quarter", ((cal.get(Calendar.MONTH) - 1) / 3) + 1);
cap.getProperties().putValue("Year", cal.get(Calendar.YEAR));
cap.getProperties().putValue("DayofWeek", cal.get(Calendar.DAY_OF_WEEK));
cap.getProperties().putValue("DayofMonth", cal.get(Calendar.DAY_OF_MONTH));
cap.getProperties().putValue("DaysinMonth", DaysinMonth(cal.get(Calendar.MONTH)+1, cal.get(Calendar.YEAR)));
cap.getProperties().putValue("DayofYear", cal.get(Calendar.DAY_OF_YEAR));
cap.getProperties().putValue("WeeksofMonth", cal.get(Calendar.WEEK_OF_MONTH));
cap.getProperties().putValue("WeeksofYear", cal.get(Calendar.WEEK_OF_YEAR));
cap.getProperties().putValue("Month", new SimpleDateFormat("MMMM").format(cal.getTime()));
cap.getProperties().putValue("WeekDay", new SimpleDateFormat("EEEE").format(cal.getTime()));
cap.save(RefreshMode.REFRESH);
logger.debug(cap.get_Id());
return cap;
}
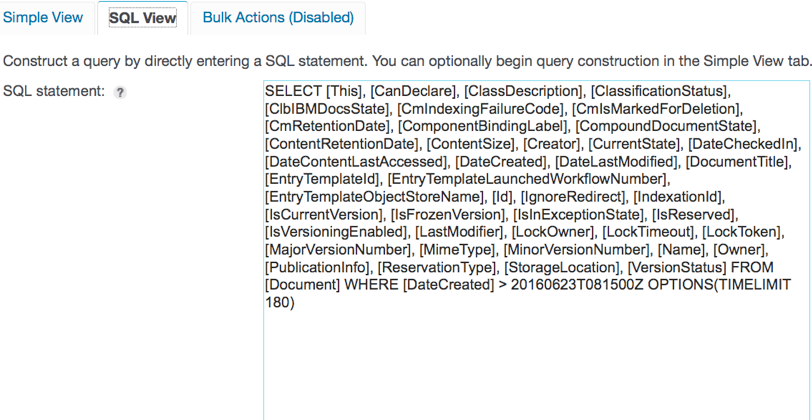
The best way to verify if a date exists is searching the date itself, but in FileNet you need a specific format in order to query it: yyyyMMdd'T'HHmmss'Z'. You can see a example of this if you create a search on ACCE on the simple view and then move to the SQL View.
Figure 23. Filtering with dates
Listing 11 Inside DatePopulationHandler Part 2
public CmAbstractPersistable findDate(ObjectStore objectStore, Date d) throws ParseException
{
CmAbstractPersistable userObj = null;
String useQuery = "SELECT Id FROM DIMDate WHERE DayDate = " + new SimpleDateFormat("yyyyMMdd'T'HHmmss'Z'").parse(d.toString());
SearchSQL sql = new SearchSQL(useQuery);
SearchScope ss = new SearchScope(objectStore);
IndependentObjectSet ios = ss.fetchObjects(sql, null, null, Boolean.valueOf(false));
IndependentObject io = null;
Iterator iter = ios.iterator();
if (iter.hasNext())
{
io = (IndependentObject)iter.next();
Id id = io.getProperties().getIdValue("Id");
userObj = Factory.CmAbstractPersistable.fetchInstance(objectStore, "DIMDate", id, null);
}
return userObj;
User Dimension
The user dimension takes the creator of the document as input and retrieve the id, name and email. To validate the existence of the user in the dimension we use its id, as i mentioned before you can extend this dimension taking attributes from the LDAP if you need so.
Listing 11 Inside UserPopulationHandler
public CmAbstractPersistable findUser(ObjectStore objectStore, String user)
{
CmAbstractPersistable userObj = null;
String useQuery = "SELECT Id FROM DIMUser WHERE UserId = '" + user + "'";
SearchSQL sql = new SearchSQL(useQuery);
SearchScope ss = new SearchScope(objectStore);
IndependentObjectSet ios = ss.fetchObjects(sql, null, null, Boolean.valueOf(false));
IndependentObject io = null;
Iterator iter = ios.iterator();
if (iter.hasNext())
{
io = (IndependentObject)iter.next();
Id id = io.getProperties().getIdValue("Id");
userObj = Factory.CmAbstractPersistable.getInstance(objectStore, "DIMUser", id);
}
return userObj;
}
When you are done, go to your class definition template and edit it. Replace the old query with the new query that uses all of the functions
Building the package
From this point until the end of this article we will be working only Cognos, and FileNet database to create the report package and the report itself.
Creating the Object Store data source
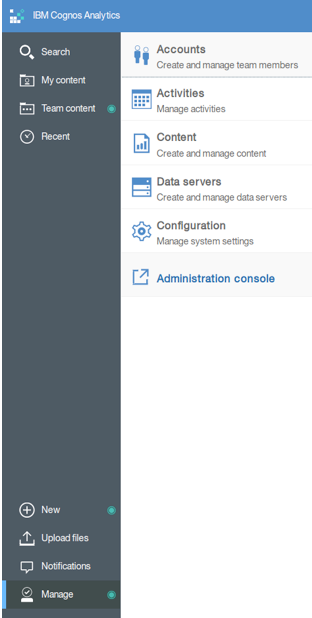
Login into your Cognos Analytics environment, on the left pane click Manage and select Administration Console.
Figure 24. Administration Console
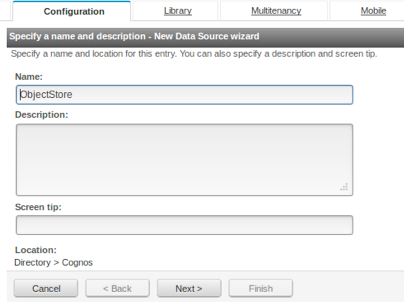
On the configuration tab, click on the new data source icon
Figure 25. New Data Source creation Part 1

Fill the name field and move to the next step.
Figure 26. New Data Source creation Part 2
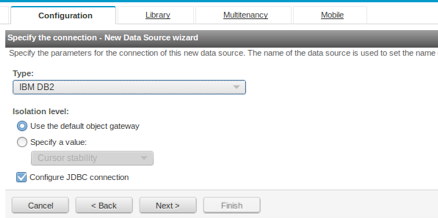
select IBM DB2 and move to the next step.
Figure 27. New Data Source creation Part 3
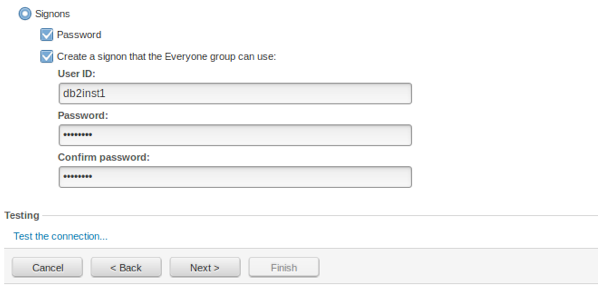
On the next windows just configure the user and password to connect to the Object Store database.
Figure 28. New Data Source creation Part 4
Now put the server name or ip, port number and the database name. When you are done click the test link and then the test button.
Figure 29. New Data Source creation Part 5
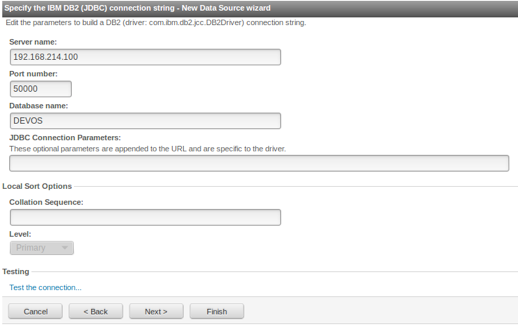
If Cognos was able to reach your database, you will get Succeeded.
Figure 30. New Data Source creation Part 6

UID
ibm11280908