Technical Blog Post
Abstract
Maximo and WebSphere 8.5.5 - Did you forget the plug-in configuration?
Body
Scenario: You've completed downloading and installing IBM WebSphere Application Server 8.5.5, IBM HTTP Server (IHS) for IBM WebSphere Application Server, and Web Server Plug-Ins for IBM WebSphere Application Server. You have everything up and running. Maximo is deployed and want to use the web server to access Maximo or load balance to multiple JVMs, so why isn't it working? Why are you receiving "Page Not Found" errors? In most cases, it's likely a key step was missed that is automated with the Middleware\Maximo 7.5 installation when using WebSphere 7. That step is the plug-in configuration.
During the install of WebSphere 8.5.5, you might have only installed the Application Server, HTTP Server and the plug-in files. However, you also need to install the WebSphere Customization Toolbox, which contains the configuration tool for the web server plug-in. Here we go over the installation, and how to configure the plug-in.
Configuring the WebSphere Plug-in for Maximo
1. If you haven't already, the first step is to install the WebSphere Customization Toolbox. Use IBM Installation Manager. The package is contained in the WebSphere Supplemental Repositories.
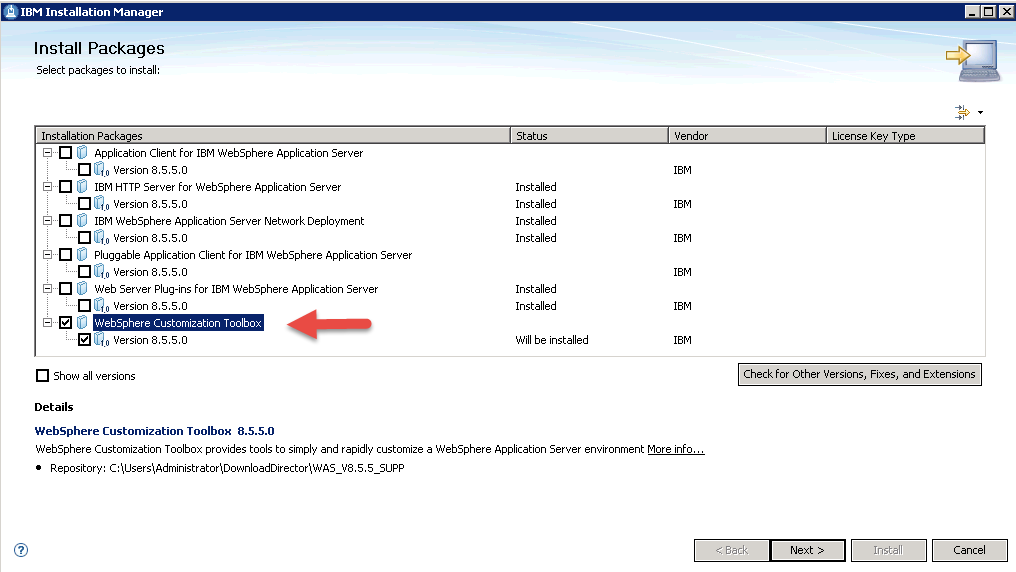
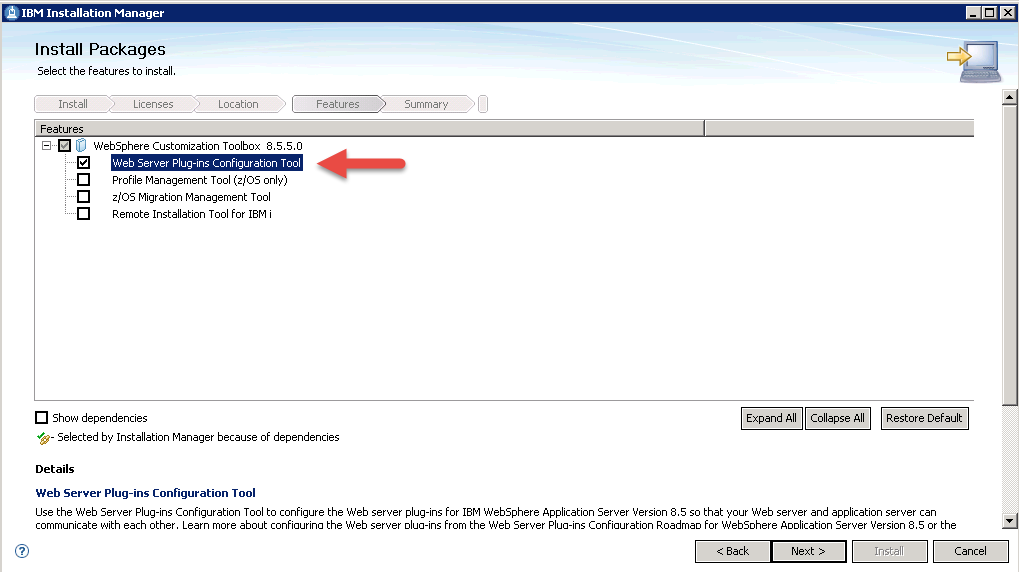
2. Click through the installation screens, reading and accepting the agreements and choosing your install path. Once you reach the screen showing the packages to install, select Web Server Plug-ins Configuration Tool. Click Next and Install to finish the install of the Plug-in Configuration Tool.
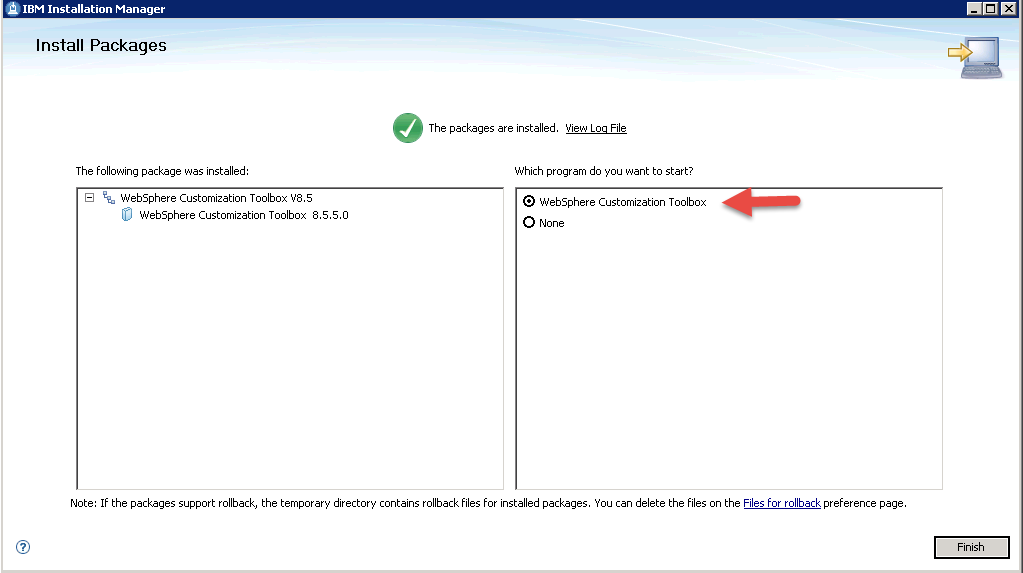
3. When the installation finishes click select WebSphere Customization Toolbox, and then Finish, to launch the tool.
4. The toolbox loads. Click Web Server Plug-ins Configuration Tool, then click Launch Selected Tool.

5. You are now brought to the Plug-ins Configuration Page. In the 'Web Server Plug-ins Run time Locations' section click on Add. On the input page give your plug-in a name (for example, IHS_plug-in) and point the Location to the Plug-ins directory installed with WebSphere. Click Finish.

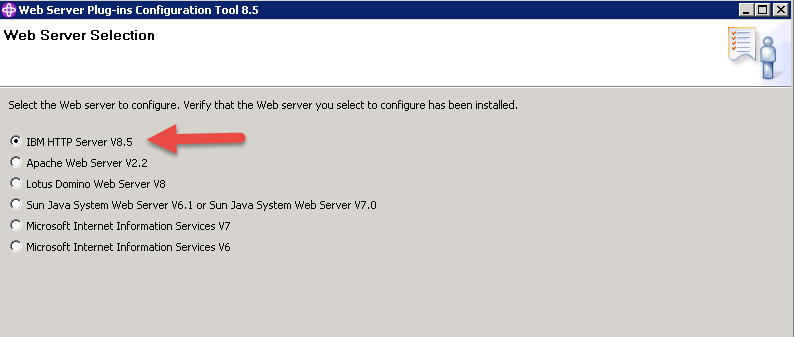
6. Once step 5 is completed, under Web Server Plug-in Configurations click on Create. You are prompted to select the web server you wish to configure on the first screen. Choose IBM HTTP Server 8.5 and click Next.
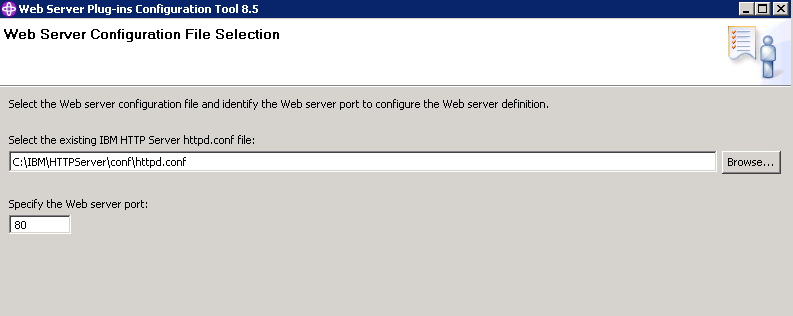
7. On this point to your IBM HTTP Server configuration file (httpd.conf) and specify the port your web server is going to listen on and click next.
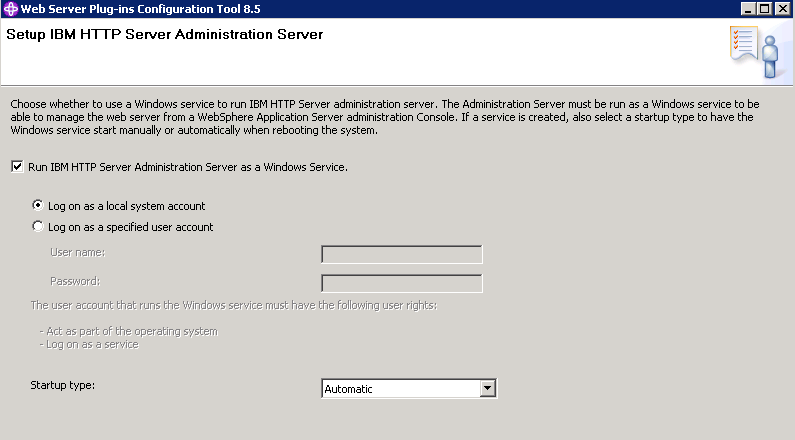
8. If you want to set up the Administration Server, check the box Setup IBM HTTP Server Administration Server and specify the port. Default is 8008. Click Next. You can also create a user name and password on this screen, or leave it open and configure authentication later.

9. Specify whether you want to IBM HTTP Server Administration Server to run as a service, the Windows user account to start the service, and if you want it to start automatically or manual.
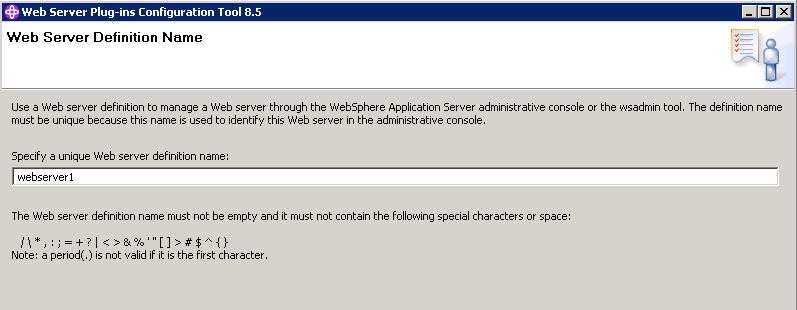
10. On the Web Server Definition Name screen, specify your webserver name. If you have already created this in WebSphere, this name matches what is listed under web servers in the WebSphere console. In our case we chose webserver1. If no web server exists in the WebSphere console, you can enter another name.
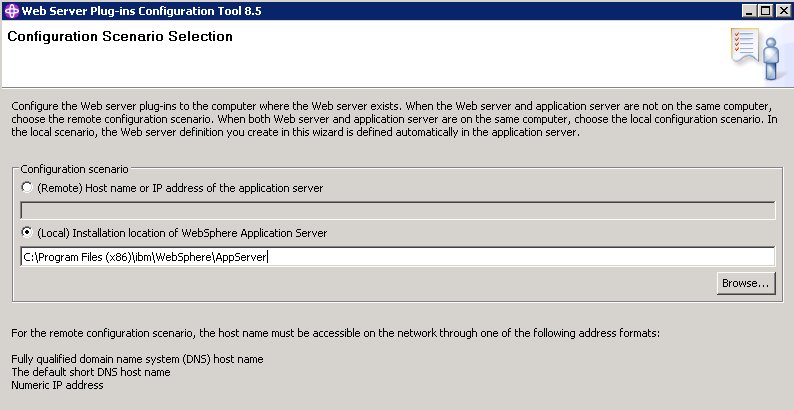
11. On the 'Configuration Scenario Selection' screen, choose if you are doing a local configuration or a remote. If your Application Server exists on a different machine then your web server, select Remote. Enter in the Host Name or IP of the Application Server. For this example, our Application server is on the same system. We chose Local and pointed to the Application server directory.
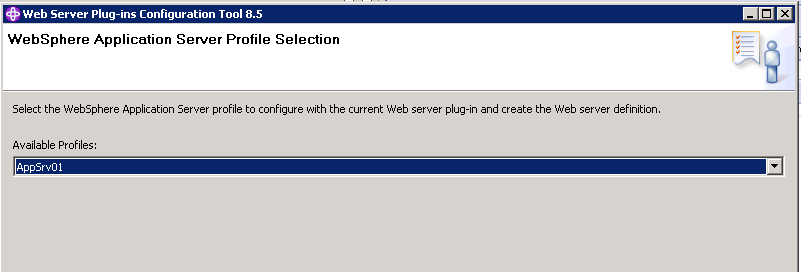
12. On the last screen of the configuration choose your Application Server profile, click Next. Review the information. After that, click Configure.
13. Your configuration Wizard screen should now look like you see here. You can close this out, and continue with the last step of the configuration.

14. The last step to the profile configuration is to run the script created from the configuration wizard above. From your IBM\WebSphere\Plugins\Bin directory search for the file configurewebserver1.bat. You will need to copy this file to your application server and put it in the IBM\WebSphere\AppServer\bin folder. Once copied run the file from the command prompt inputting your WebSphere admin username and password. Once done the output will show 'Configuration save is complete' If you named your web server something different the batch file name reflects the name you chose, not webserver1.

Your configuration of the webserver plug-in for Maximo is now complete, if it didn't already exist you will see the webserver1 you configured under the 'Web Servers' section in your Application Server console. From here on, when you deploy the ear be sure to deploy a virtual host containing your web server port and mapped to the web server and your application server. You will now be able to direct traffic to Maximo via the Web Server port defined.
UID
ibm11133031