Technical Blog Post
Abstract
Installing Maximo 7.6 to Oracle WebLogic 12.1.3.0
Body
There are five parts to installing Maximo to WebLogic.
Table of Contents
- Install Oracle (R) WebLogic
- Install Maximo 7.6.1
- Configure Oracle(R) WebLogic
- Create MXServer, JMS and email listener queues
- Configure Maximo Asset Management 7.6
Part 5. Deploy the Maximo ear files to WebLogic
Parts 1 and 1.5 are below, nice and short. Since IBM includes WebSphere 8.5.5.3 with Maximo 7.6, the Configuration Tool configures it for Maximo, and you can also create WebSphere clusters with the Configuration Tool. The Configuration Tool does not configure WebLogic.

Therefore, the focus of this articles is configuring WebLogic and deploying Maximo 7.6. I'm made a couple of assumptions before preparing the process:
- You will be creating a Maximo domain.
- You will install Maximo to the Administration Server in that domain.
If you already have a WebLogic environment, you will likely not follow those steps. For example, you wouldn't install Maximo to your Admin server, but instead create a managed server or cluster. The key parts for you will be creating the Maximo server (MXServer) and JMS queues, and configuring Maximo.
Before configuring WebLogic for Maximo, install WebLogic 12c using the latest version of Oracle JDK 8, which is required for Maximo 7.6.
Using the Launchpad and IBM Installation Manager, install Maximo 7.6. Do not install WebSphere Application Server. When complete, do not launch the Configuration Tool.
2.1.2. Create Domain
Change domain name to maximoserver. Click Next.
2.1.3 Templates
Keep only Basic WebLogic Server Domain - 12.1.3.0 [wlserver] * selected. Click Next.
2.1.4 Administrator Account
Enter a username and password. (I kept the default weblogic name and used Manager1 for password).
2.1.5 Domain Mode and JDK
Select Production. WebLogic will choose the JDK that was used to install it. As I said yesterday, make sure that the JDK is Oracle HotSpot. It must be JDK 1.7 because that is what Maximo 7.6 uses.
2.1.6 Advanced Configuration
I checked off Administration Server here. It is not necessary to do so.
2.1.7 Configuration Summary
Look it over, make any changes that are needed, and click Create.
2.1.8 Configuration Progress
2.1.9 Configuration Successful
Do not check Start Admin Server. Click Finish.
2.2.1 (Oracle (R)Database only ) Copy the oraclethin.jar file.
Windows: Copy the oraclethin.jar file from the administrative workstation (default C:\IBM\SMP\maximo\applications\maximo\lib\) to the Oracle server directory (using install location above, C:\Oracle\Middleware\Oracle_Home\wlserver\server\lib).
Unix: Copy the oraclethin.jar file from the administrative workstation (default /opt/IBM/SMP/maximo/applications/maximo/lib/) to the Oracle server directory (using install location above, /home/oracle/Oracle/Middleware/Oracle_Home/wlserver/server/lib).
2.2.2 Update setDomainEnv.cmd|sh.
Navigate to Windows: C:\Oracle\Middleware\Oracle_Home\user_projects\domains\maximoserver\bin Unix: /home/oracle/Oracle/Middleware/Oracle_Home/user_projects/domains/maximoserver/bin
Right-click and edit (do not double-click) Windows: setDomainEnv.cmd or Unix: setDomainEnv.sh.
Using your text editor, search for and replace the following entries:
Windows (Oracle Database only) Search for
if NOT "%EXT_PRE_CLASSPATH%"=="" (
if NOT "%PRE_CLASSPATH%"=="" (
set PRE_CLASSPATH=%EXT_PRE_CLASSPATH%;%PRE_CLASSPATH%
) else (
set PRE_CLASSPATH=%EXT_PRE_CLASSPATH%
Update the last set PRE_CLASSPATH to include the parameters below
set PRE_CLASSPATH=%WL_HOME%\server\lib\oraclethin.jar
Unix (Oracle Database only) Search for
if [ "${EXT_PRE_CLASSPATH}" != "" ] ; then
if [ "${PRE_CLASSPATH}" != "" ] ; then
PRE_CLASSPATH="${EXT_PRE_CLASSPATH}${CLASSPATHSEP}${PRE_CLASSPATH}"
export PRE_CLASSPATH
else
PRE_CLASSPATH="${EXT_PRE_CLASSPATH}${CLASSPATHSEP}$%WL_HOME%/server/lib/oraclethin.jar"
export PRE_CLASSPATH
fi
fi
Update the last PRE_CLASSPATH to include the parameters below
PRE_CLASSPATH="${EXT_PRE_CLASSPATH}${CLASSPATHSEP}$%WL_HOME%/server/lib/oraclethin.jar"
Increase the Java Heap parameters by searching for MEM_ARGS and setting the parameters:
Search for and change the second instance
Windows:
WLS_MEM_ARGS_64BIT=-Xms256m -Xmx512m
to
WLS_MEM_ARGS_64BIT=-Xms4096m -Xmx4096m
Unix:
WLS_MEM_ARGS_64BIT=-Xms256m -Xmx512m
to
WLS_MEM_ARGS_64BIT=-Xms4096m -Xmx4096m
Search for and change the first instance
Windows:
set MEM_PERM_SIZE_64BIT=-XX:PermSize=128m
to
set MEM_PERM_SIZE_64BIT=-XX:PermSize=512m
Unix:
MEM_PERM_SIZE_64BIT="-XX:PermSize=128m"
to
MEM_PERM_SIZE_64BIT="-XX:PermSize=512m"
Increase Permanent Generation setting for Garbage collection (JDK 1.7 only)
Search for and change the first instance
Windows:
set MEM_MAX_PERM_SIZE_64BIT=-XX:MaxPermSize=256m
to
set MEM_MAX_PERM_SIZE_64BIT=-XX:MaxPermSize=512m
Unix:
MEM_MAX_PERM_SIZE_64BIT="-XX:MaxPermSize=256m"
to
MEM_MAX_PERM_SIZE_64BIT="-XX:MaxPermSize=512m"
Windows only:
Search for set JAVA_OPTIONS=%JAVA_OPTIONS% %JAVA_PROPERTIES%. Insert an option directly after this string, as follows:
-Dcom.sun.xml.namespace.QName.useCompatibleSerialVersionUID=1.0
The entry looks like this example when complete:
set JAVA_OPTIONS=%JAVA_OPTIONS% %JAVA_PROPERTIES% -Dcom.sun.xml.namespace.QName.useCompatibleSerialVersionUID=1.0 -Dwlw.iterativeDev=%iterativeDevFlag% -Dwlw.testConsole=%testConsoleFlag% -Dwlw.logErrorsToConsole=%logErrorsToConsoleFlag%
Save and close the setDomainEnv.cmd|.sh file.
2.2.3 Verify settings by starting Oracle WebLogic Server. To ensure that the edits that you made to the previous Oracle WebLogic Server files were accurate, start the Oracle WebLogic Server.
Start a command prompt at C:\Oracle\Middleware\Oracle_Home\user_projects\domains\maximoserver\bin
startWebLogic.cmd
It has completed startup when you see <Notice> <WebLogic Server> <BEA-000360) <The server started in RUNNING mode.>
b.Log in to the WebLogic Administration Console at http://localhost:7001/console with the username and password you set during configuration.
2.2.4. Create a boot.properties file
a. In <weblogic_home>\user_projects\domains\maximoserver\servers\AdminServer, create a directory called \security
Create a text file called boot.properties. In that file, put two lines, for example:
username=weblogic
password=Manager1
When the Admin Server is started, the username and password will be encrypted.
Log in to the WebLogic console
3.1 Create MXServer
In Change Center, click Lock & Edit

In Domain Structure, expand Environment. Click Servers.

In Summary of Servers, click New. For Server name, enter MXServer. For Server Listen Port, enter 7003.

Click Next, then click Finish.
In change Center, click Activate Changes.

3.2 Create Persistent Stores
In Change Center, click Lock & Edit.
In Domain Structure, expand Services and Messaging. Click Persistent Stores.

From the New dropdown menu, select Create FileStore. Enter the following information:
Name: sqinstore
Target: MXServer
Directory: C:\Oracle\Middleware\Oracle_Home\user_projects\domains\maximoserver\filestores (or the location of your choice)
Click OK.
Repeat for three more file stores:
| Name | Target |
|---|---|
| sqoutstore | MXServer |
| cqinstore | MXServer |
| lsnrstore | AdminServer |
In the Change Center, click Activate Changes.

3.3 Create JMS Servers
In Change Center, click Lock & Edit.
In Domain Structure, expand Services, then Messaging. Click JMS Servers.

Click New. Enter the following information:
Name: sqinserver
Persistent Store: sqinstore
Click Next.
Target: MXServer
Click Finish.
Click new sqinserver server
Click Thresholds and Quotas tab
In Bytes Maximum, enter 20% or below of the allotted JVM heap size (838861 bytes for a 4096m JVM).
Click Save.
Repeat for three more JMS Servers:
| Name | Target |
|---|---|
| sqoutserver | MXServer |
| cqinserver | MXServer |
| lsnrstore | AdminServer |
In the Change Center, click Activate Changes

3.4 Create JMS Resources
3.4.1 Create JMS Modules. In Change Center, click Lock & Edit.
On the left, expand Services, then Messaging. Click JMS Modules.

Click New
Name: intjmsmodule
Click Next
Target: MXServer
Check "Would you like to add resources to this JMS system module?" and click Finish
Click New
Name: lsnrjmsmodule
Click Next
Target: AdminServer
Check "Would you like to add resources to this JMS system module?" and click Finish

3.4.2 Create Connection Factories. Click intjmsmodule.
Under Settings for intjmsmodule>Summary of Resources, click New.
Select Connection Factory.
Click Next
Name: intjmsconfact
JNDI Name: jms/maximo/int/cf/intcf
Click Next.
Click Finish.
Click lsnrjmsmodule.
Under Settings for intjmsmodule>Summary of Resources, click New.
Select Connection Factory.
Click Next.
Name: lsnrconfact
JNDI Name: jms/mro/int/lsnr/lsnrcf
Click Next.
Click Finish.
3.4.3 Create JMS Queues. Click JMS Modules, then intjmsmodule. Click New.
Select Queue.
Click Next.
Name: sqin
JNDI Name: jms/maximo/int/queues/sqin
Click Next.
Create a New Subdeployment, which should be populated with sqin.
Click OK.
Target: sqinserver
Click Finish.
Repeat for three more JMS Queues:
| Name | JNDI Name | Target |
|---|---|---|
| sqout | jms/maximo/int/queues/sqout | sqoutserver |
| cqin | jms/maximo/int/queues/cqin | cqinserver |
| cqinerr | jms/maximo/int/queues/cqinerr | cqinserver |
Click JMS Modules, then intjmsmodule. Click New.
Select Queue.
Click Next.
Name: lsnrqueue
JNDI Name: jms/mro/lsnr/qin
Click Next.
Create a New Subdeployment, which should be populated with lsnrqueue.
Click OK.
Target: lsnrserver
Click Finish.
Additional configuration
Under intjmsmodule>Summary of Resources, click the cqin queue
Click the Delivery Failure tab.
Set the redelivery limit to 5.
Set the error destination to cqinerr.
Click Save.
Under intjmsmodule>Summary of Resources, click intjmsconfact.
On the Client tab, change Maximum Messages per Session to -1.
On the Transactions tab, make sure that XA Connection Factory Enabled is checked.
Click Save.
In the Change Center, click Activate Changes
From here, set up the email listener queue as documented in the Installation Guide.
When finished, log out of the Administration Console and stop and restart the WebLogic server.
1. (Oracle (R) Database and Microsoft (R) SQL Server only) Create a Maximo database following the instructions in the Installation guide.
2. Launch the Configuration Tool.

3. Click Define Deployment Environment.

a. For database type, select the type of database you are installing Maximo to. (In this example, I am using Oracle Database 12c.)
b. for Define the Deployment Manager Server host, select WebLogic
c. If you wish, define a default password. It is not required (you can enter individual passwords for each account later).
d. Click Finish.
4. Configure General Product Information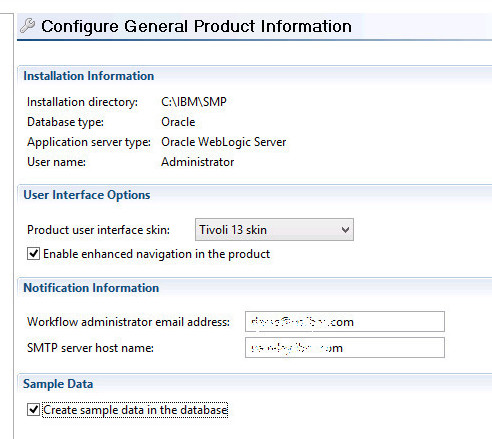
a. (optional) Enter the Workflow administrator email address
b. (optional) Enter the SMTP server host name
c. (optional) Check Create sample data in the database.
d. Click Next.
5. Configure Database
Enter the settings that are correct for your database. (In this example, I am using Oracle Database 12c.) Click Next.
6. Configure Application Security
If you checked Define a default password on the first screen, this will be grayed out. Otherwise, enter the passwords for the administrative users, plus whether you want to Enable restrictive password policy. Click Next.
7. Configure a Base Language
Set your base language here. (I'm opting for English.) Click Next.
8. Add Additional Languages
Check any additional languages you want to add. (I don't.) Click Next.
9. Apply Deployment Operations
I always uncheck all selections, then re-check Validate the configuration properties. It's not necessary, but I want to check the settings after they have been validated to make sure all entries are correct. After they are double-checked, I come back to this screen again and check every box.
While the configuration Tool can populate your Maximo database, it cannot deploy ear files to WebLogic servers.

Ignore that error! The longest wait here is usually database creation.
10. Configuration Operations successful!

Another reminder that you have to deploy the ear files manually.
Part 5. Deploy the Maximo ear files to the WebLogic console
See Technote Deploying the Maximo.ear file to WebLogic 12.1.1
UID
ibm11113843