Technical Blog Post
Abstract
How to Use FileNet Deployment Manager to Migrate IBM Content Collector Email Data
Body
How to Use FileNet Deployment Manager to Migrate IBM Content Collector Email Data
Background
IBM Content Collector (ICC) uses a special data model to store email data. When using the IBM FileNet P8 Content Engine (P8) repository with IBM Content Search Services (CSS), email data is stored in two document classes: ICCMail3 and ICCMailInstance3.
The use of this data model allows email deduplication. The ICCMail3 object contains the email file, attachments, and any unique data across different email copies such as the email subject, sender, and recipients. The ICCMail3Instance3 object contains information pertaining the different copies such as the mailbox ID of the mailbox from which that particular copy is ingested. Each ICCMail3 object contains object references to all the associating ICCMailInstance3 objects. Similarly, all ICCMailInstance3 objects also have an object reference to the corresponding ICCMail3 object.
When using the FileNet Deployment Manager (FDM) to migrate email data, the object references between the ICCMail3 and ICCMailInstance3 objects must also be maintained and migrated.
In the following discussion, we will explore the steps and options required in FDM to migrate ICC email data properly. To keep the discussion simple, we will assume that the document classes in use are the default classes - ICCMail3 and ICCMailInstance3, and the security principal, storage policies, and storage areas are the same between the source object store and target object store.
For other non-email data, such as files, SharePoint, and IBM Connections document, the use of the ICC email data model is not required. Therefore, there is no special consideration when migrating those documents.
Limitations: Documents that are on eDiscovery hold should not be migrated using this method.
Overview of steps:
- Prerequisites
- Prepare environments in FileNet the Deployment Tool
- Assigning alias ID to the target object store
- Prepare source-destination pair
- Create export manifests for the data to be migrated
- Import data
- Verify the migrated data
Prerequisites
User
User should be familiar with the use of Administration Console for Content Platform Engine (ACCE) and FileNet Deployment Manager (FDM)
Security Check
In the destination object store, ensure that the user running FDM has this rights:
- “Modify certain system properties”


Document Classes
Both ICCMail3 and ICCMailInstance3 classes should already exist in the target object store. If they do not already exist, you may create these classes by running the IBM Content Collector > Set-up Tools > P8 Repository Configuration.
If your migration involves sub-classes, those sub-classes should also be created in the target object store before you proceed with the migration steps.
Prepare environments in the FileNet Deployment Tool
Create a new deployment tree in FDM.
- In FDM, select File > New > Deployment Tree.
- Enter a path for the deployment tree.

Create 2 environments in FDM, one for the source object store and one for the destination object store. In the example here, we will use these two object stores:
- Source object store: P852EXOS
- Destination object store P852LDOS
- In FDM, right-click on Environments > New > Environment….
- Provide a name for this environment. In the example, we will use the same name as the object store.

- Then, click Finish.
- Double-click on the environment just created. In the new panel that is opened, click on the CE Connection tab at the bottom.

- Fill out the connection information in the CE Connection tab.

- Click on Test Connection to verify the connection is successful.
- Save the settings.
-
Go back to the Overview tab and click on Retrieve Data for object store, storage policy, storage area.
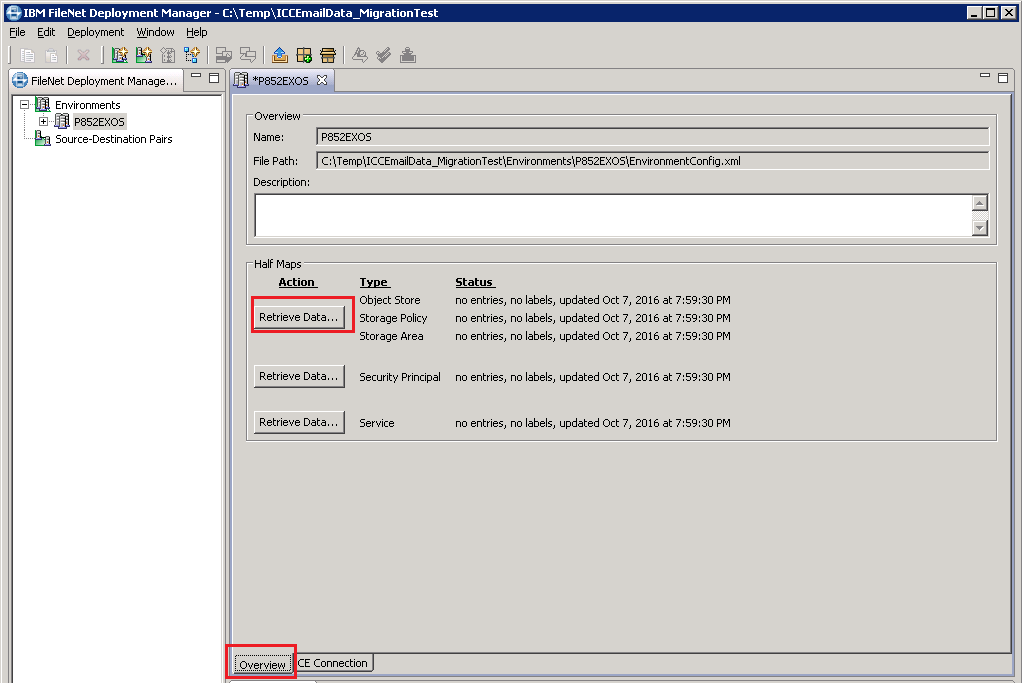

- When it completes, verify that it shows new entries for your object store. The actual number of entries may be different depending on the environment.

- Repeat the steps 1-9 for the destination object store.


Prepare source-destination pair
Create one source-destination pair to map the source and target object stores
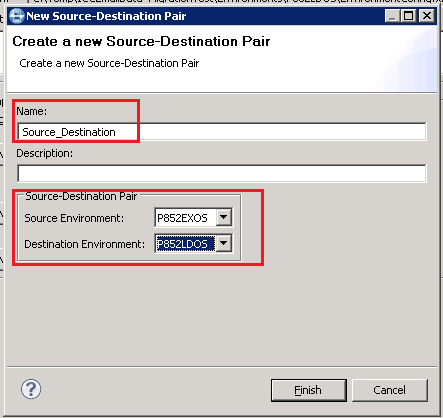
- In FDM, right-click on Source-Destination Pairs, select New > Source-Destination Pair…
- Provide a name for the pair and select the appropriate object store for the source and destination environment. Click Finish.
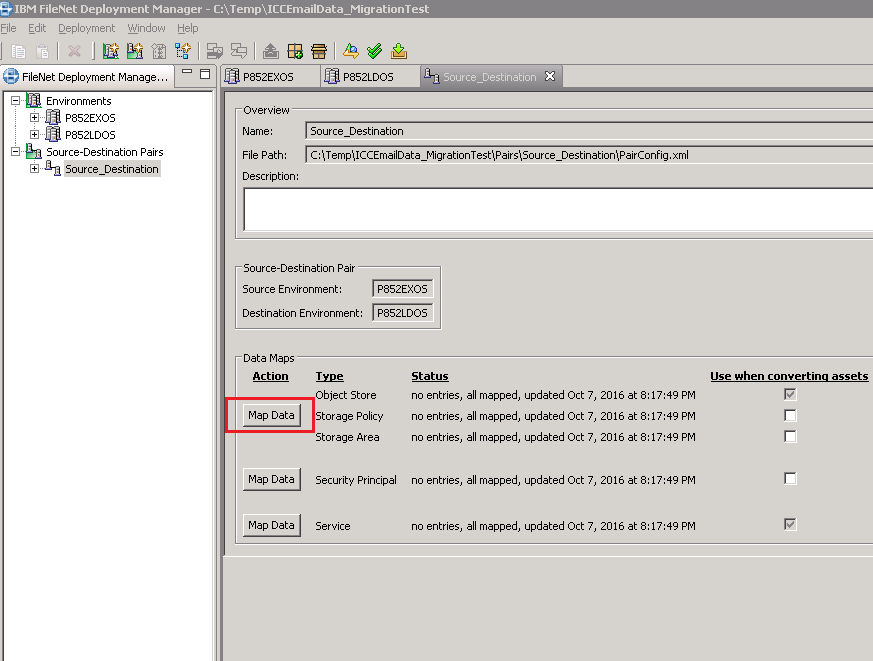
- Double-click on the pair created to open it in the right panel.

- Assuming, the object stores have same security. Uncheck the checkbox for Security Principal.
- Save the settings.
-
Next, click on Map Data button for Object Store, Storage Policy, Storage Area.
.

- After selecting OK, the object store map will automatically be opened. In the object store map, perform 3 steps:
- In the line for the source object store, first blank out the value of its destination name.
- In the line for the destination object store, change the value of its destination name to the source object store.
- Go back to the line for the source destination object store, change the value of the destination name to the source object store.
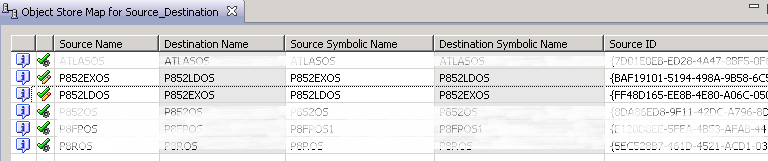
- Save the settings.
Assigning alias ID to the target object store
- In ACCE, go to the source object store.
- Take note of the class ID for ICCMail3 and ICCMailInstance3 class.
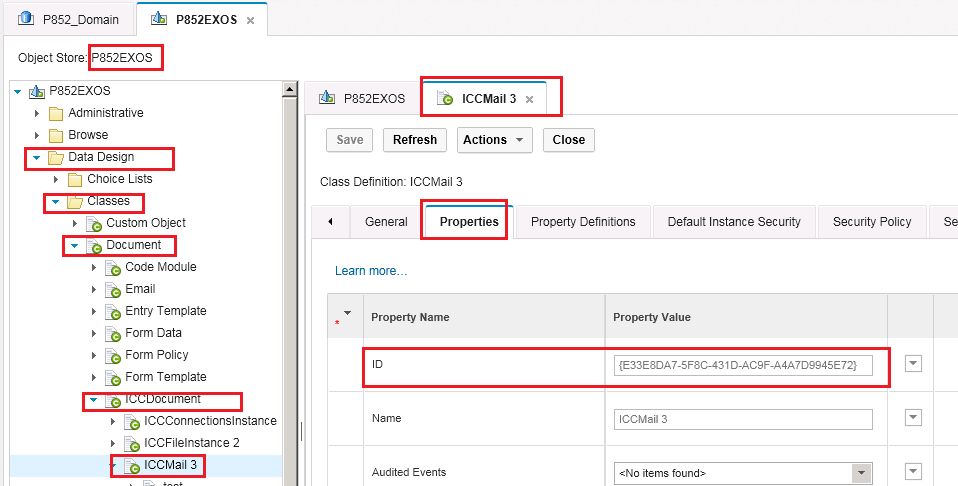

ICCMail3: {E33E8DA7-5F8C-431D-AC9F-A4A7D9945E72}
ICCMailInstance3: {7369F3D0-43FB-4912-B9E9-658F238F99F1} -
Go to the target object store and browse to the ICCMail3 class. Go to the Properties tab and look for Alias ID List.
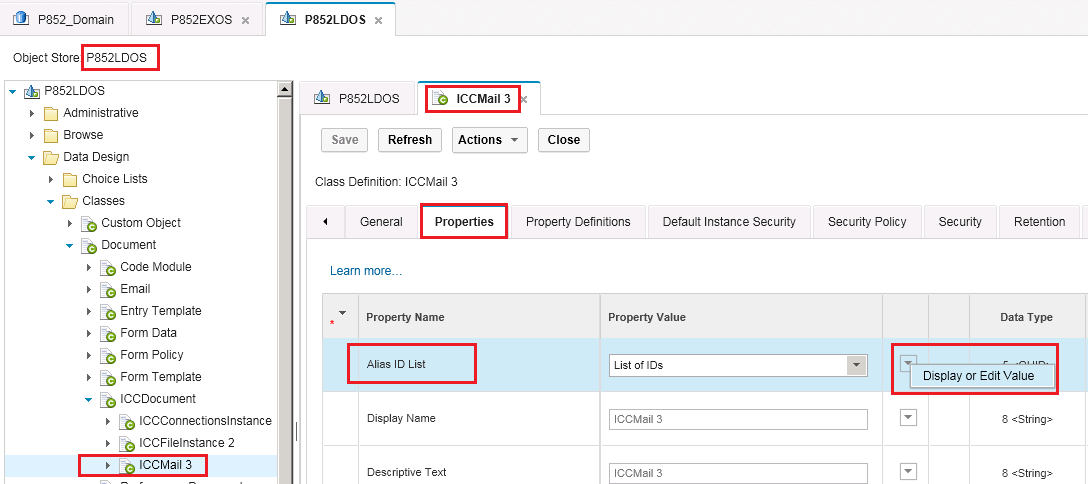
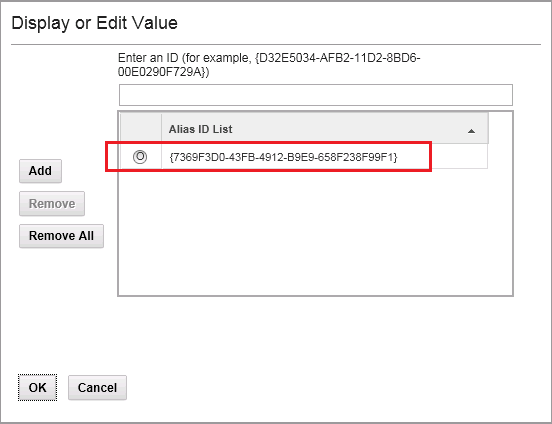
- Click on the arrow in the column next to the property value. Select Display or Edit Value.
- Add the ID for ICCMail3 class from the source object store. Click OK to save.

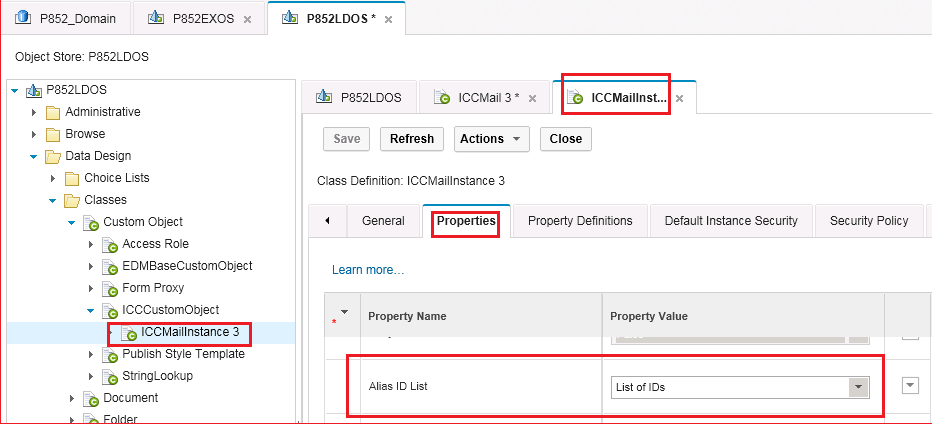
- Similarly, in the target object store, browse to the ICCMailInstance3 class.
Go to Properties tab and look for Alias ID List and add the class ID of ICCMailInstance3 from the source object store.
-
Save your settings.
Create export manifests for the data to be migrated
- In FDM, expand Environments. Expand the source object store P852EXOS.
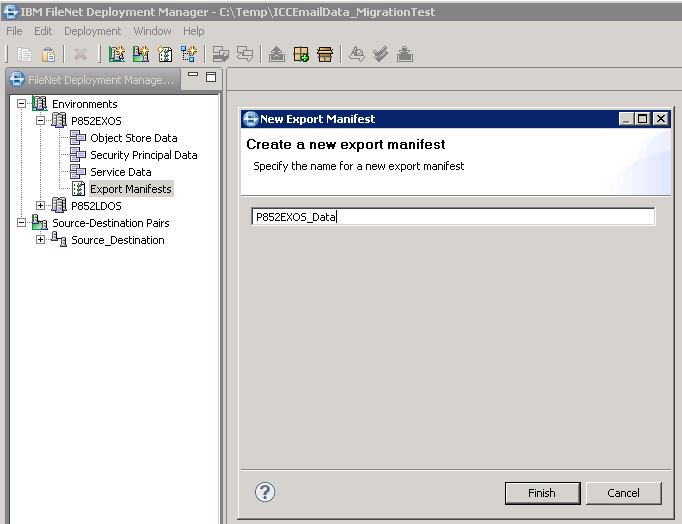
- Under the source object store, right-click Export Manifest, select New > Export Manifests.
- Provide a name and click Finish.
- Double-click on the new manifest file to open it.
- Select the documents you need to export. There are several ways to do this depending on the number of documents you are exporting and what is available to you.
- Follow (I) if you just need to manually select a few documents to export.
- Follow (II) if you have many documents to export and you can use FileNet Enterprise Manager (FEM) to create a manifest export file.
- Follow (III) if you have many documents to export and can only use ACCE.
(I) Add a few documents to export by manually choosing the documents from Browse.
- In the newly created manifest file, click on the green plus sign at the top to add.

- In the Add Assets window, expand to your source object store and select the documents to be migrated.
Click Add and then Close.
By default, ICC email objects can be found in the Unfiled documents.


- Select all documents and then click on the pencil icon on the top to select the include options.

- Save the settings.
-
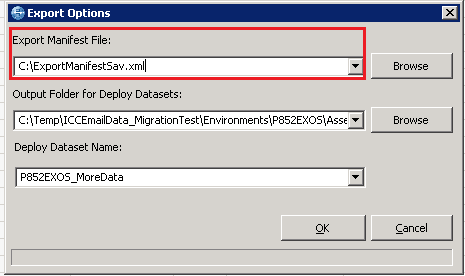
Right-click on the export manifest P852EXOS_Data.xml and select Export. Verify the path and click OK.


(II) Export many documents by using export manifest from FEM
-
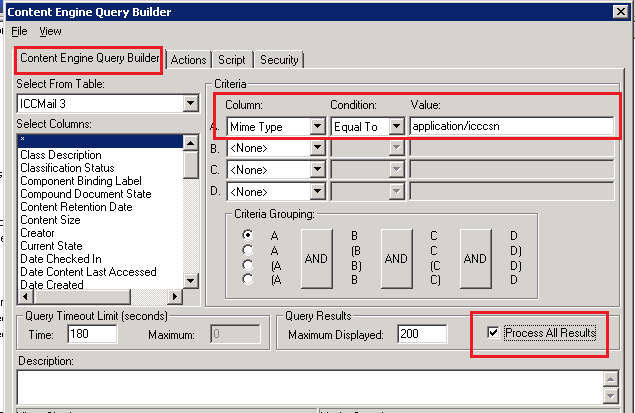
In FileNet Enterprise Manager, perform a search on the documents you need to export. For example, in my search, I wanted to find all documents that were Lotus Domino emails.
Be sure to check “Process All Results” if you expect more than 200 results.
- In the Actions tab, select Add to Export Manifest.
Click OK.

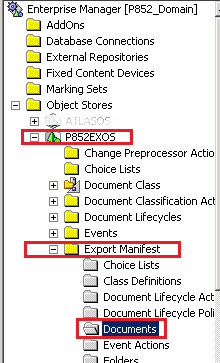
- Then, expand the object store, Export Manifest > Documents, right-click and select Save Export Manifest to File.
- Select a path to save the Export Manifest file.
- Go back to FDM.
In FDM, expand Environments. Expand the source object store P852EXOS.
Expand Export Manifests. - Right-click on the export manifest P852EXOS_Data.xml you created earlier and select Export.
Enter the previous Export Manifest file name you saved in FEM from step (d) here.
Click OK. - A confirmation message will be displayed if the export is successful and it displays how many items are processed.
(III) Export many documents using saved search in ACCE
- In ACCE, create a saved search that will return all the documents that you would like to migrate.

- In FDM, expand Environments. Expand the source object store P852EXOS.
Expand Export Manifests. - Double-click on the export manifest P852EXOS_Data.xml you created earlier to open it.
- Click on the green plus sign at the top to add.
- In the Add Assets window, expand to your source object store and select the saved search to be used for selecting documents.
(to be completed)
Regardless of which way you select the documents to be migrated, by now you should have exported the data into a Deploy Dataset.
Import Data
- In FDM, expand Source-Destination Pairs. Right-click on the Source_Destination pair previously created and select Convert Assets.
- Select Content Engine Deploy Dataset. Click Next.

- Verify the path is correct in the next two screens.


- Click Finish.

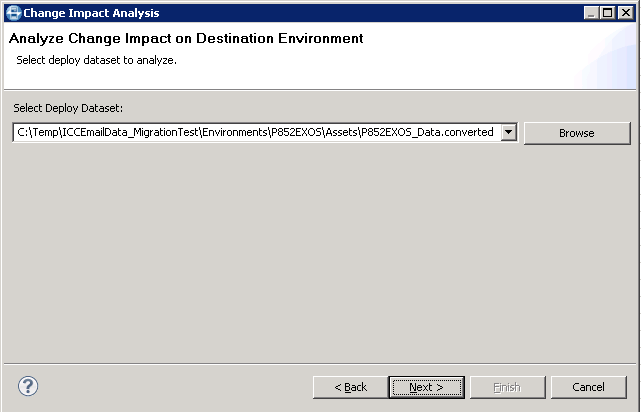
- Right-click on the Source_Destination pair again, and now select Analyze.
- Select Content Engine Deploy Dataset and click Next.

- Verify the path is correct and click Next.
- Select the appropriate option in the next two screens and click Next.


- Click Finish.
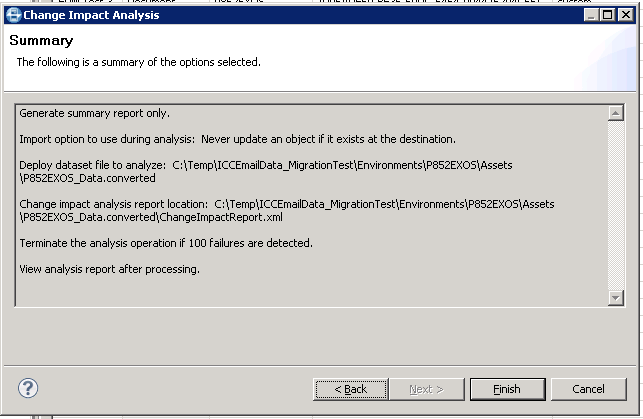


The report may automatically open up.
If there are warnings or errors, examine them if any appropriate actions need to be taken before proceeding.
-
Right-click on the Source_Destination pair again, and now select Import.

-
Verify the path and select Finish.

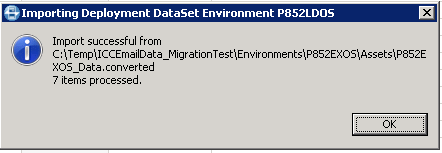
The email data is now migrated to the target object store.
Verify the migrated data
- In ACCE, go to the target object store. Verify the objects are migrated and with the proper content elements and object references.

Each ICCMail3 object should have one or more references in the ICCMailInstanceReference property.
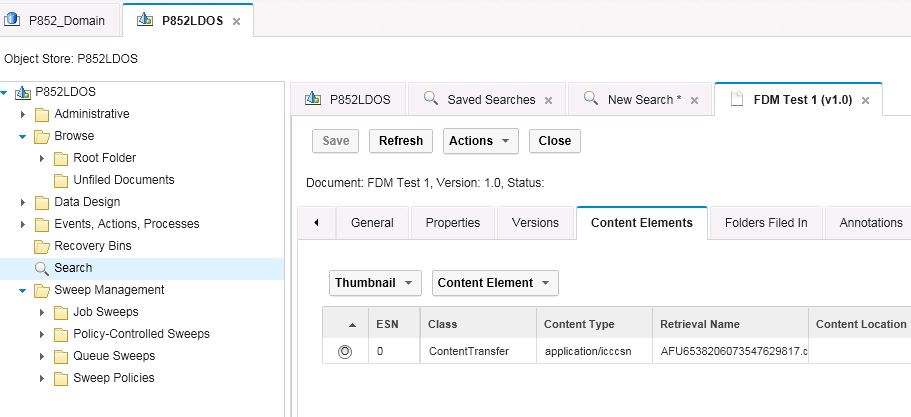
Each ICCMail3 object should have one or more content elements. The first element is always the email file (.csn, .eml, or .msg). The subsequent content elements will be attachment files in the email.
- In EDM, perform a search in the target object store. The migrated objects in the target object store should be indexed and can be found by eDM text search.

UID
ibm11138924