Providing a specification and service level definition for the service

After completing the planning information, you must provide a clear statement about the service levels that consumers of this service can access. The service level definition (SLD) provides access to key information classes that are extracted from the WSDL when it is loaded.
Tip: The SLD was automatically created when you loaded the WSDL to add the service interface, and the named port and endpoint were automatically associated to the version. See Registering the WSDL for a service.

Roles participating in this task

Part 1: Completing the SLD specification

Operations

The Operations user completes the SLD specification.

  1. If necessary, log in as the Operations user. Switch to the Operations view by selecting Operations from the drop-down menu in the banner.

    Operations view

  2. In the Search widget, select a search type of Business Capability and click Search. Click Account eligibility in the results to view the business service details.
  3. In the Detail widget, click the Interface tab.
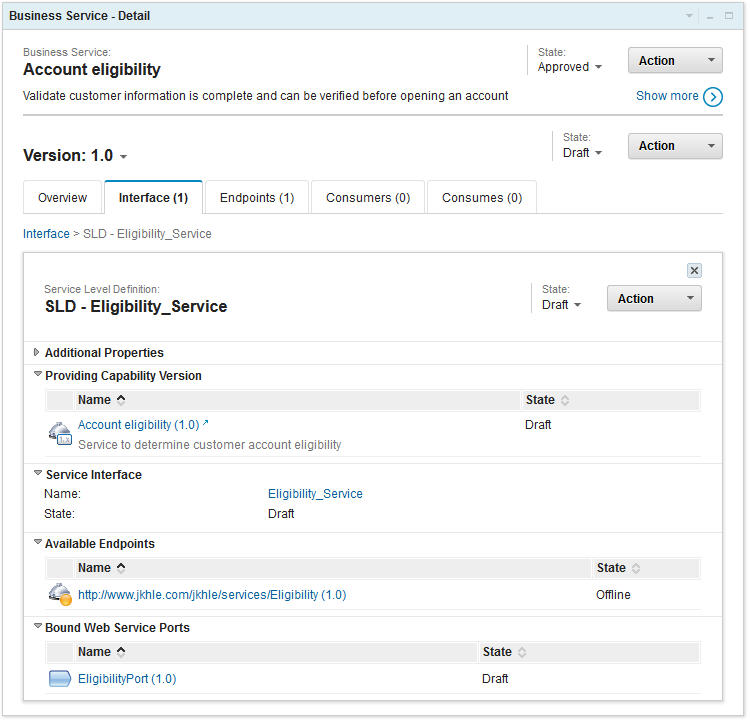
  4. Click SLD – Eligibility_Service to display details of the SLD.

    SLD – Eligibility_Service link

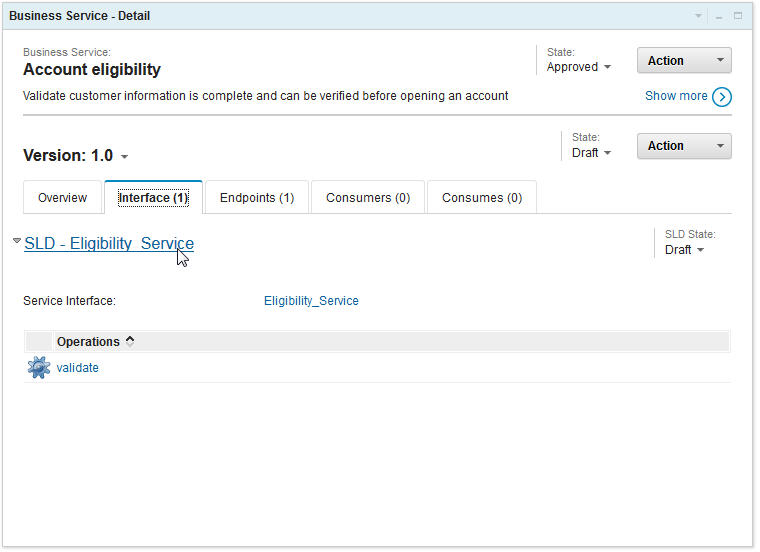
    The details are displayed in an inline card within the Interface tab.

    SLD details in inline card

  5. In the SLD inline card, locate the State drop-down list that is adjacent to the Action menu, and click Draft > Send for Review. Notice that the governance state is now updated to Awaiting Review.

Part 2: Approving the SLD specification

SOA Governance

The SOA Governance user approves the SLD specification.

  1. If necessary, log in as the SOA Governance user. Switch to the SOA Governance view by selecting SOA Governance from the drop-down menu in the banner.

    SOA Governance view

  2. In the Search widget, select a search type of Business Capability and click Search. Click Account eligibility in the results to view the business service details.
  3. In the Detail widget, click the Interface tab.
  4. Click SLD – Eligibility_Service to display details of the SLD within an inline card on the Interface tab.
  5. In the SLD inline card, locate the State drop-down list that is adjacent to the Action menu, and click Awaiting Review > Approve.

    Approving the SLD

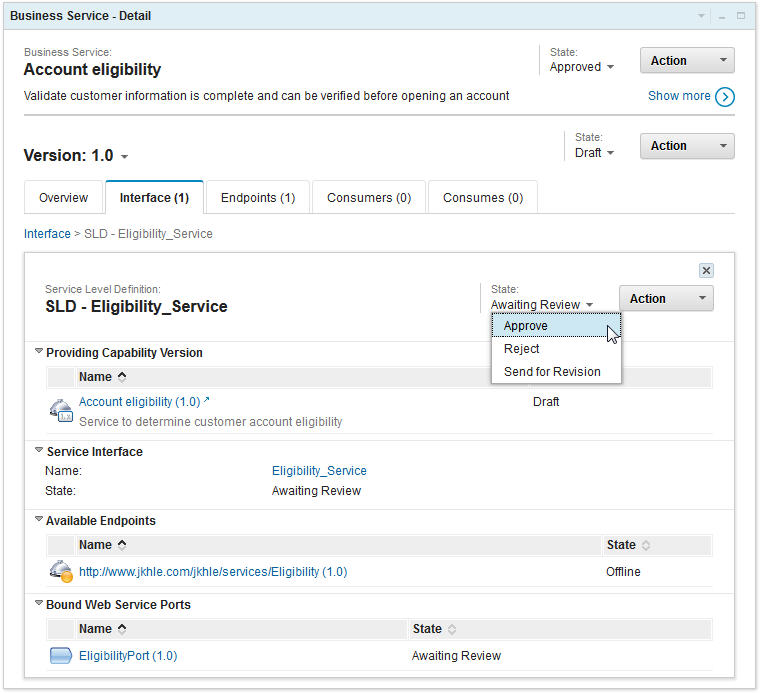
    Notice that the governance state is updated to Approved, and also that Supersede and Deprecate options are now available in the State drop-down list. This SLD is approved, which means that service level agreements can now be requested against it.

  6. View the service level definition structure. In the Detail widget (under the Business Service section at the top), click Action > View in Graphical Explorer. Then examine the structure of the Account eligibility service, and its relationship to the service level definition and the information defined in the original WSDL.

Shows the graphical explorer view

Part 3: Completing the service specification

Development

The Development user completes the Account eligibility service specification.

  1. If necessary, log in as the Development user. Switch to the Development view by selecting Development from the drop-down menu in the banner.

    Development view

  2. In the Search widget, select a search type of Business Capability and click Search. Click Account eligibility in the results to view the business service details.
  3. In the Detail widget, locate the State drop-down list in the Version section, and click Draft > Send for Specification Review.

    Send for Specification Review option

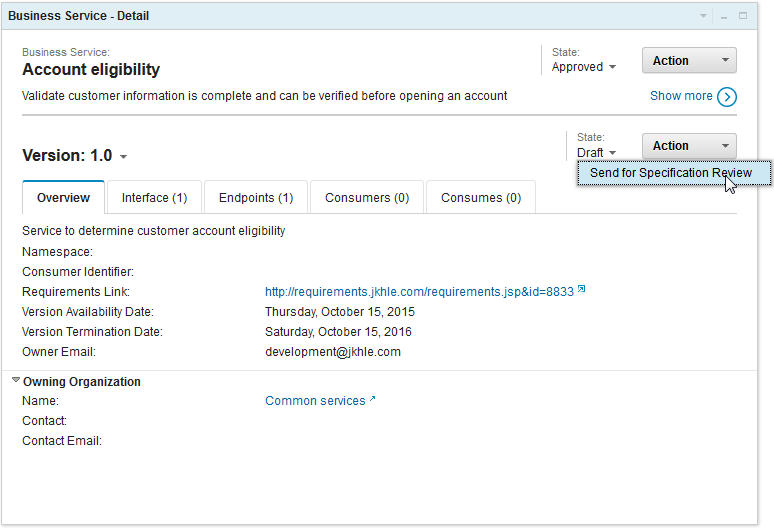
    Notice that the governance state is updated to Awaiting Specification Review, and that the Approve Specification and Send for Specification Revision options are now available in the State drop-down list.

Part 4: Approving the service specification

SOA Governance

The SOA Governance user approves the Account eligibility service specification.

  1. If necessary, log in as the SOA Governance user. Switch to the SOA Governance view.
  2. In the Search widget, select a search type of Business Capability and click Search. Click Account eligibility in the results to view the business service details.
  3. In the Detail widget, locate the State drop-down list in the Version section, and click Awaiting Specification Review > Approve Specification. Notice that the governance state is updated to Specified, and that the Send for Implementation Review option is now available in the State drop-down list.

Part 5: Completing the service implementation

Development

The Development user completes the Account eligibility service implementation. Because the service is already deployed, you would tie in any deployed or installable assets during this next stage.

  1. If necessary, log in as the Development user. Switch to the Development view.
  2. In the Search widget, select a search type of Business Capability and click Search. Click Account eligibility in the results to view the business service details.
  3. In the Detail widget, locate the State drop-down list in the Version section, and click Specified > Send for Implementation Review. Notice that the governance state is updated to Implementation Review, and that the Approve Implementation and Send for Implementation Revision options are now available in the State drop-down list.
  4. Click Implementation Review > Approve Implementation. Notice that the governance state is updated to Implemented, and that the Set to Staged option is now available in the State drop-down list.

At this point in the lifecycle, you are ready to register the endpoints that are used in any given environment, and to enable the endpoints as the service completes its lifecycle.

What you did in this lesson

In this lesson, you completed the following activities:
  • Completed the SLD specification
  • Completed the service specification
  • Completed the service implementation

What to do next

Finish the tutorial by declaring the endpoint: Completing the service lifecycle.