Troubleshooting
Problem
This document describes the steps needed to create a partition that is hosted by an i partition.
Resolving The Problem
For i client partitions, both partitions must be at V6R1M0 (or later) on an IBM POWER6 (or later) system with firmware at EM320 (or later).
| 1. Create the Client Partition via HMC Classic: |
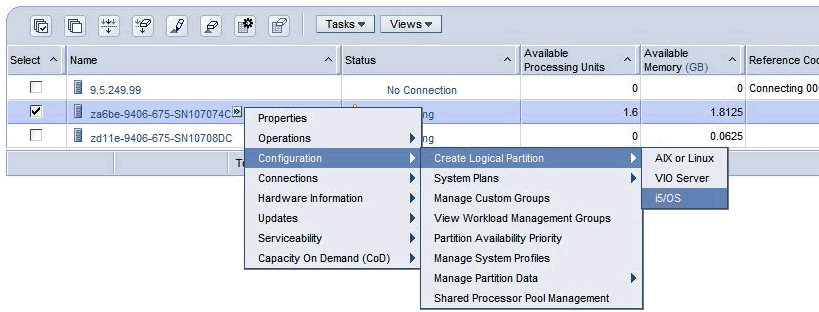
Select the appropriate operating system. In this example, we are creating an i5/OS partition. Assign processors, memory, and any other applicable options.
2. On the I/O screen, you do not need to select anything. If you want a physical tape or optical drive in this partition, you could select the IOP and IOA here. Normally, all your DASD will be virtualized from the Host partition; however, you can mix physical DASD with virtual DASD. If that is the case, you can add the necessary hardware resources here.
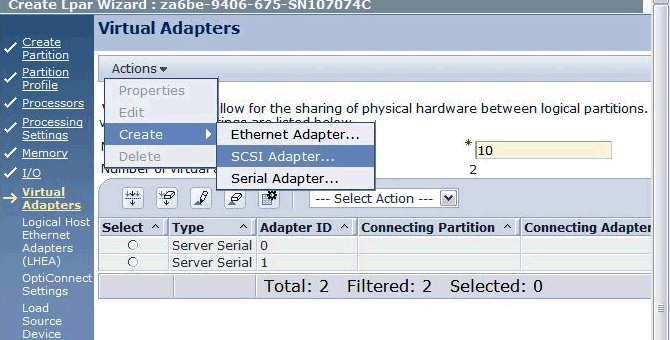
| 3. On the Virtual Adapter screen, create a client SCSI adapter. Make sure you check the box to make the adapter required, or it will not show up on the tagged I/O screen as a valid Load Source. |

4. For i OS partitions on the tagged I/O screen, select the Client SCSI adapter for the Load Source. For AIX and Linux partitions, you do not need to tag a Load Source. This is assuming you are using the Virtual drives on the Host for Load source and not actual hardware. If you are using the virtual optical drive from the Host partition, tag the Client SCSI adapter as the alternate restart device. If you are using a real tape or optical drive, tag the controller for the real hardware as the alternate restart device.
On the Host partition, do the following:
|
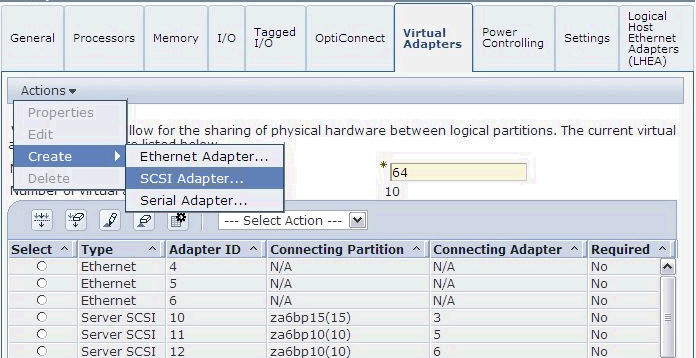
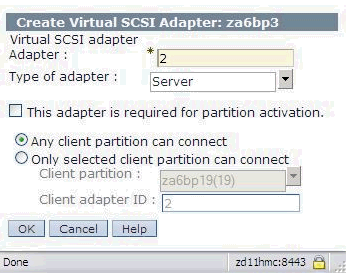
Be sure to specify the client partition name in the Server SCSI adapter.
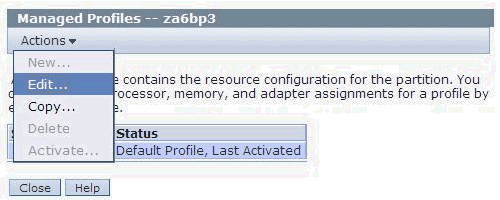
If you are not able to shut down and then activate this modified profile, create the adapter using Dynamic Logical Partitioning (DLPAR):
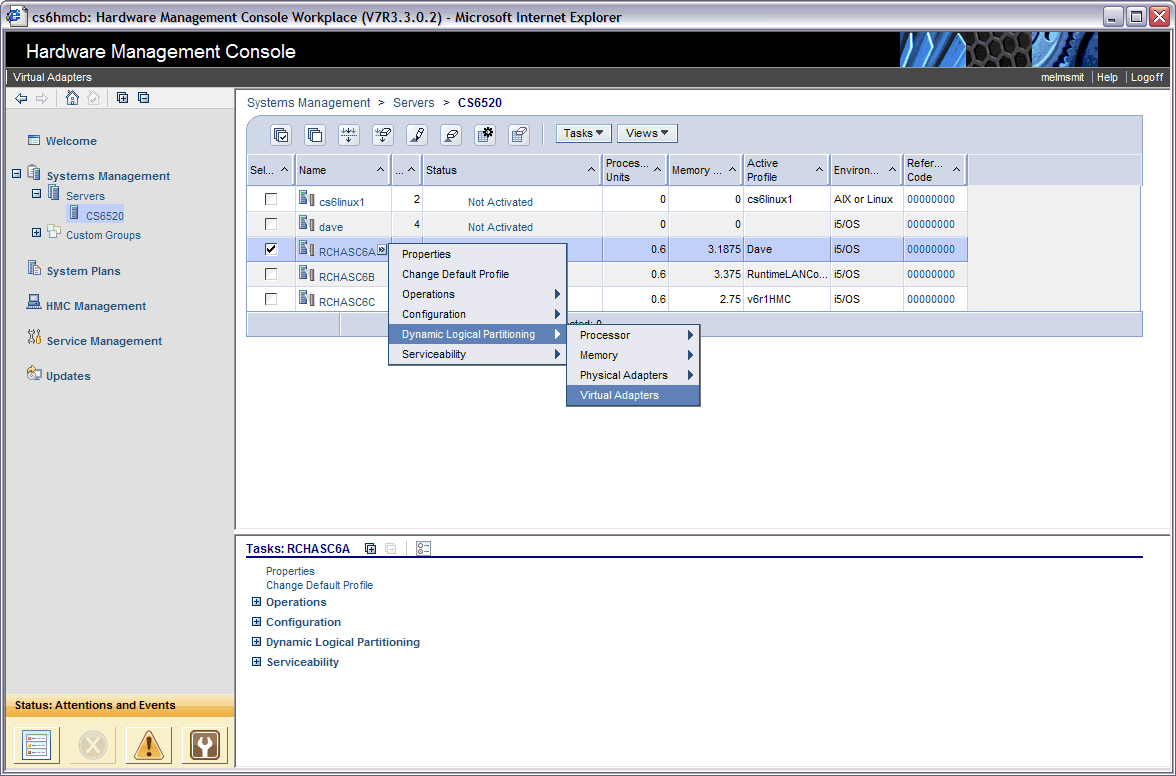
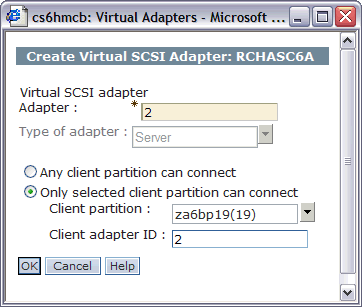
Be sure to specify the client partition name in the Server SCSI adapter.
5. Once the server SCSI adapter is dynamically added, this creates a 290B COMM adapter on the HOST lpar. To find the rsc name on the HOST partition type: wrkhdwrsc *cmn and look for the 290B with the same ID that was created.
The remaining procedure is unchanged, you create the NWSD on the server partition and vary it on.
| 6. Find the controller name associated with the Virtual SCSI Server adapter using WRKHDWRSC *CMN. Look for a resource with type 290B. 7. Create a NWSD (Network Server Description): CRTNWSD |

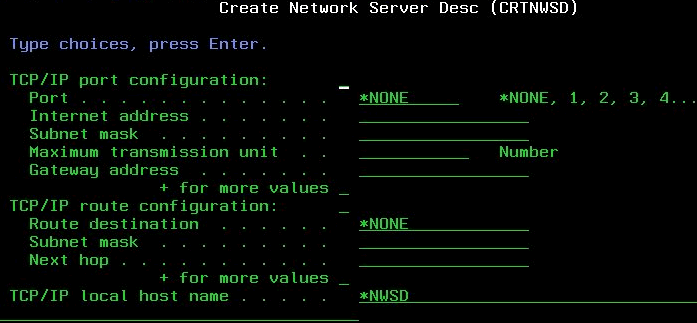
Use either partition name or partition ID of the partition created in Step 2.
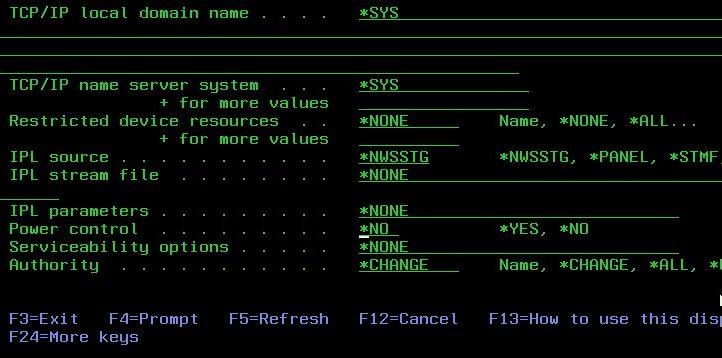
Specify the Server Operating system. In this example we are creating an i5/OS partition so we selected *OPSYS. For an AIX partition, use *AIXPPC; for Linux, use *LINUXPPC. For IPL source use *PANEL for the IPL Source for the first IPL, and change it after the partition is installed to *NWSSTG.
**NOTE** prior to vary on of the NWSD, any tape or optical that is to be virtualized, should be varied on, on the hosting lpar.
If the network server description fails to vary on, check the qsysopr message queue using command DSPMSGQ QSYSOPR and find the reason code for the CPDB1AD error message. This will tell the reason it is failing.
8. Create Network Storage. Each Network Storage will represent a disk unit on the client partition.
|
9. Add Network Storage Link:
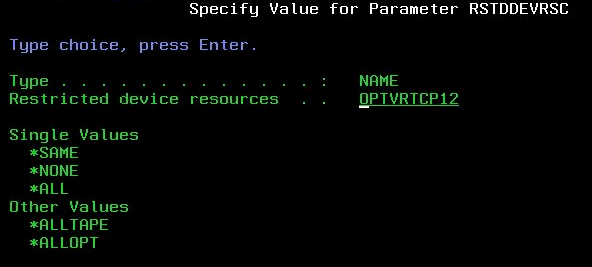
Please consider adding the following note: NOTE: If you plan to install LIC and OS on the client partition using a full system save tape or SAVSYS tape rather than an optical device then issue command CHGNWSD RSTDDEVRSC(*ALLOPT). This means tape device(s) will be created but no optical devices will be created on the client partition during NWSD vary on. |
10. By default, all optical devices up to 10 will get virtualized to the client partition. If you have more than one optical drive on the Host partition you must limit this down to one device so that you know which device you are using on the client partition:
| Note: An NWSD is needed for each set of disks over the max of 16 (or 32 for R710 TR9 and later). o Starting at R710 Technology Refresh 2 Tape resources are virtualized by the NWSD. For more Hardware and Software requirement see: https://www.ibm.com/developerworks/ibmi/media
|
11. Vary on the NWSD.
o WRKCFGSTS CFGTYPE(*NWS), Option 1 to Vary on.
12. Install the partition. For System i, DM IPL the client partition from i_base install media.
====================================================
** NOTE**
Concurrent removal of external and virtual storage devices whether configured or non-configured is NOT
supported by IBM i.
The support statement isn't limited to virtual (attached) disk. Removing external storage LUNs from an active
partition is NOT supported on IBM i, regardless of whether they are attached natively or via a virtual adapter.
Virtual SCSI disks are also considered "external" storage by the client even when the backing hardware on the
server partition are internal storage.
As for removing the volume group, it doesn't matter how they are connected (vSCSI, NPIV, or Natively), the volumes
should always be removed from the configuration first, then the partition shut down, then the volume group can be destroyed/removed.
The partition should be shutdown prior to removing or unassigning and virtual disk units or LUNs.
====================================================
VIRTUAL ETHERNET BRIDGING
Here is a link to the document to setup virtual ethernet bridging:
http://www.ibm.com/support/docview.wss?uid=nas8N1011193
CREATE THE NetWork Storage Description:
CRTNWSD .. provide same info as shown below


If the SYNC setting is on no further action is required to save the changes. If the SYNC setting is off,
It is recommended to save current configuration to the profile so the changes are not lost if the partition profile
is activated later.
Historical Number
498958618
Was this topic helpful?
Document Information
Modified date:
18 December 2019
UID
nas8N1013476