Troubleshooting
Problem
Note: The information in this document applies only for VMware vCenter Server (VCS) environments. Use the steps in this procedure to complete the recovery operation when a management virtual machine (VM) is not accessible.
Attention:
Use this procedure for IBM Spectrum Protect™ Plus on IBM® Cloud V10.1.1patch1 and later versions.
For IBM Spectrum Protect™ Plus on IBM® Cloud V10.1.0-V10.1.1 follow the procedure described in technote: http://www.ibm.com/support/docview.wss?uid=swg22014655
Symptom
This procedure applies if any of the following management services are partially or fully lost in the IBM Cloud development environment:
-
vCenter
-
Platform Services Controller (PSC)
-
Software-Defined Data Center (SDDC)
-
Active Directory (AD)/Domain Name System (DNS) servers
Environment
IBM Spectrum Protect Plus provides an option to automatically restore by using ESXi hosts if the vCenter is not accessible. This option restores the vCenter VM or VMs that the vCenter is dependent on.

Additional manual steps are required to complete a restore operation if the original ESXi host is not available and you are recovering to a different host.
Resolving The Problem
Recovering to a different ESXi host could result in the loss of access to VMs. This is caused because of a misconfiguration of the virtual switch. Complete the following steps on the affected VMs to recover from this state and to complete a recovery operation:
-
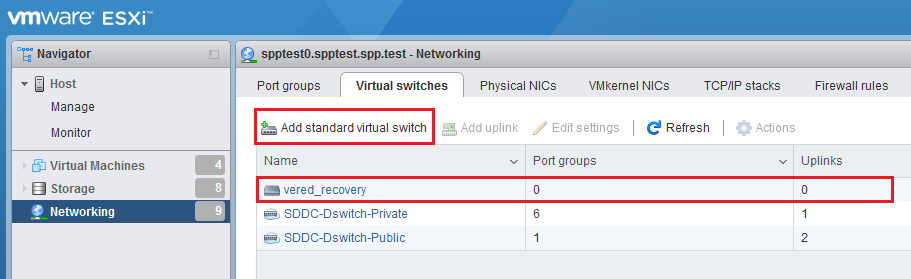
Connect to the destination ESXi UI host and create a new standard virtual switch. At the beginning, there are no port groups or uplinks for the switch.
-
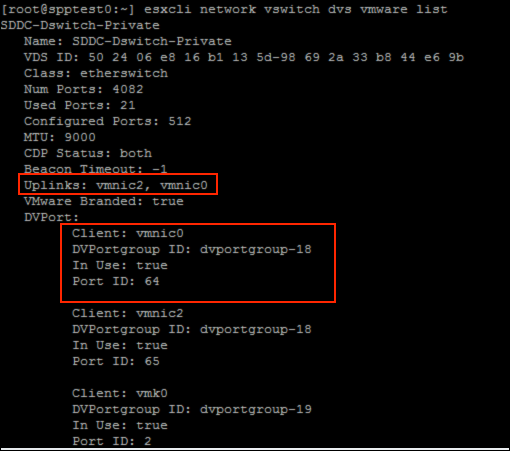
Use SSH to connect to the ESXi server. Identify and select the physical NIC and the port group of the existing distributed virtual switch SDDC-Dswitch-Private. This sample used the vnic vmnic0, which is part of the port ID 64. You can list the Distributed Virtual Switch (DVS) information by issuing this command:
#esxcli network vswitch dvs vmware list
-
Based on the previous information, remove the NIC and port ID (port group) from the SDDC-Dswitch-Private DVS. Use the port ID from step 2.
#esxcfg-vswitch -Q <physical_vnic> -V <port_group> SDDC-Dswitch-Private

-
Add the NIC and port group into the standard switch created in step 1:
#esxcli network vswitch standard uplink add –-uplink-name=<physical_vnic> --vswitch-name=<standard_vswitch>

-
In the ESXi UI, add a port group and select the standard virtual switch:
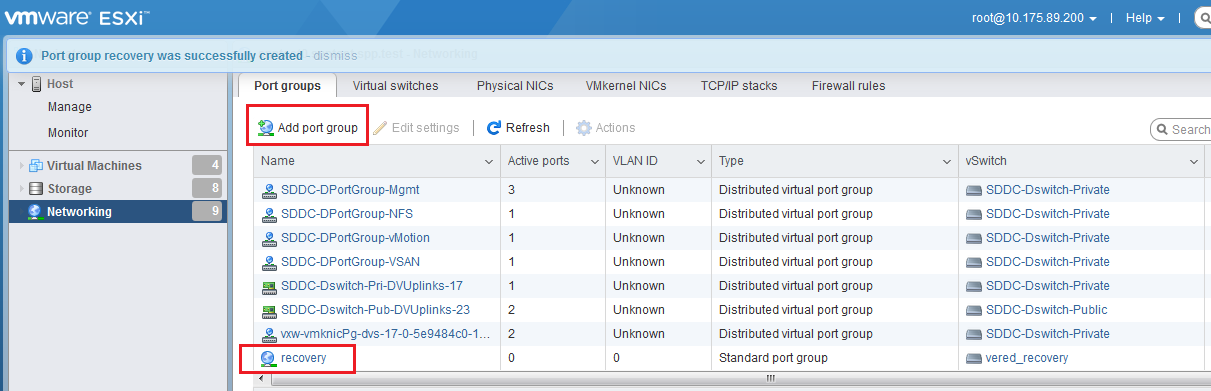
At this point, the virtual switch should have one uplink and one port group.
-
Run a restore operation by using the ESX host if vCenter is down option in the IBM Spectrum Protect Plus UI (see the first screenshot).
-
Click Options and make sure you choose the new networking switch that you created in step 1 under Networking.

-
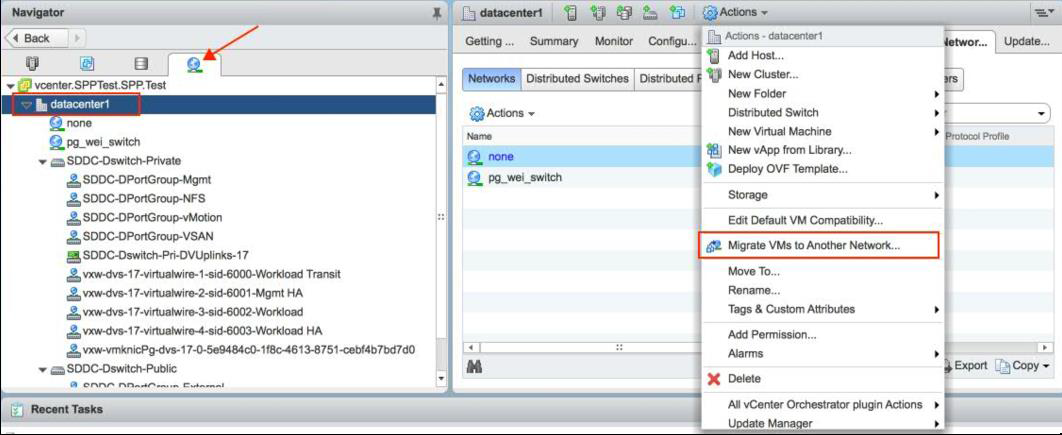
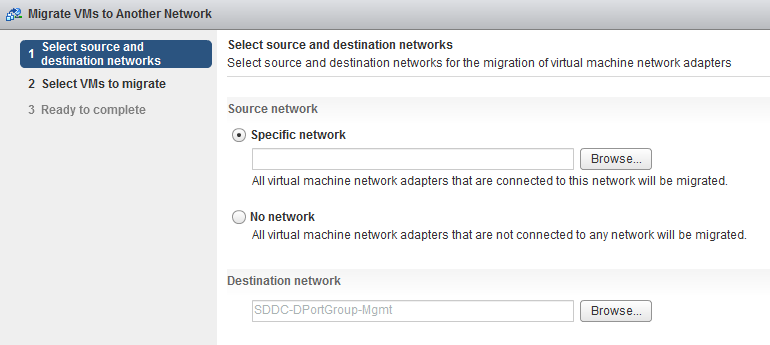
Once the VMs are reachable, log in into the vCenter UI and start the migration of the management VMs from the temporary port group created in step 5 to the original distributed port group, SDDC-DPortGroup-Mgmt.
Start a migration from the Networking tab by selecting a datacenter and then selecting Migrate VMs to Another Network from the Actions menu. Select the source network (the temporary switch created in step 5 ) and the destination network (management switch).
-
Once all VMs are migrated into the original port group, reincorporate the physical NIC and the port group into the original distributed virtual switch:
-
Remove the network cards (known as vmnics) from a standard vSwitch that was re-assigned previously by using the following command:
#esxcli network vswitch standard uplink remove --uplink-name=vmnic --vswitch-name=vSwitch
For example: #esxcli network vswitch standard uplink remove --uplink-name=vmnic0 --vswitch-name=vered_recovery -
Add network cards to a vNetwork Distributed Switch (vDS) by using the following command:
#esxcfg-vswitch -P vmnic -V unused_dvPort_ID dvSwitch # add a vDS uplink
For example: #esxcfg-vswitch -P vmnic0 -V 64 SDDC-Dswitch-Private
-
-
Delete the temporary port group and the standard vSwitch from the ESXi host UI.
-
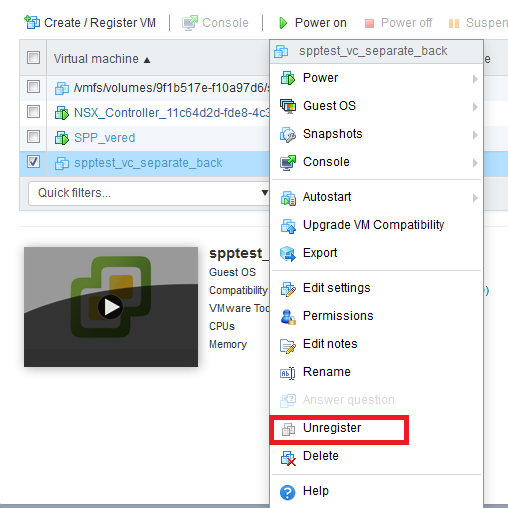
After the VMs are migrated and accessible, use the ESXI host UI to unregister (do not delete) the old VMs (if the original host is reachable). This avoids having duplicated information such as names, Media Access Control (MAC) addresses, OS level IDs, and VM Universal Unique Identifiers (UUIDs). This step must to be performed even if you are using a new datastore.
Note: In some vSphere or ESXi versions, the unregister operation can be performed by using the Remove from inventory option. This unregisters a VM from the vCenter catalog but leaves vmdk files on the datastore consuming storage space. Once you have fully recovered the VM and the environment is successfully running, you can regain the space by manually removing these files from the datastore.
Related Information
Was this topic helpful?
Document Information
Modified date:
07 August 2018
UID
ibm10719679